Monserate Mountain Preserve, Fallbrook Land Conservancy, 03/06/2019

[et_pb_section admin_label=”section”][et_pb_row admin_label=”row”][et_pb_column type=”4_4″][et_pb_text admin_label=”Text” background_layout=”light” text_orientation=”left” use_border_color=”off” border_color=”#ffffff” border_style=”solid”]

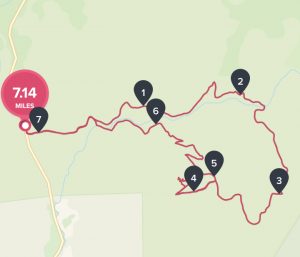
Time to Hike:  12-3pm   STEPS: 9600 Distance:  3.3 miles out and back   Hikeability:  moderate to difficult in spots  Snacks/Water:  Orange, snack bar, 1.5L water     Temp:  low 75 degrees 

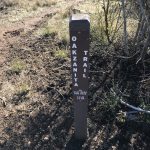
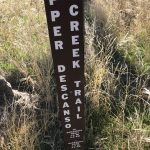
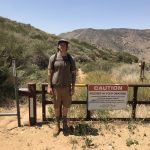
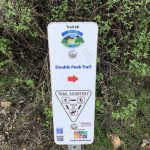
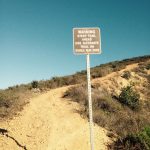
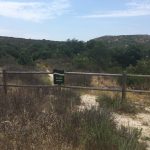
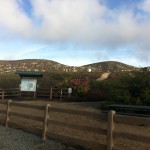
Directions to hike :  From the North or South Exit from Interstate 15 at 76/ Pala Road and drive west to Old Highway 395 and turn right (north). Drive 2.6 miles then turn right on Stewart Canyon Road and go east under the Interstate to Pankey Road. Turn right and park on the right. The start of the trail is across the street and is marked by a sign 

From the coast:  Hwy 76 to Hwy 395, turn left, Drive 2.6 miles then turn right on Stewart Canyon Road and go east under the Interstate to Pankey Road. Turn right and park on the right. The start of the trail is across the street and is marked by a sign

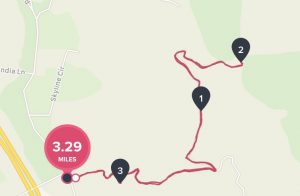
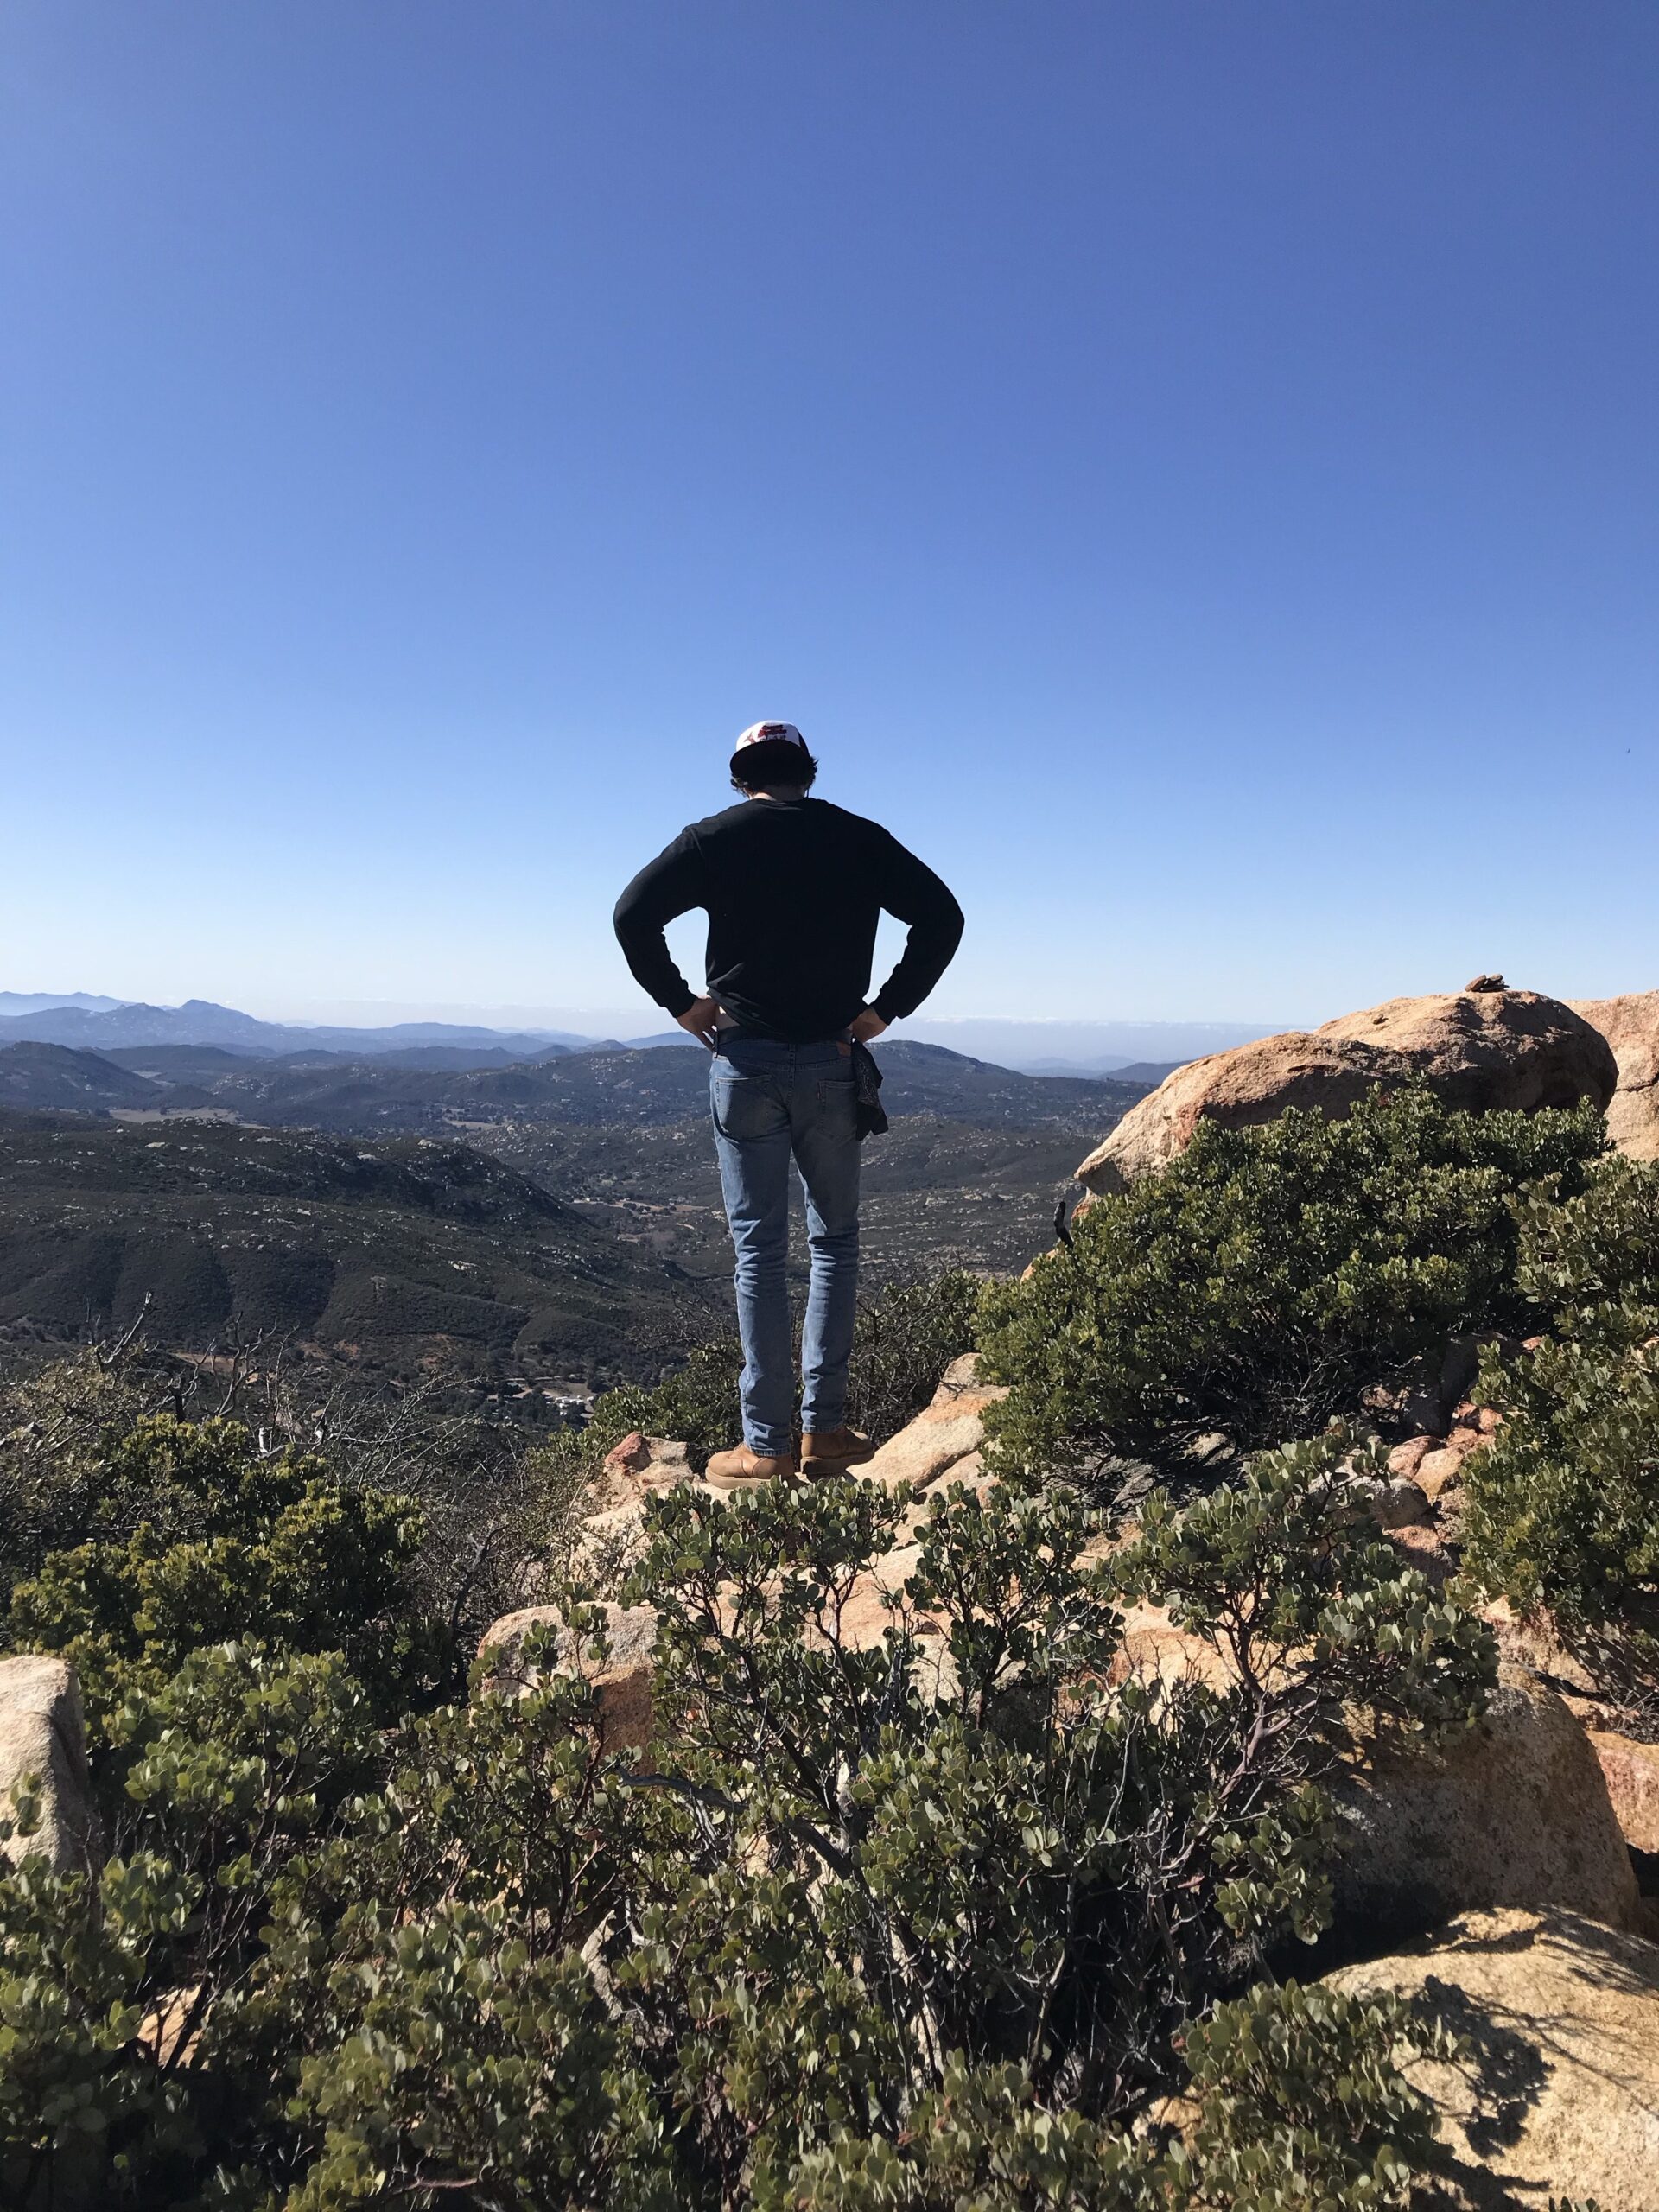
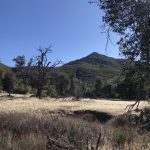
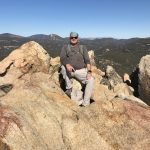
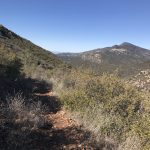
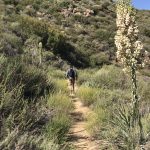
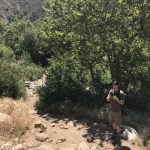
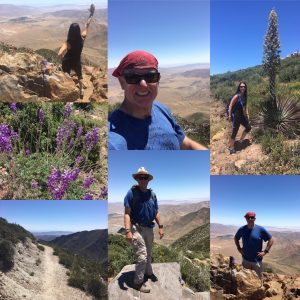
One of my Top 5 North County Hikes is Monserate Mountain in Fallbrook, CA.   Today I hiked the “Short way” up.  However, this 3.3 mile round trip out and back hike offers a good challenge for legs and cardio which make it well worth the hike.  In fact I used Monserate as one of my training hikes to get in shape to hike Mt. Whitney a few years back.  

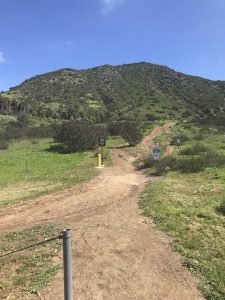
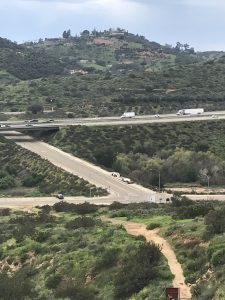
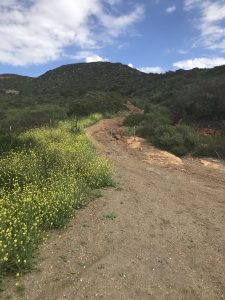
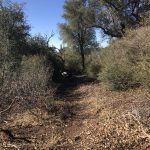
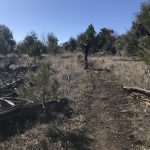
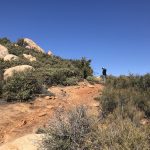
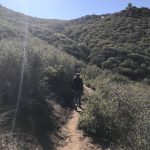
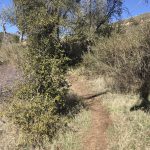
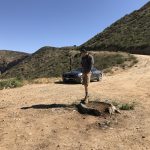
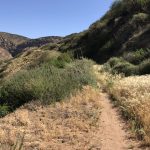
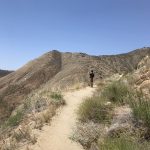
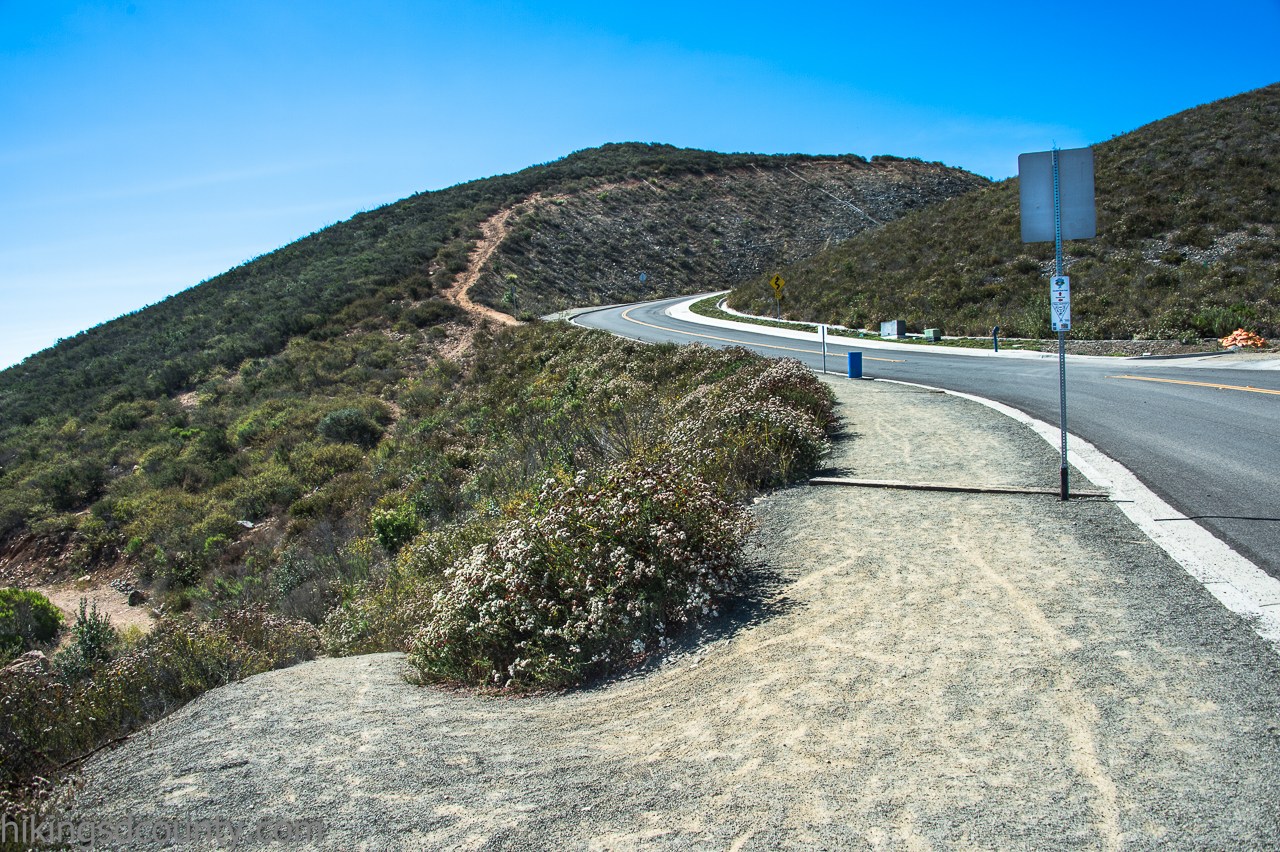
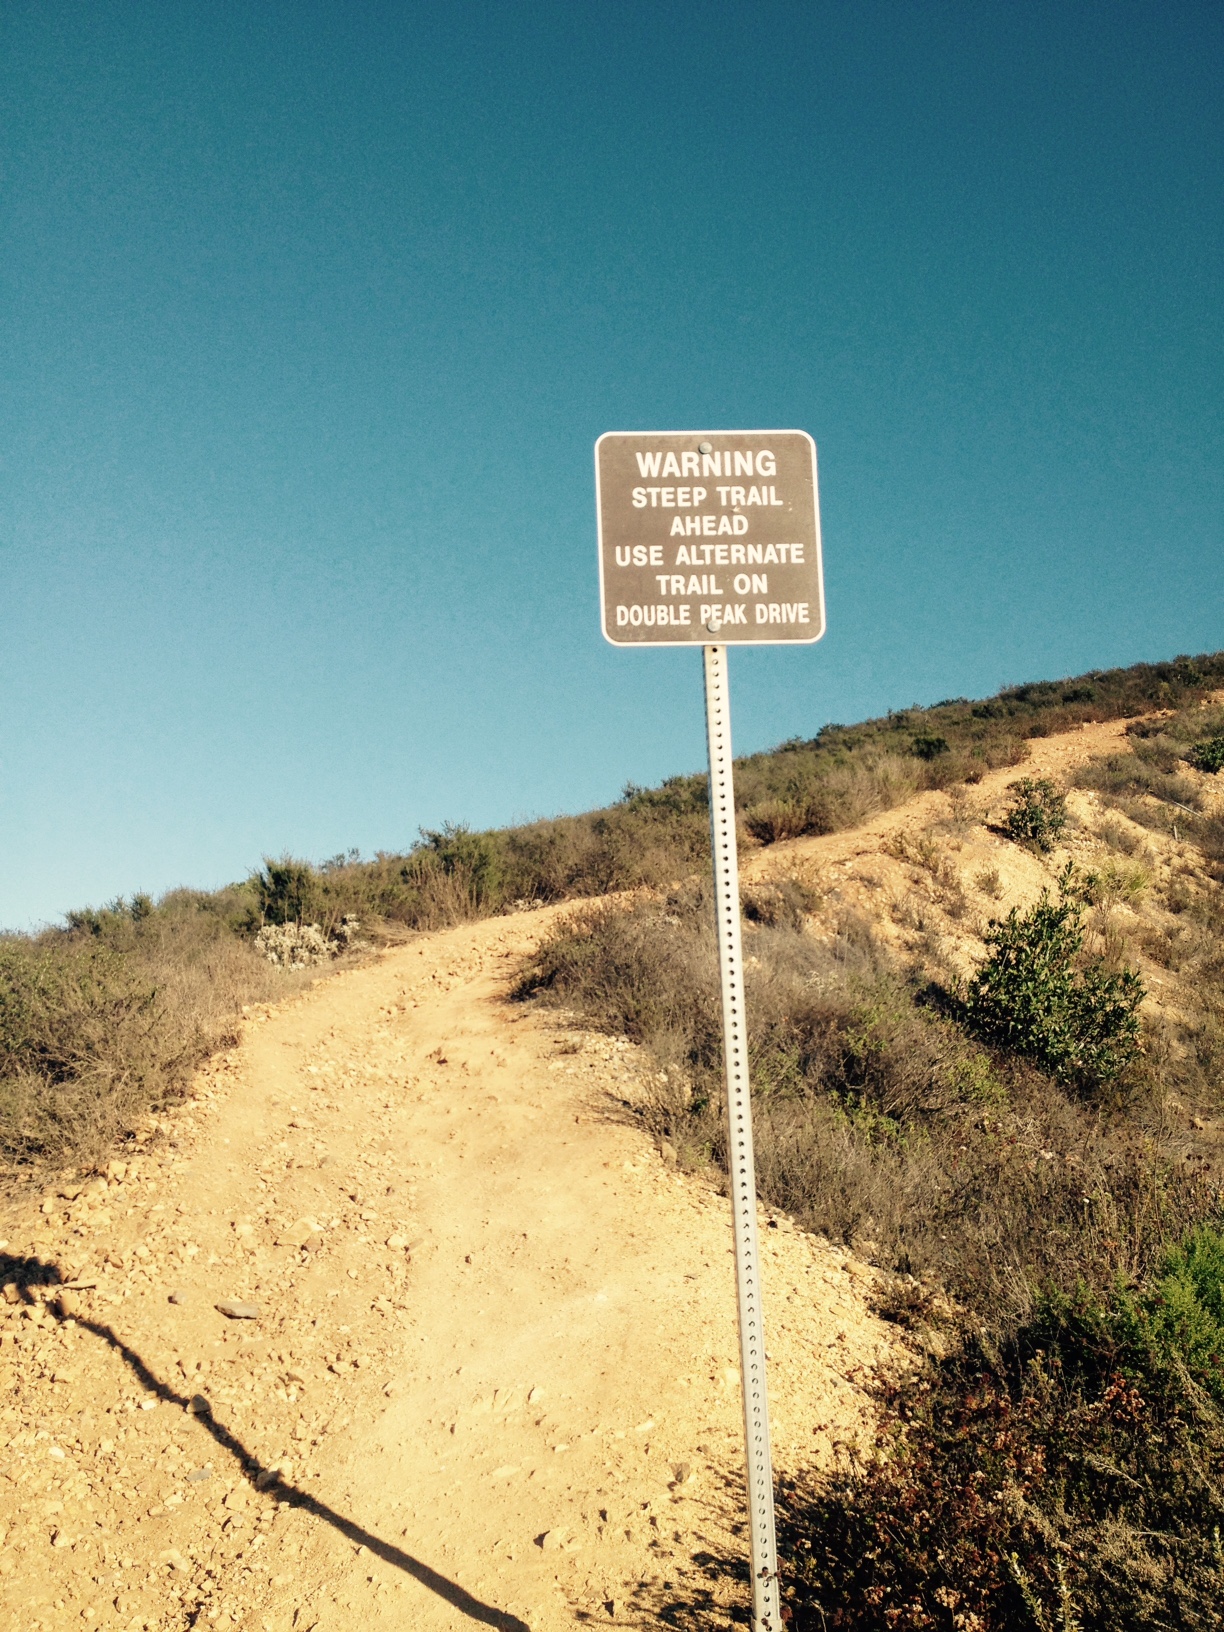
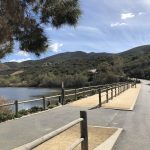
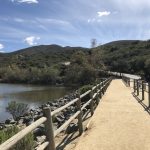
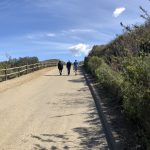
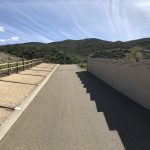
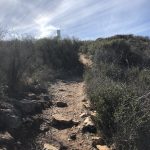
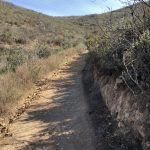
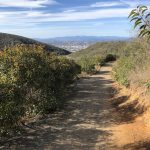
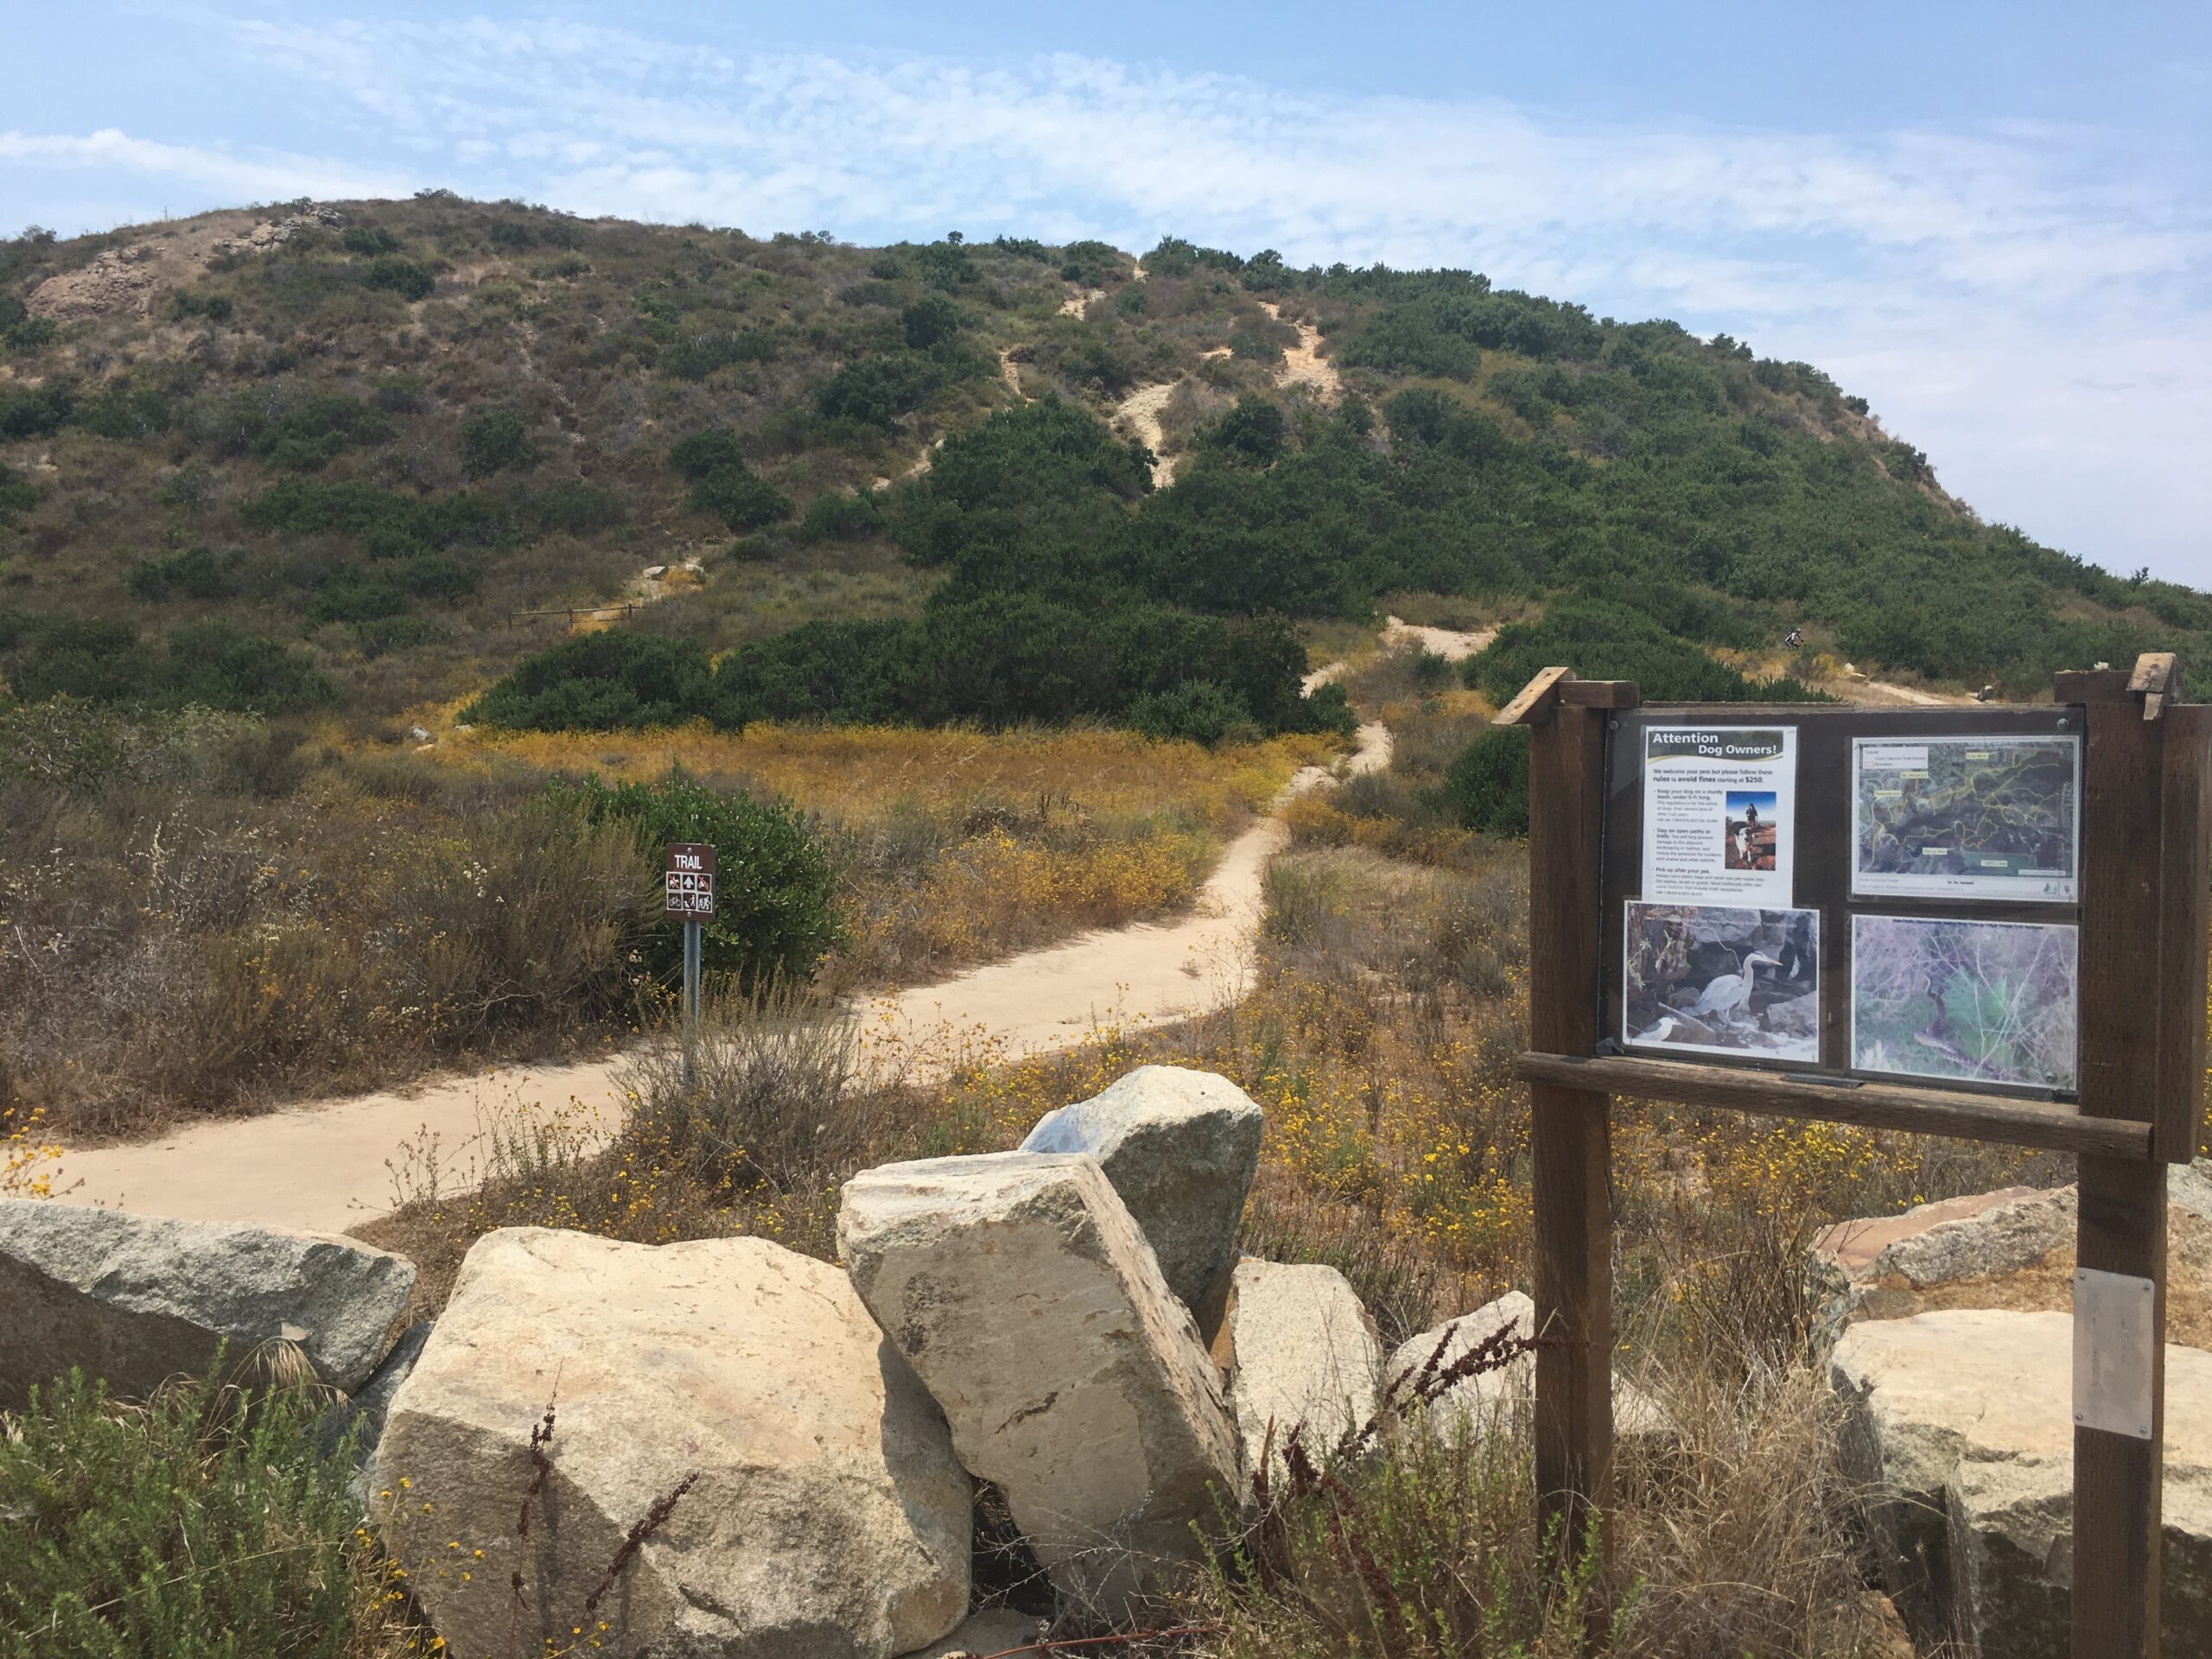
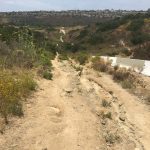
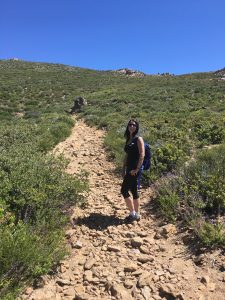
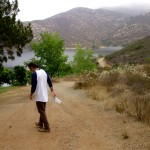
The trailhead off of Pankey road is on the opposite side to the parking area.  The trail start leads you direct east for a hundred yards towards the mountain with a gradual incline slope ascent leading you on your way.  The majority of earthen trail transitions to a majority rock and loose gravel composition.  Look back and to your west and you will see Interstate 15 and the parking area where your car is. 

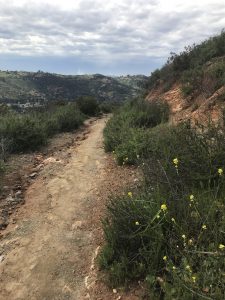
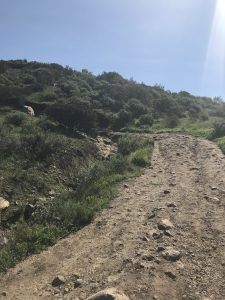
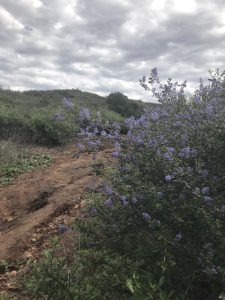
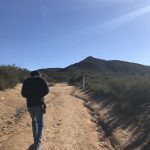
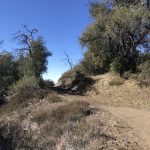
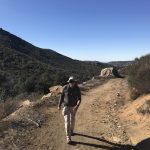
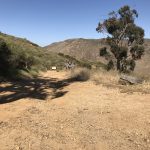
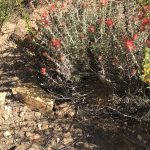
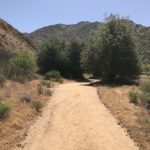
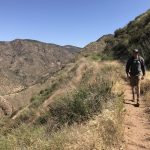
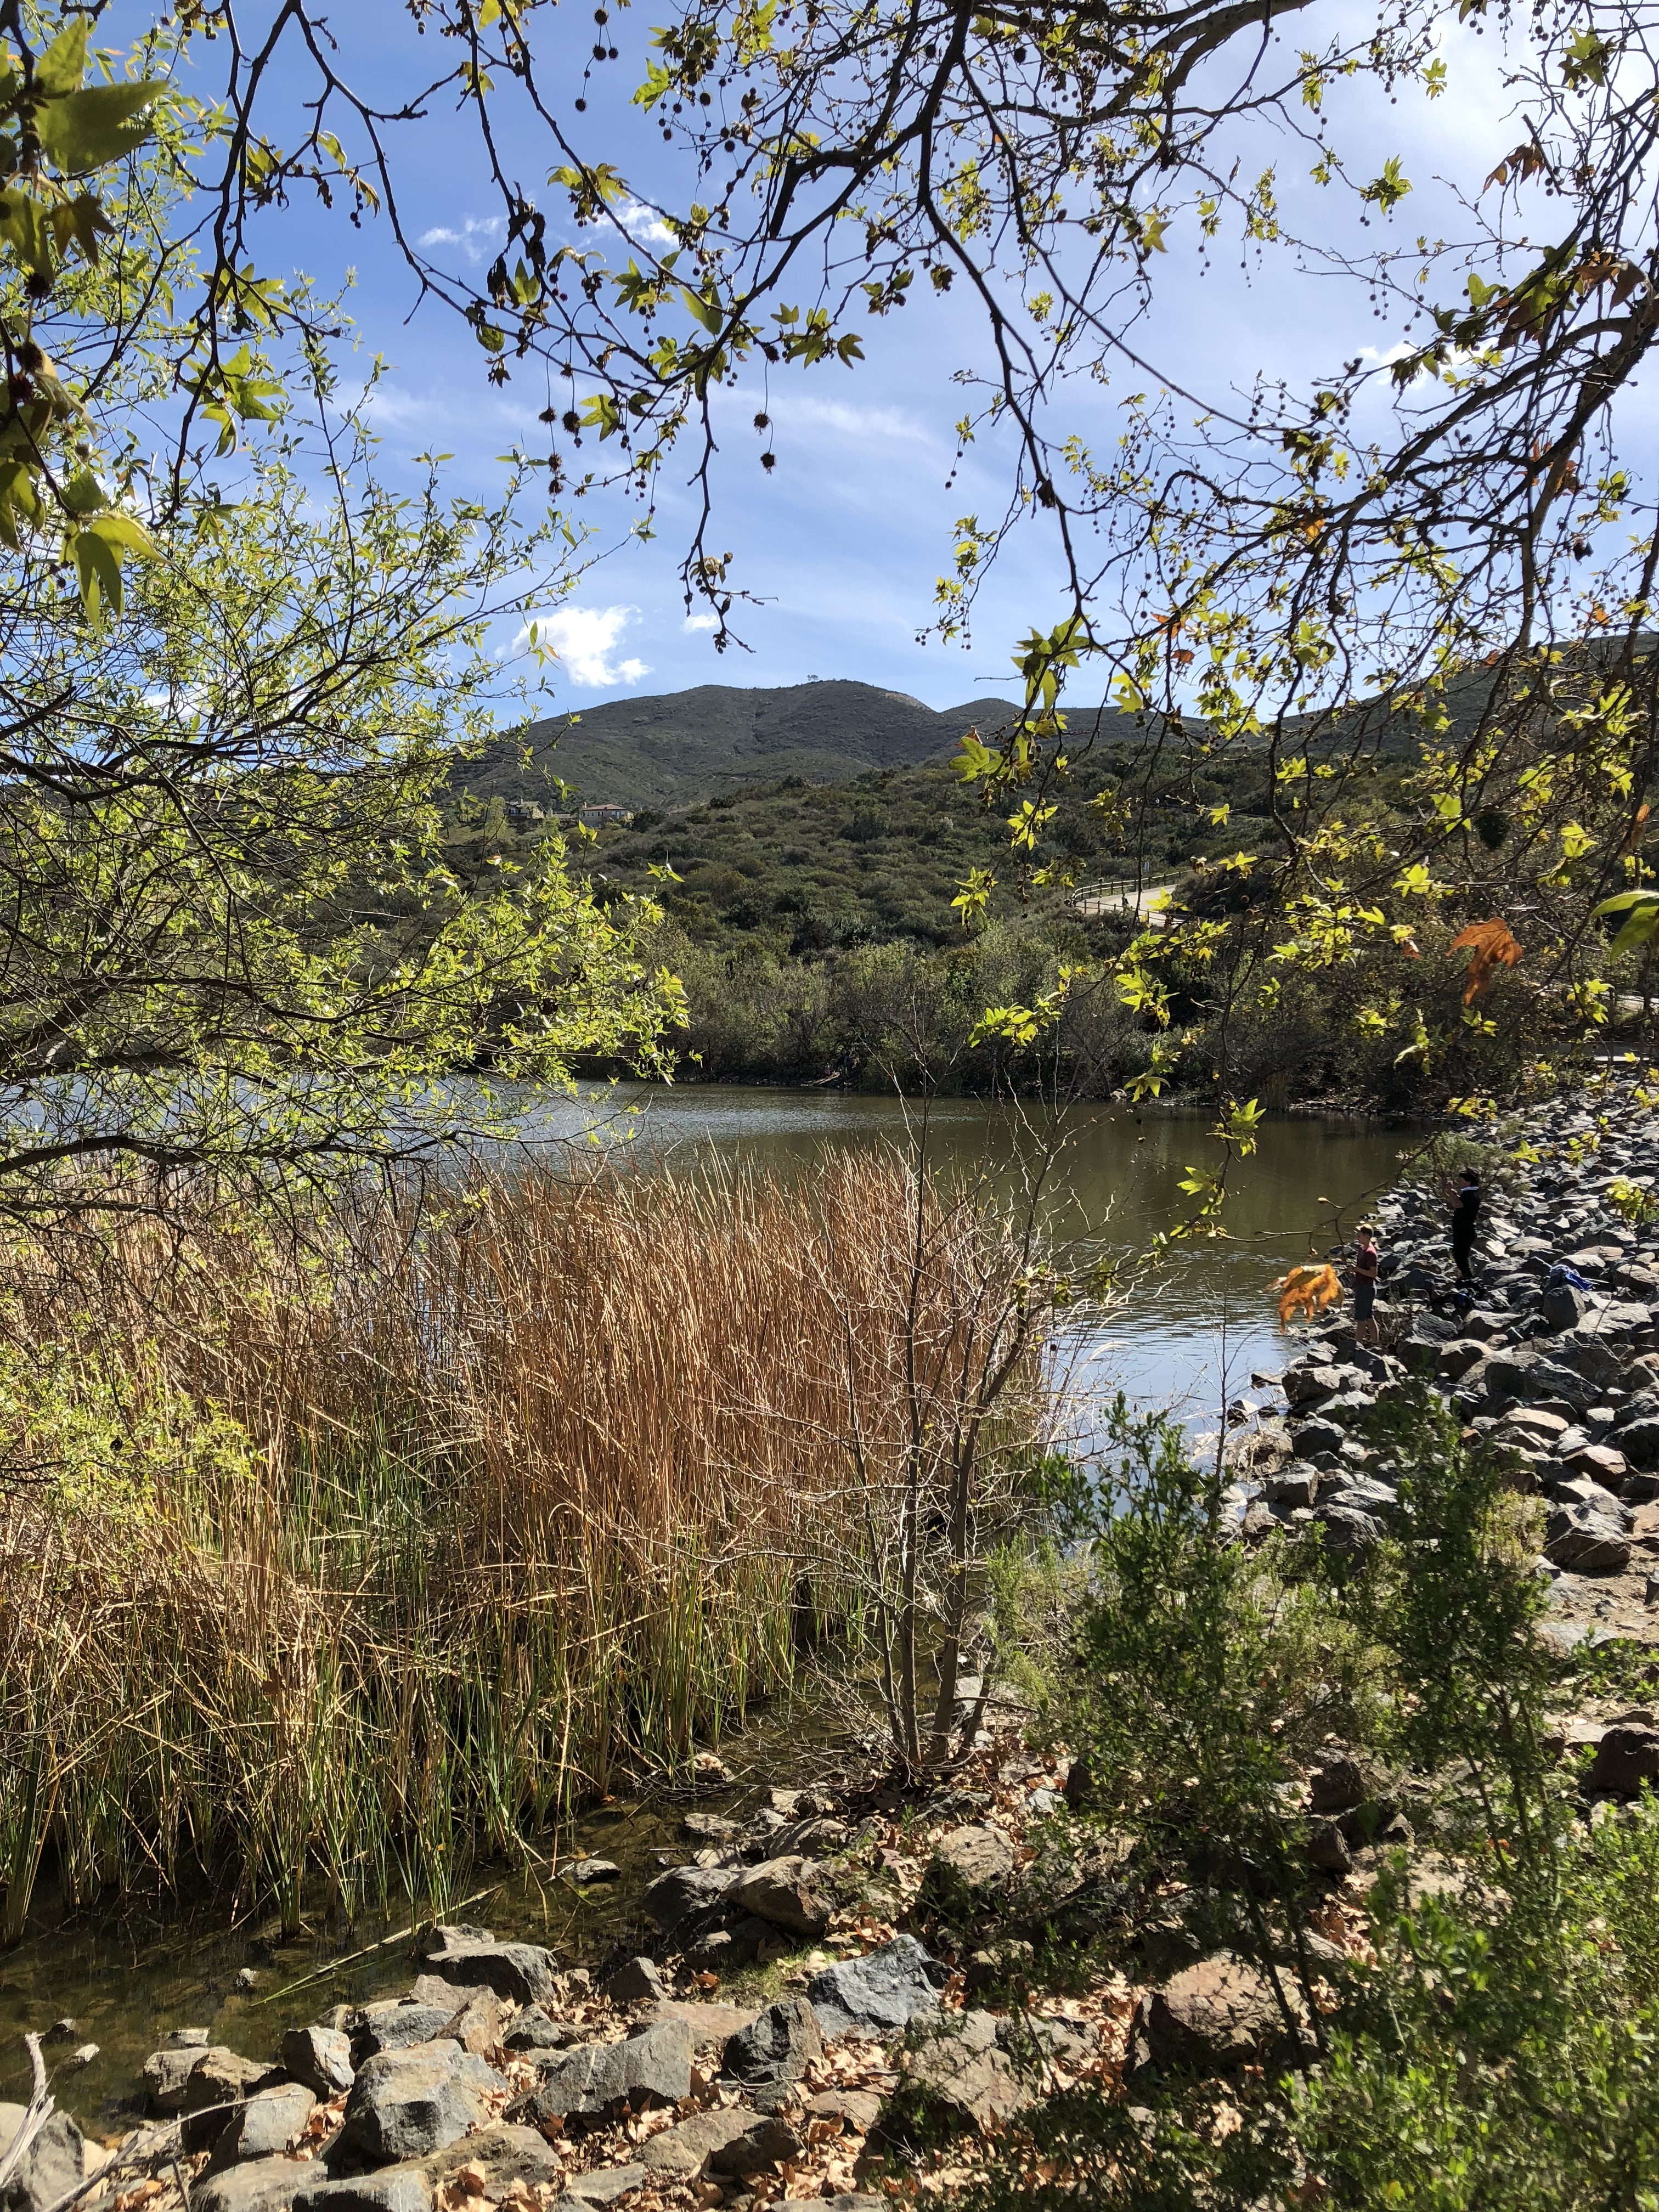
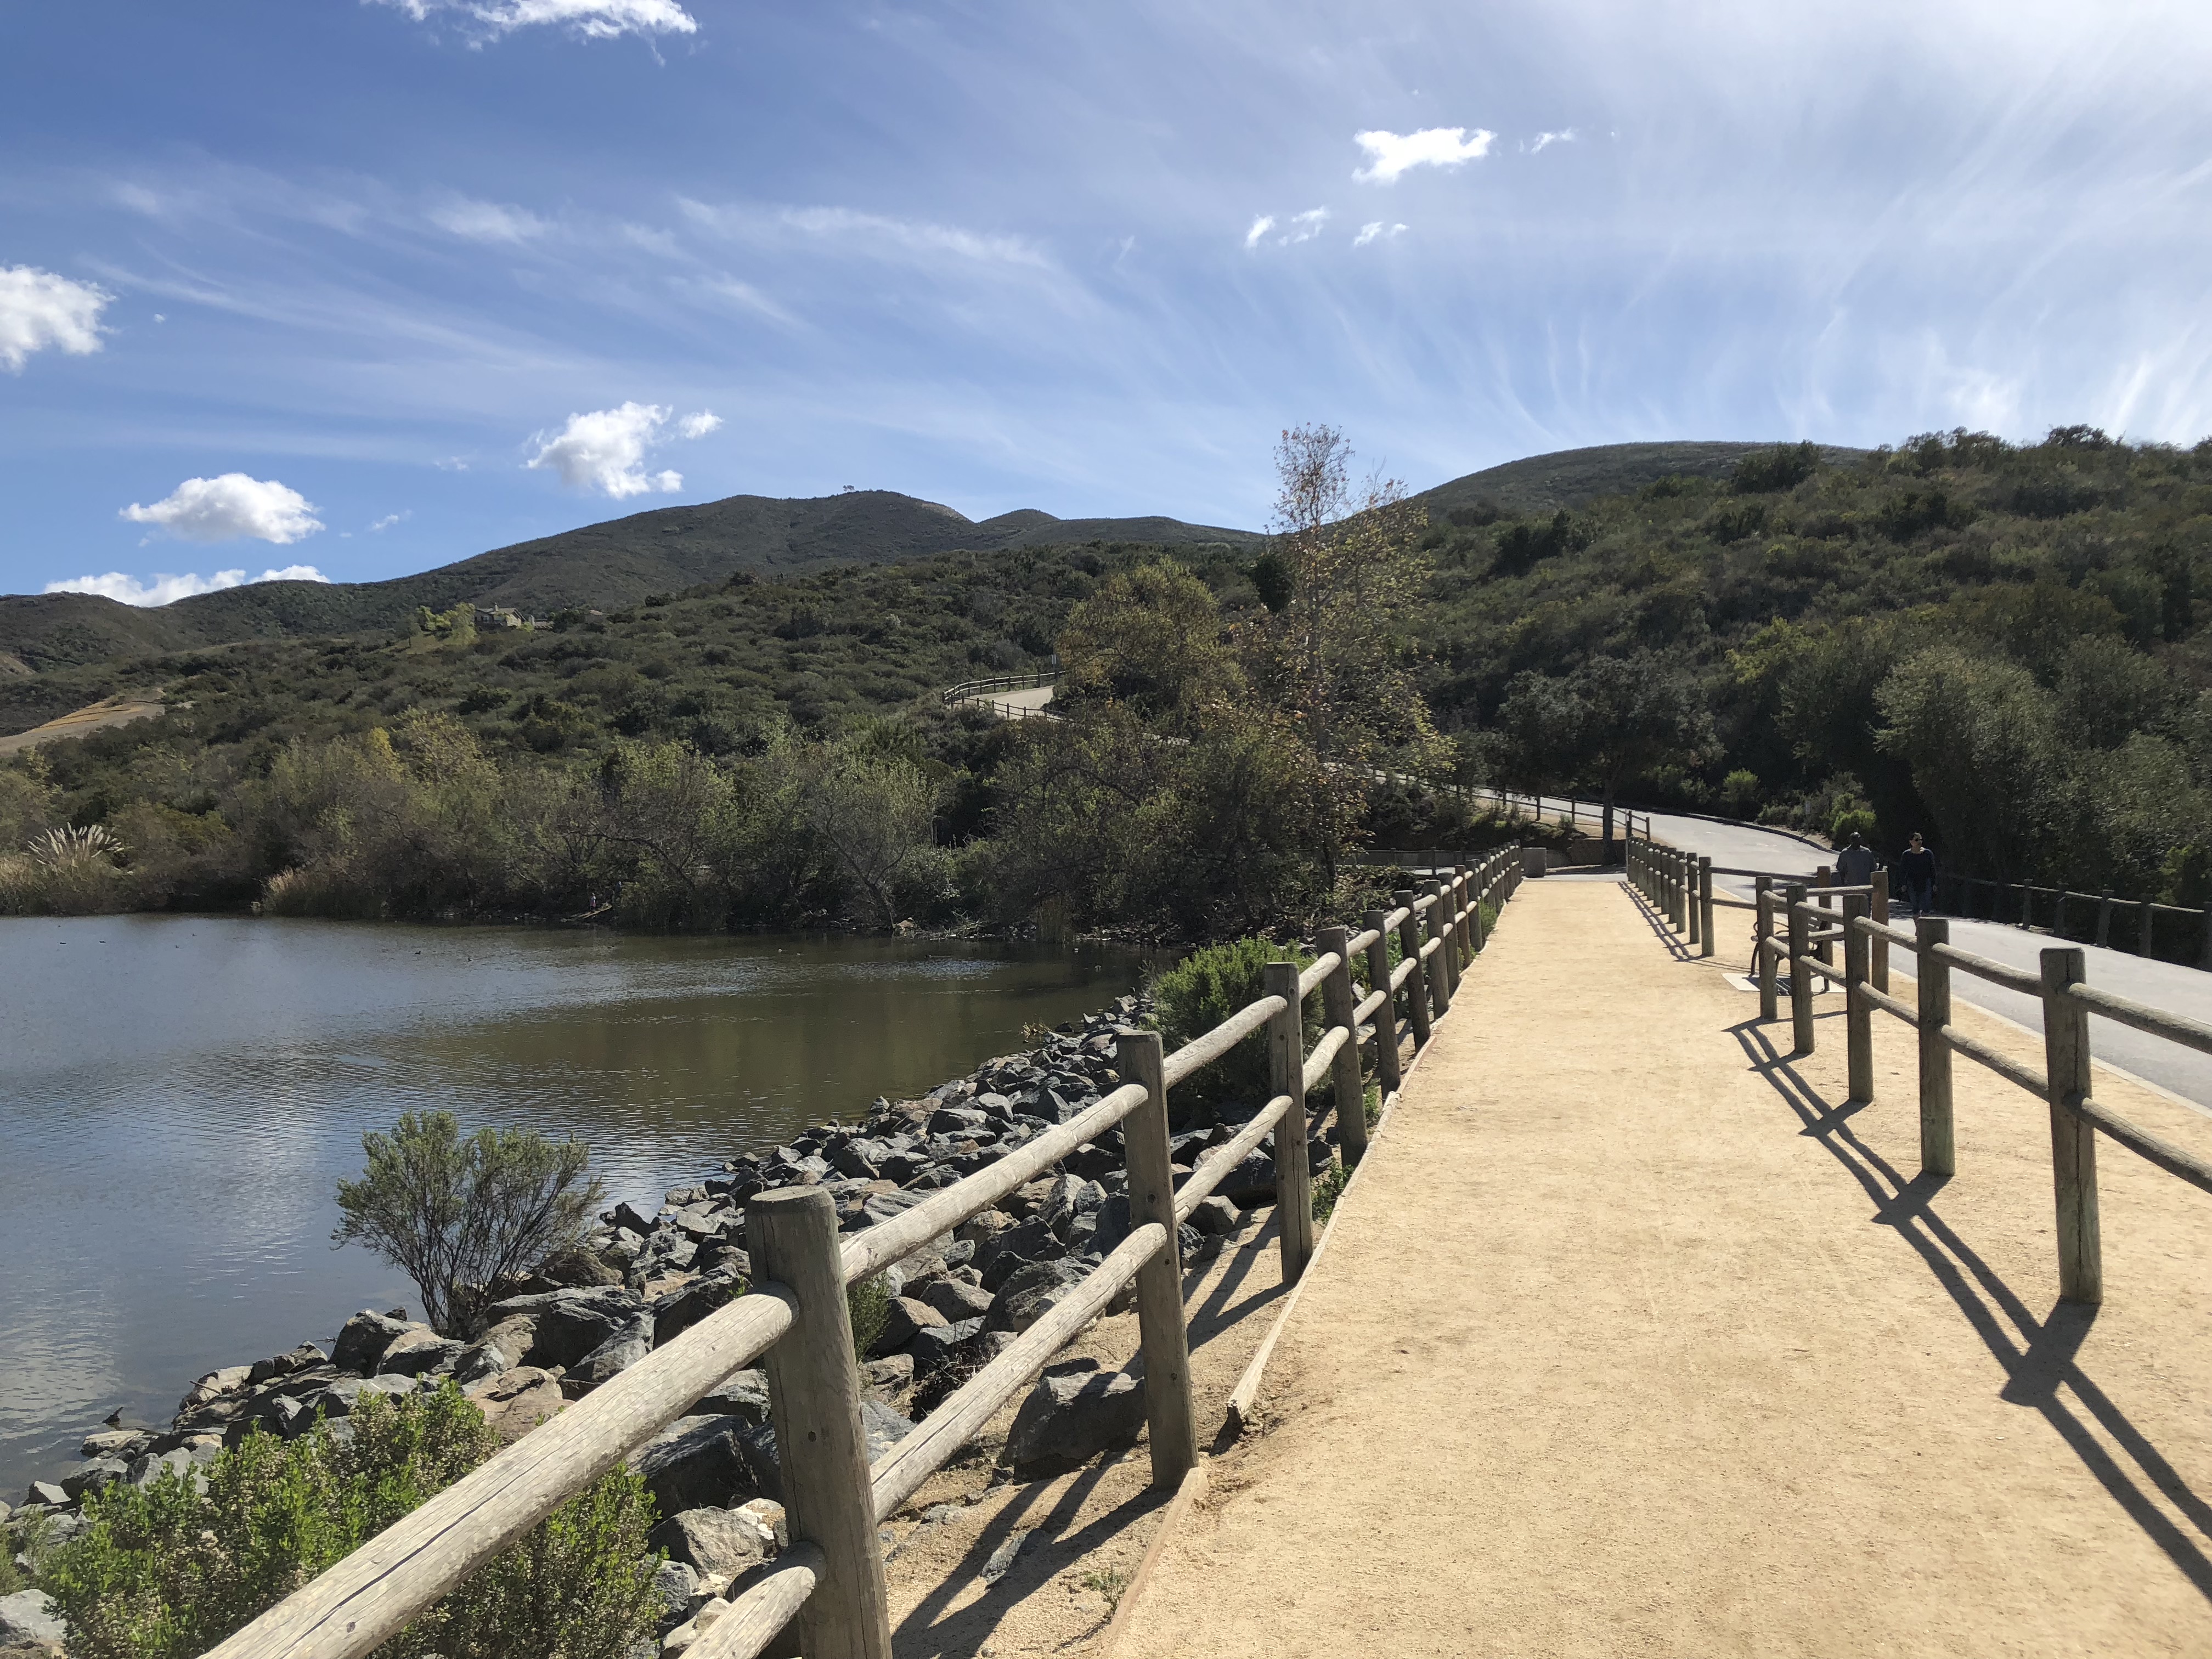
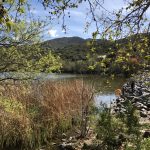
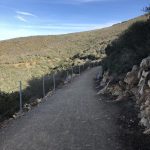
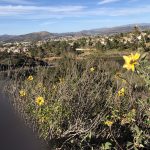
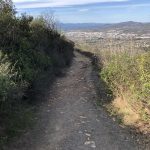
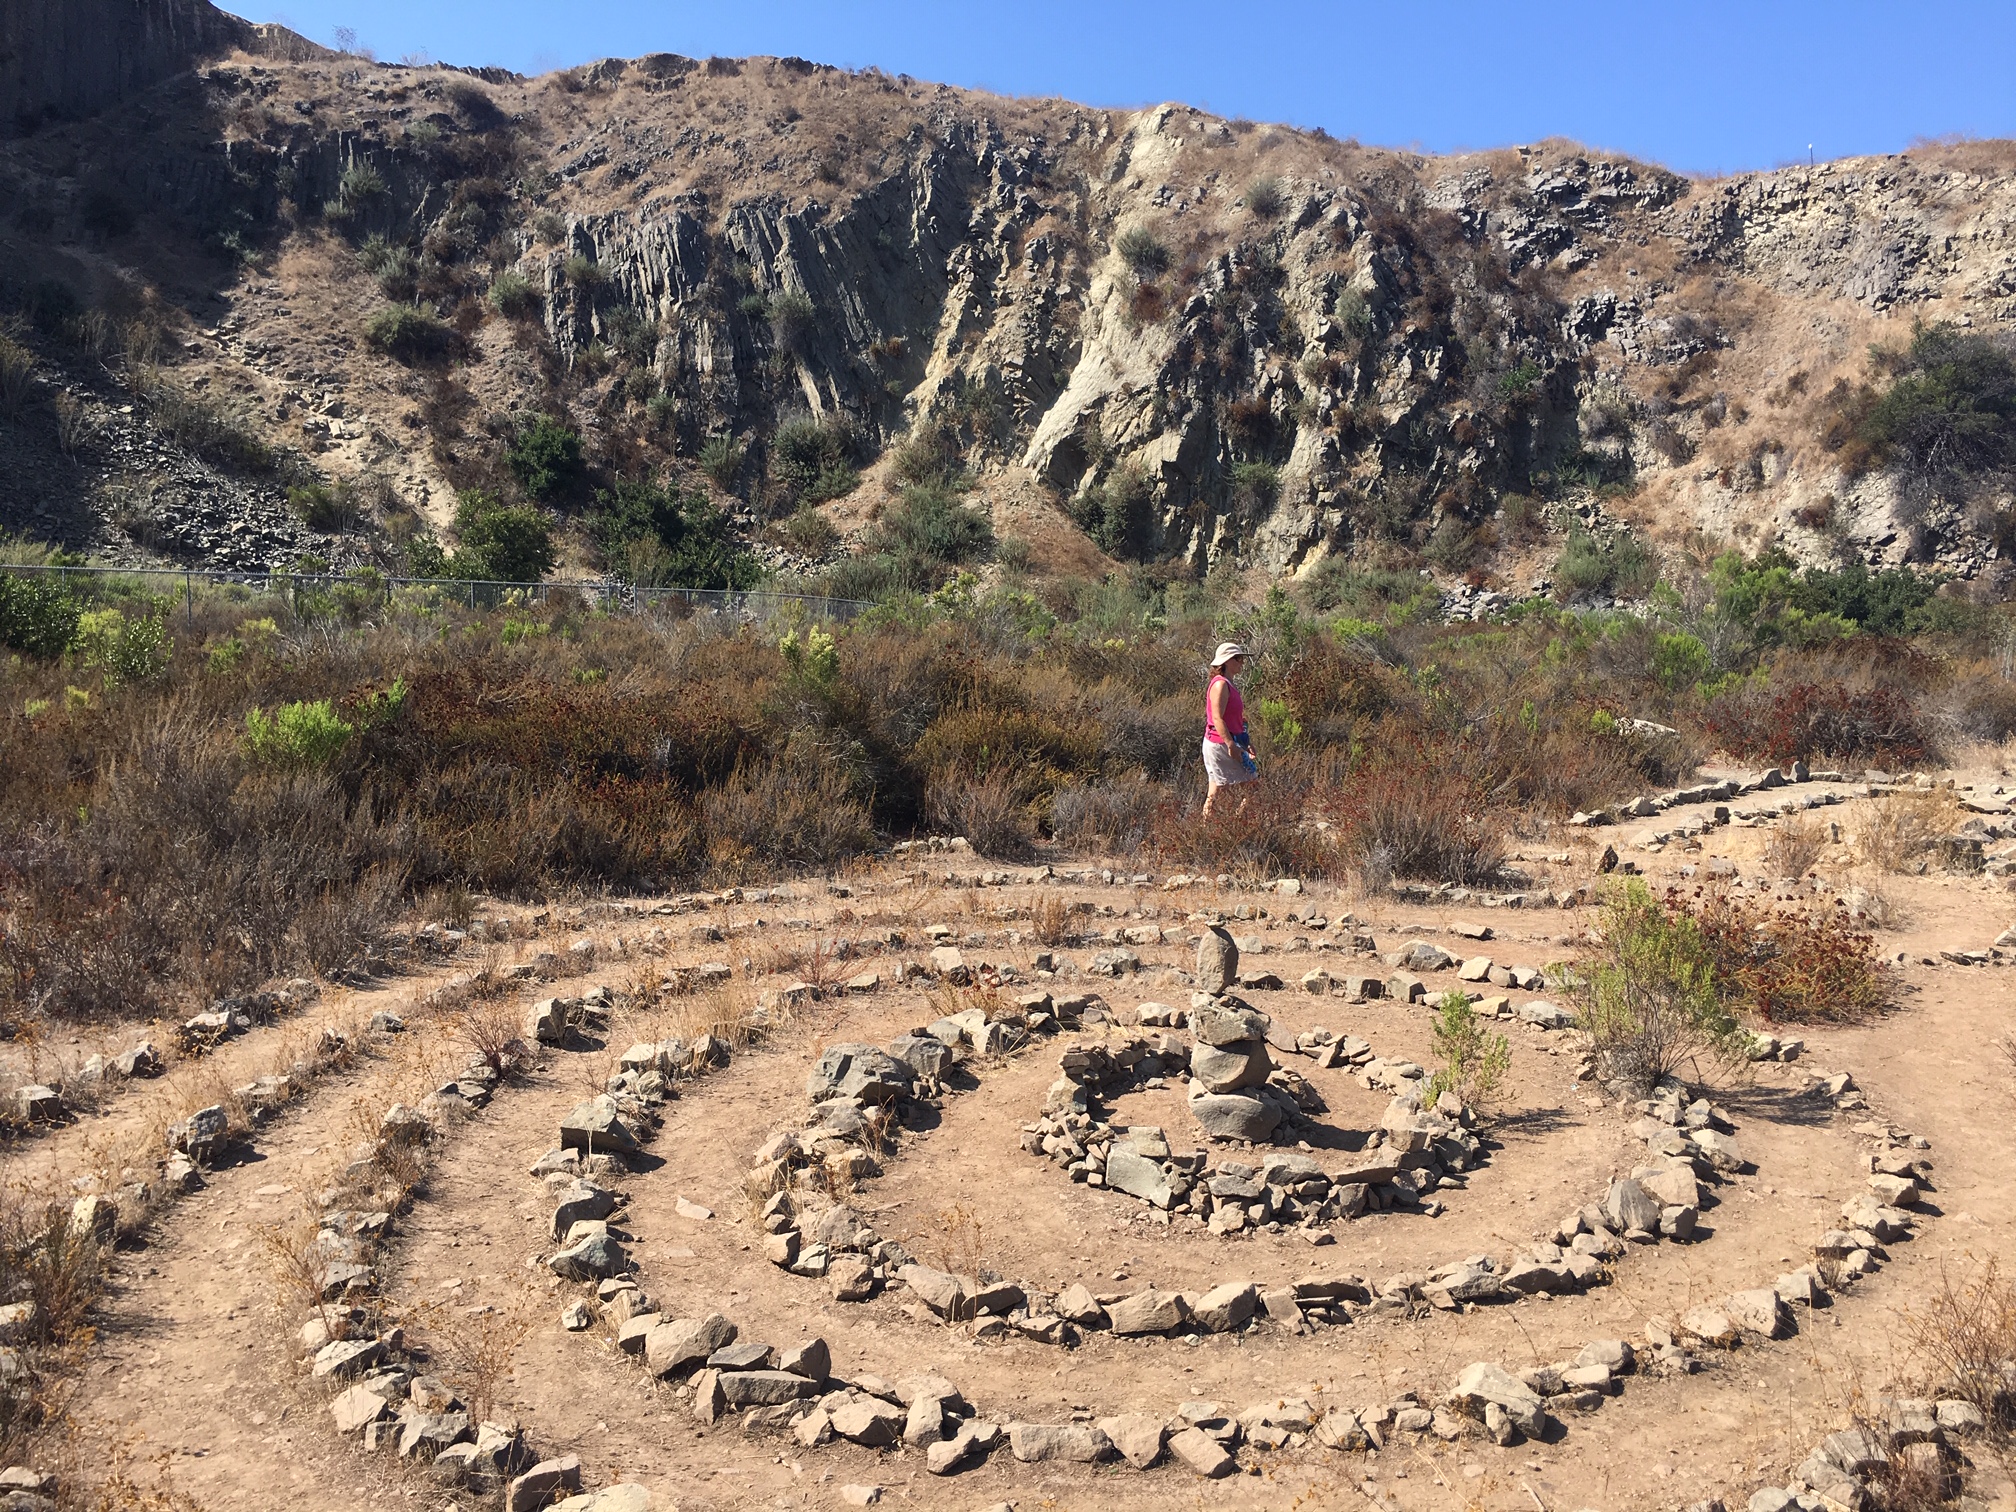
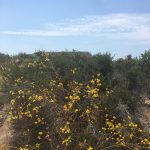
As you wind your way up this rugged trail you will come to a service road at about the .75 mile mark.  Make a left here for the remaining of the trail to the Peak.  That’s the trail I took.   Today, the plant life and brush are a beautiful mixture of various shades of natural green.  Lavender and yellow flowering plants adorn the trail.   The recent rains can be congratulated for this.   Its the most colorful Monserate has been since I started hiking it, five years ago.

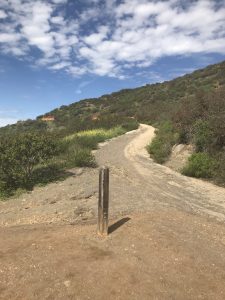
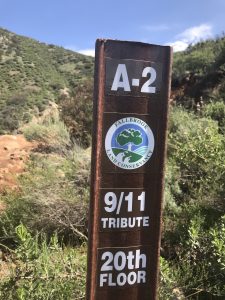
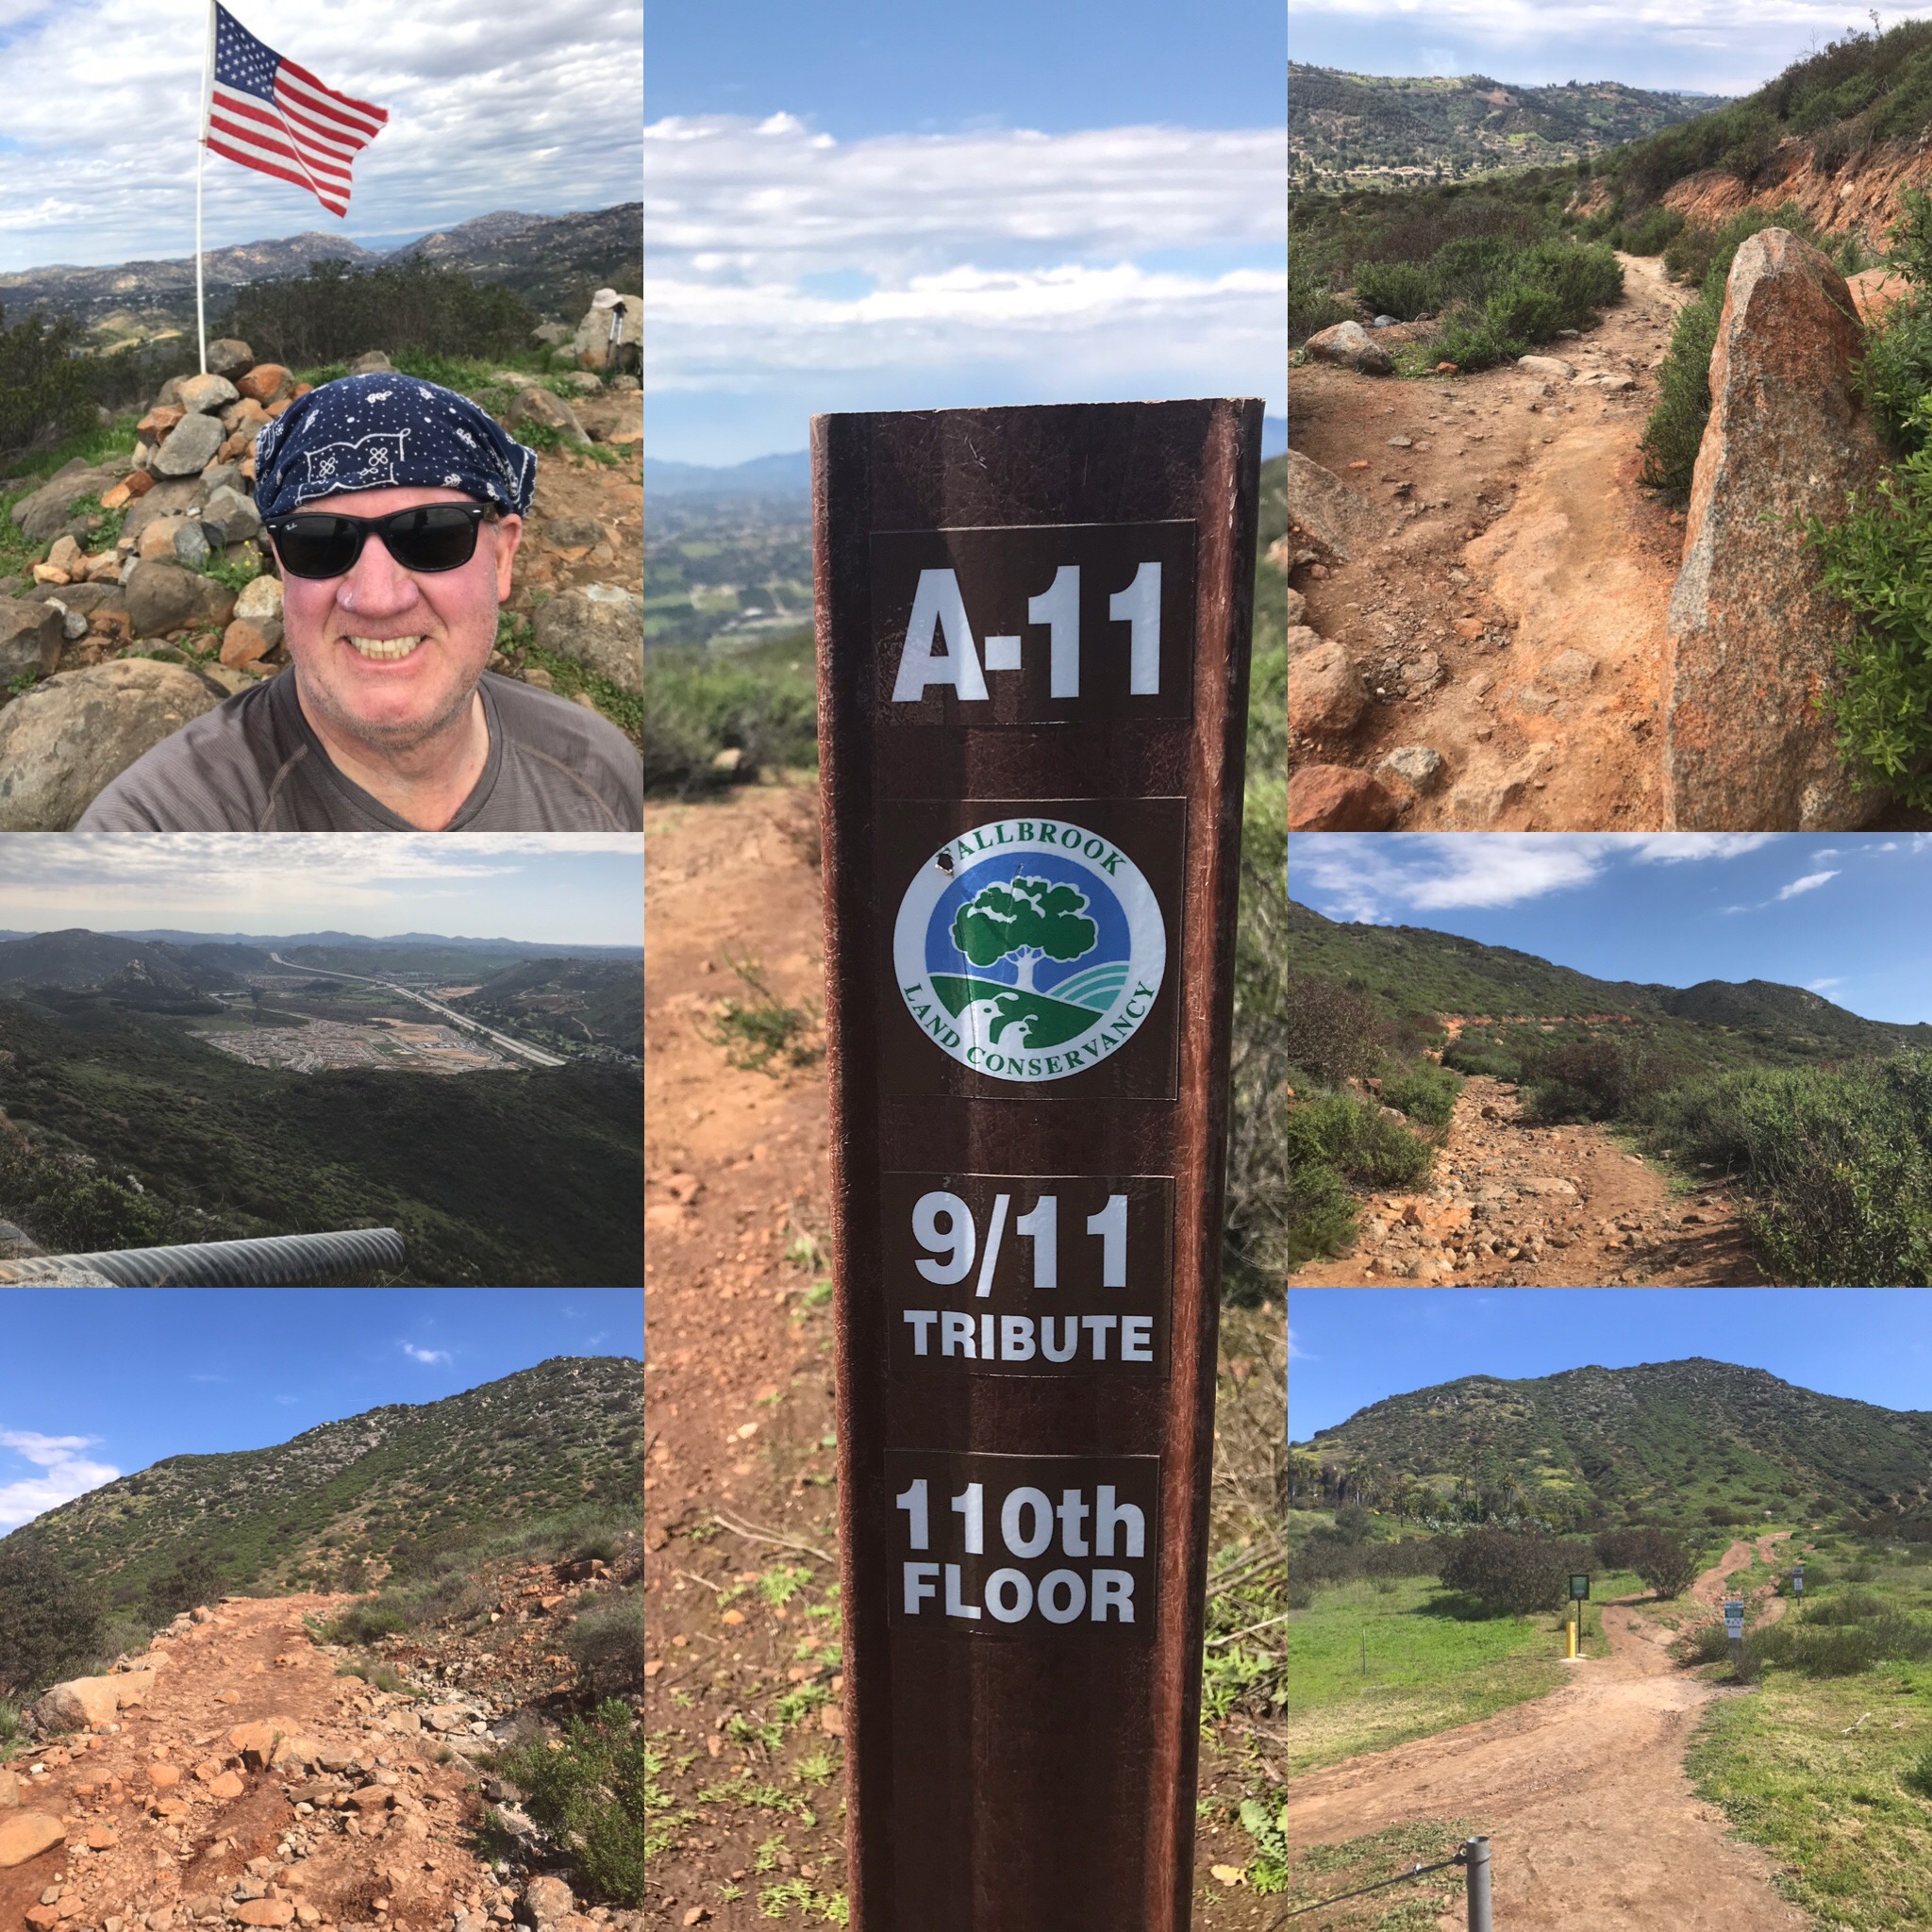
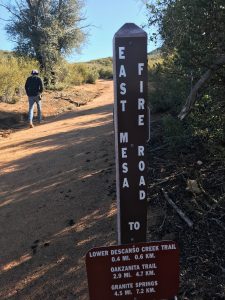
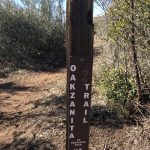
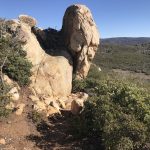
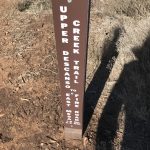
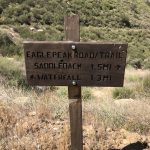
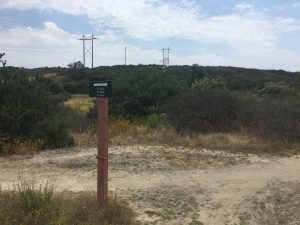
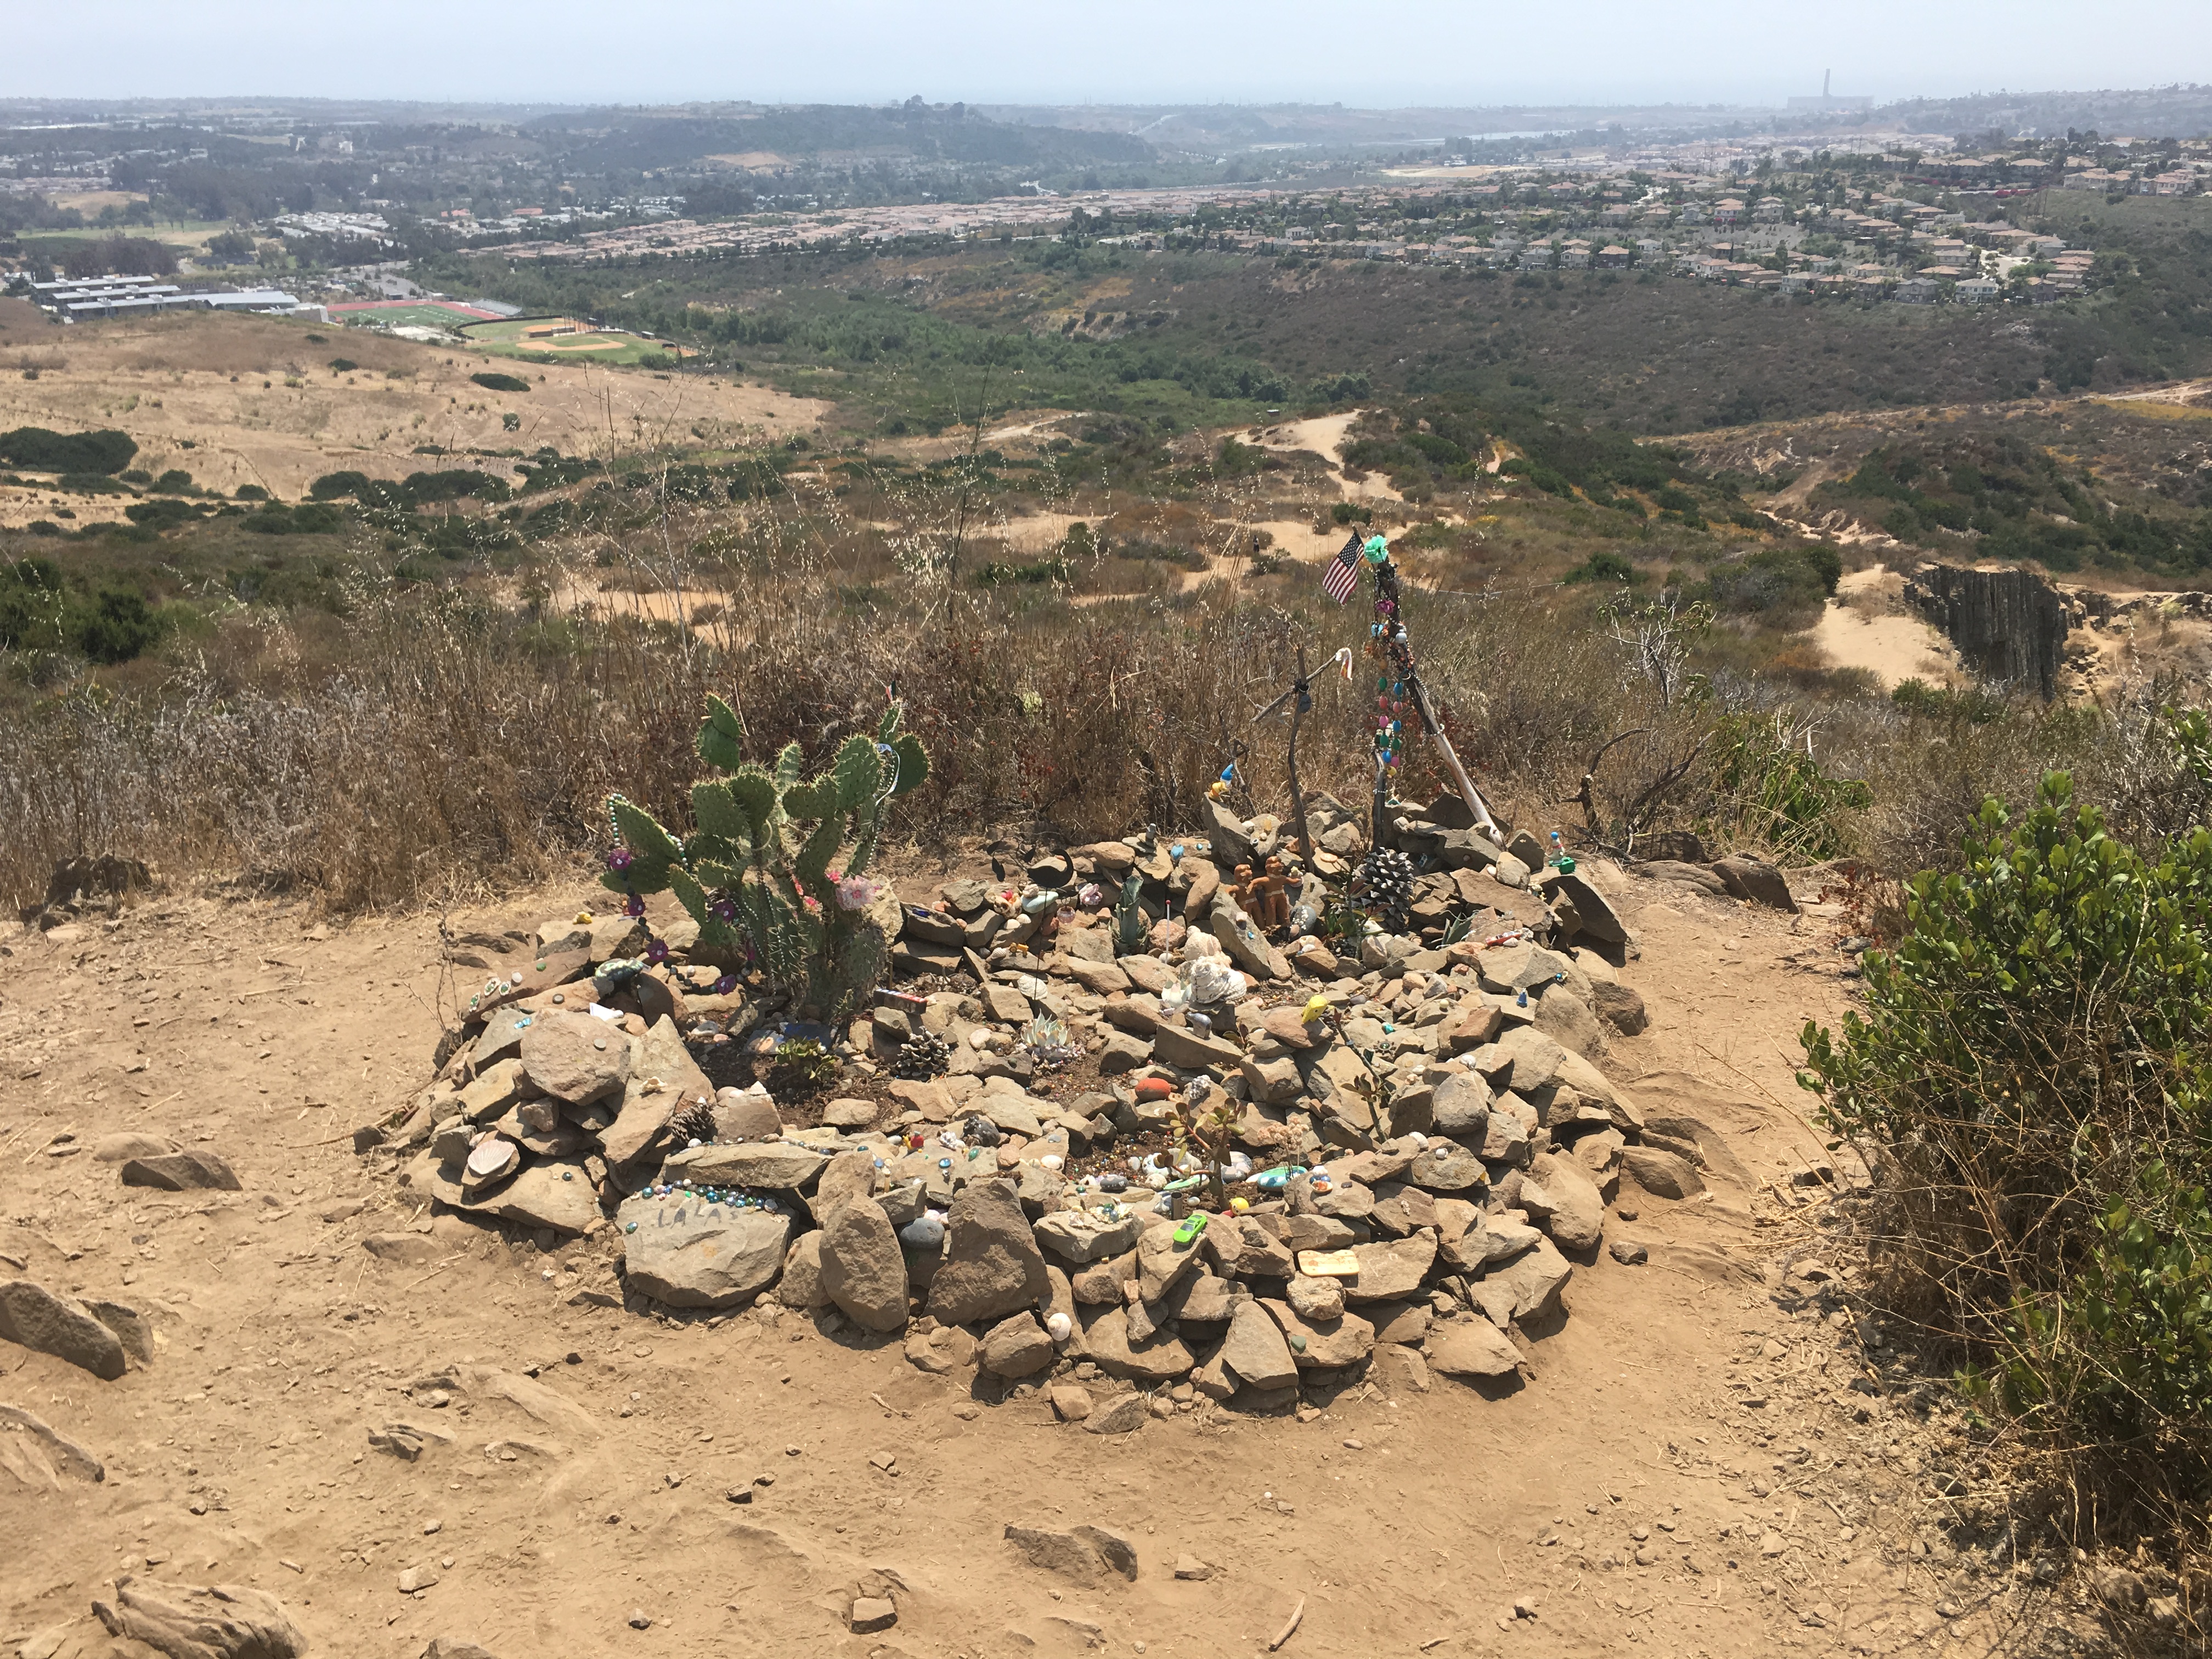
Continuing your climb you will be greeted by a few trail posts providing distance to various viewpoints and th Peak.  On your way up tribute markers to 911 mark the trail as well. .  These  911 tributes pay homage to those who lost their lives on that fateful day.  Each marker states the election using floors of the World Trade Center. see photo

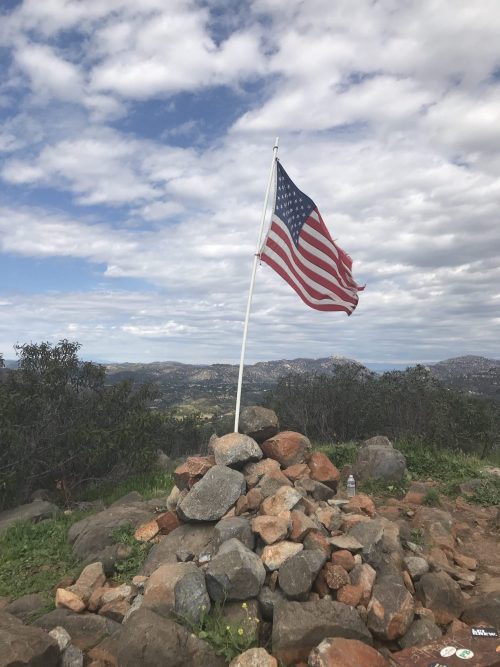
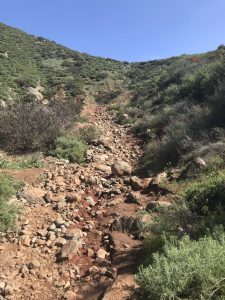
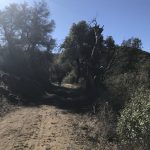
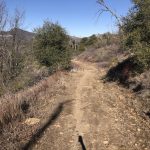
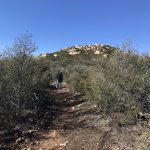
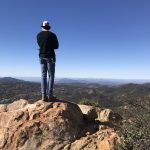
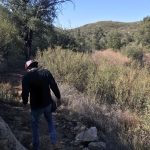
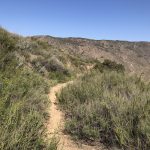
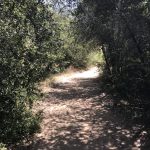
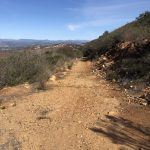
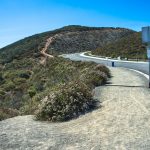
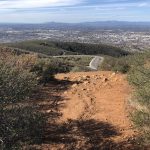
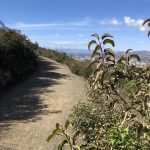
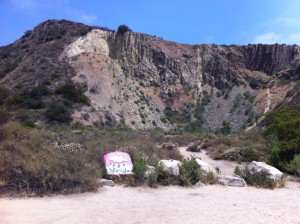
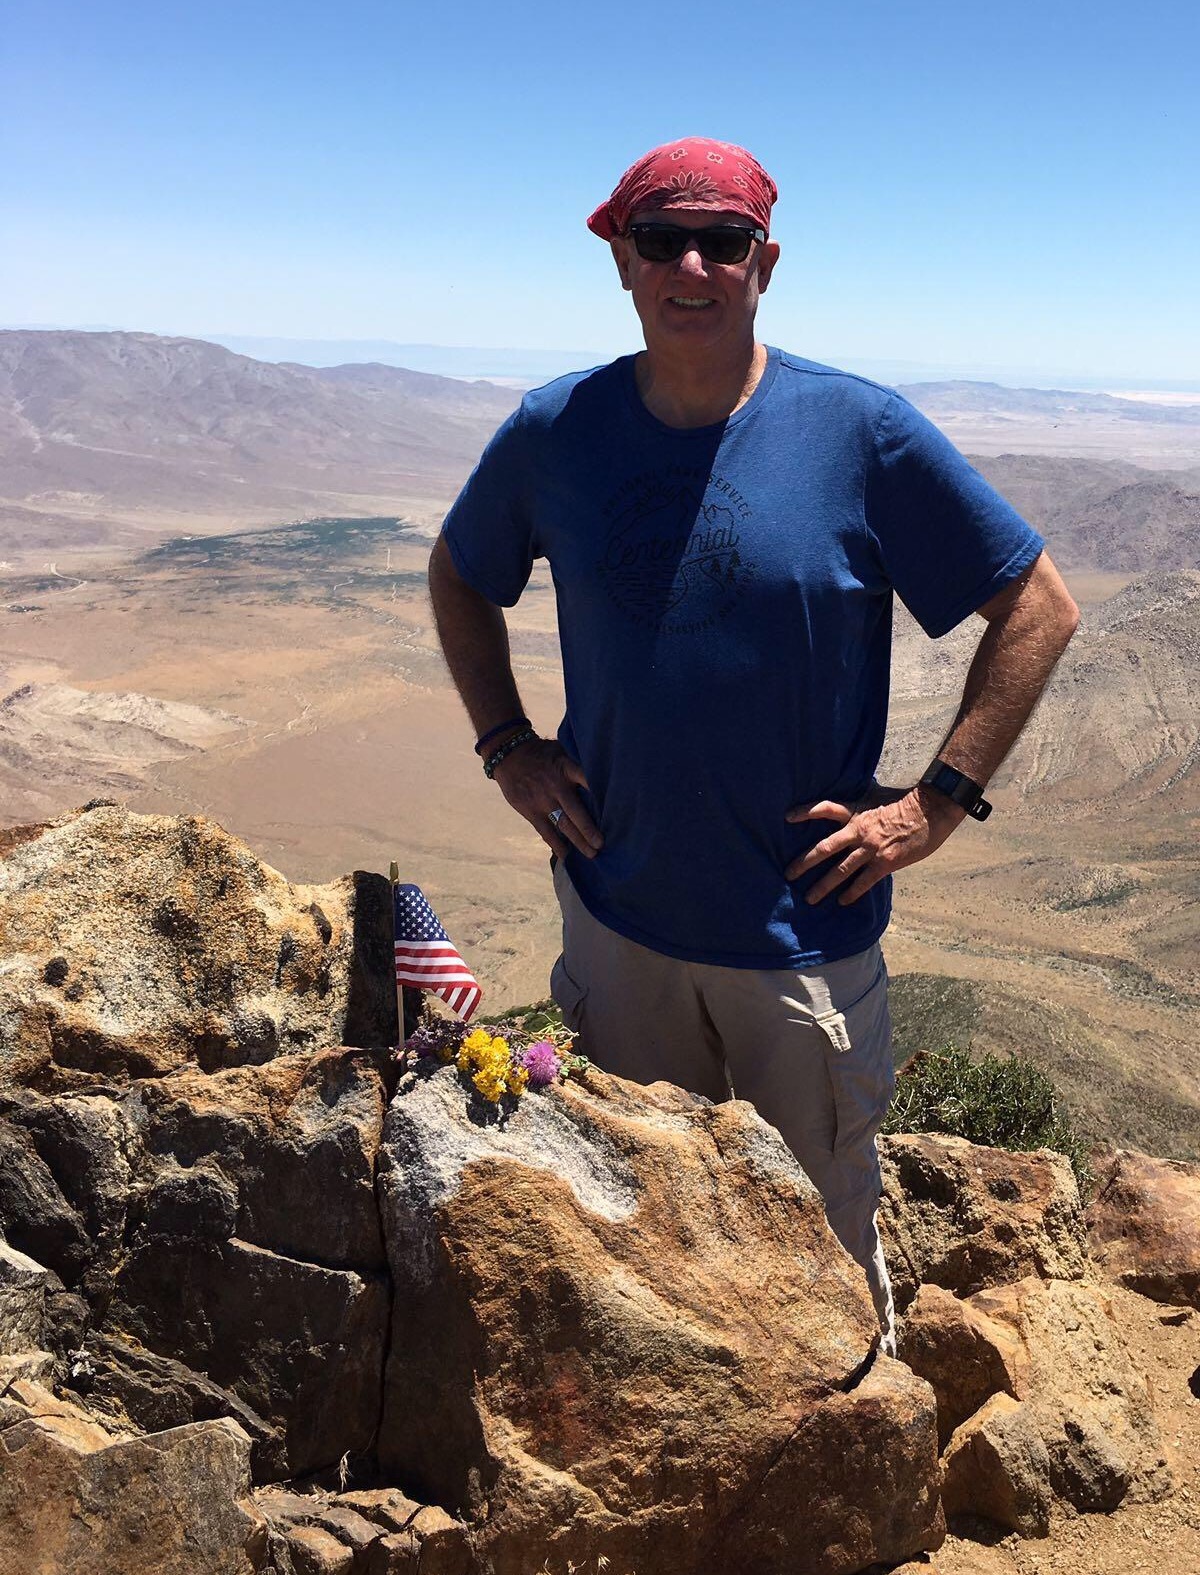
Continue ascending, the trail alternates between very loose and jagged rock and hard packed earth.  Today the earth and usual brown soil is a rich red due to the past week’s rains. The trail levels out at about the 1.25-mile mark for about .3 of a mile.  Here you begin your final push to the peak hiking a 30-degree slope to the top.  100 yards from the peak you will see the American Flag waving i the wind cleaning it sake of being planted at the summit of Monserate Mountain.

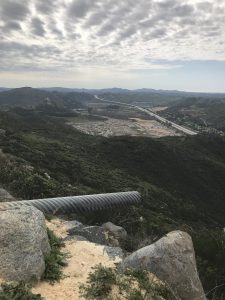
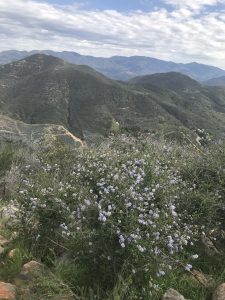
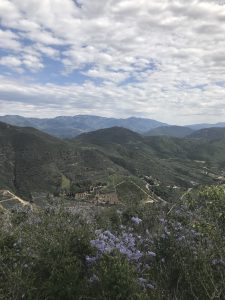
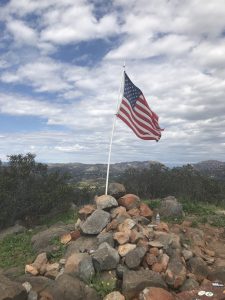
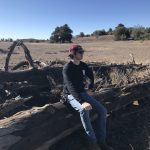
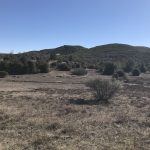
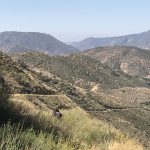
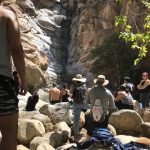
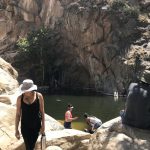
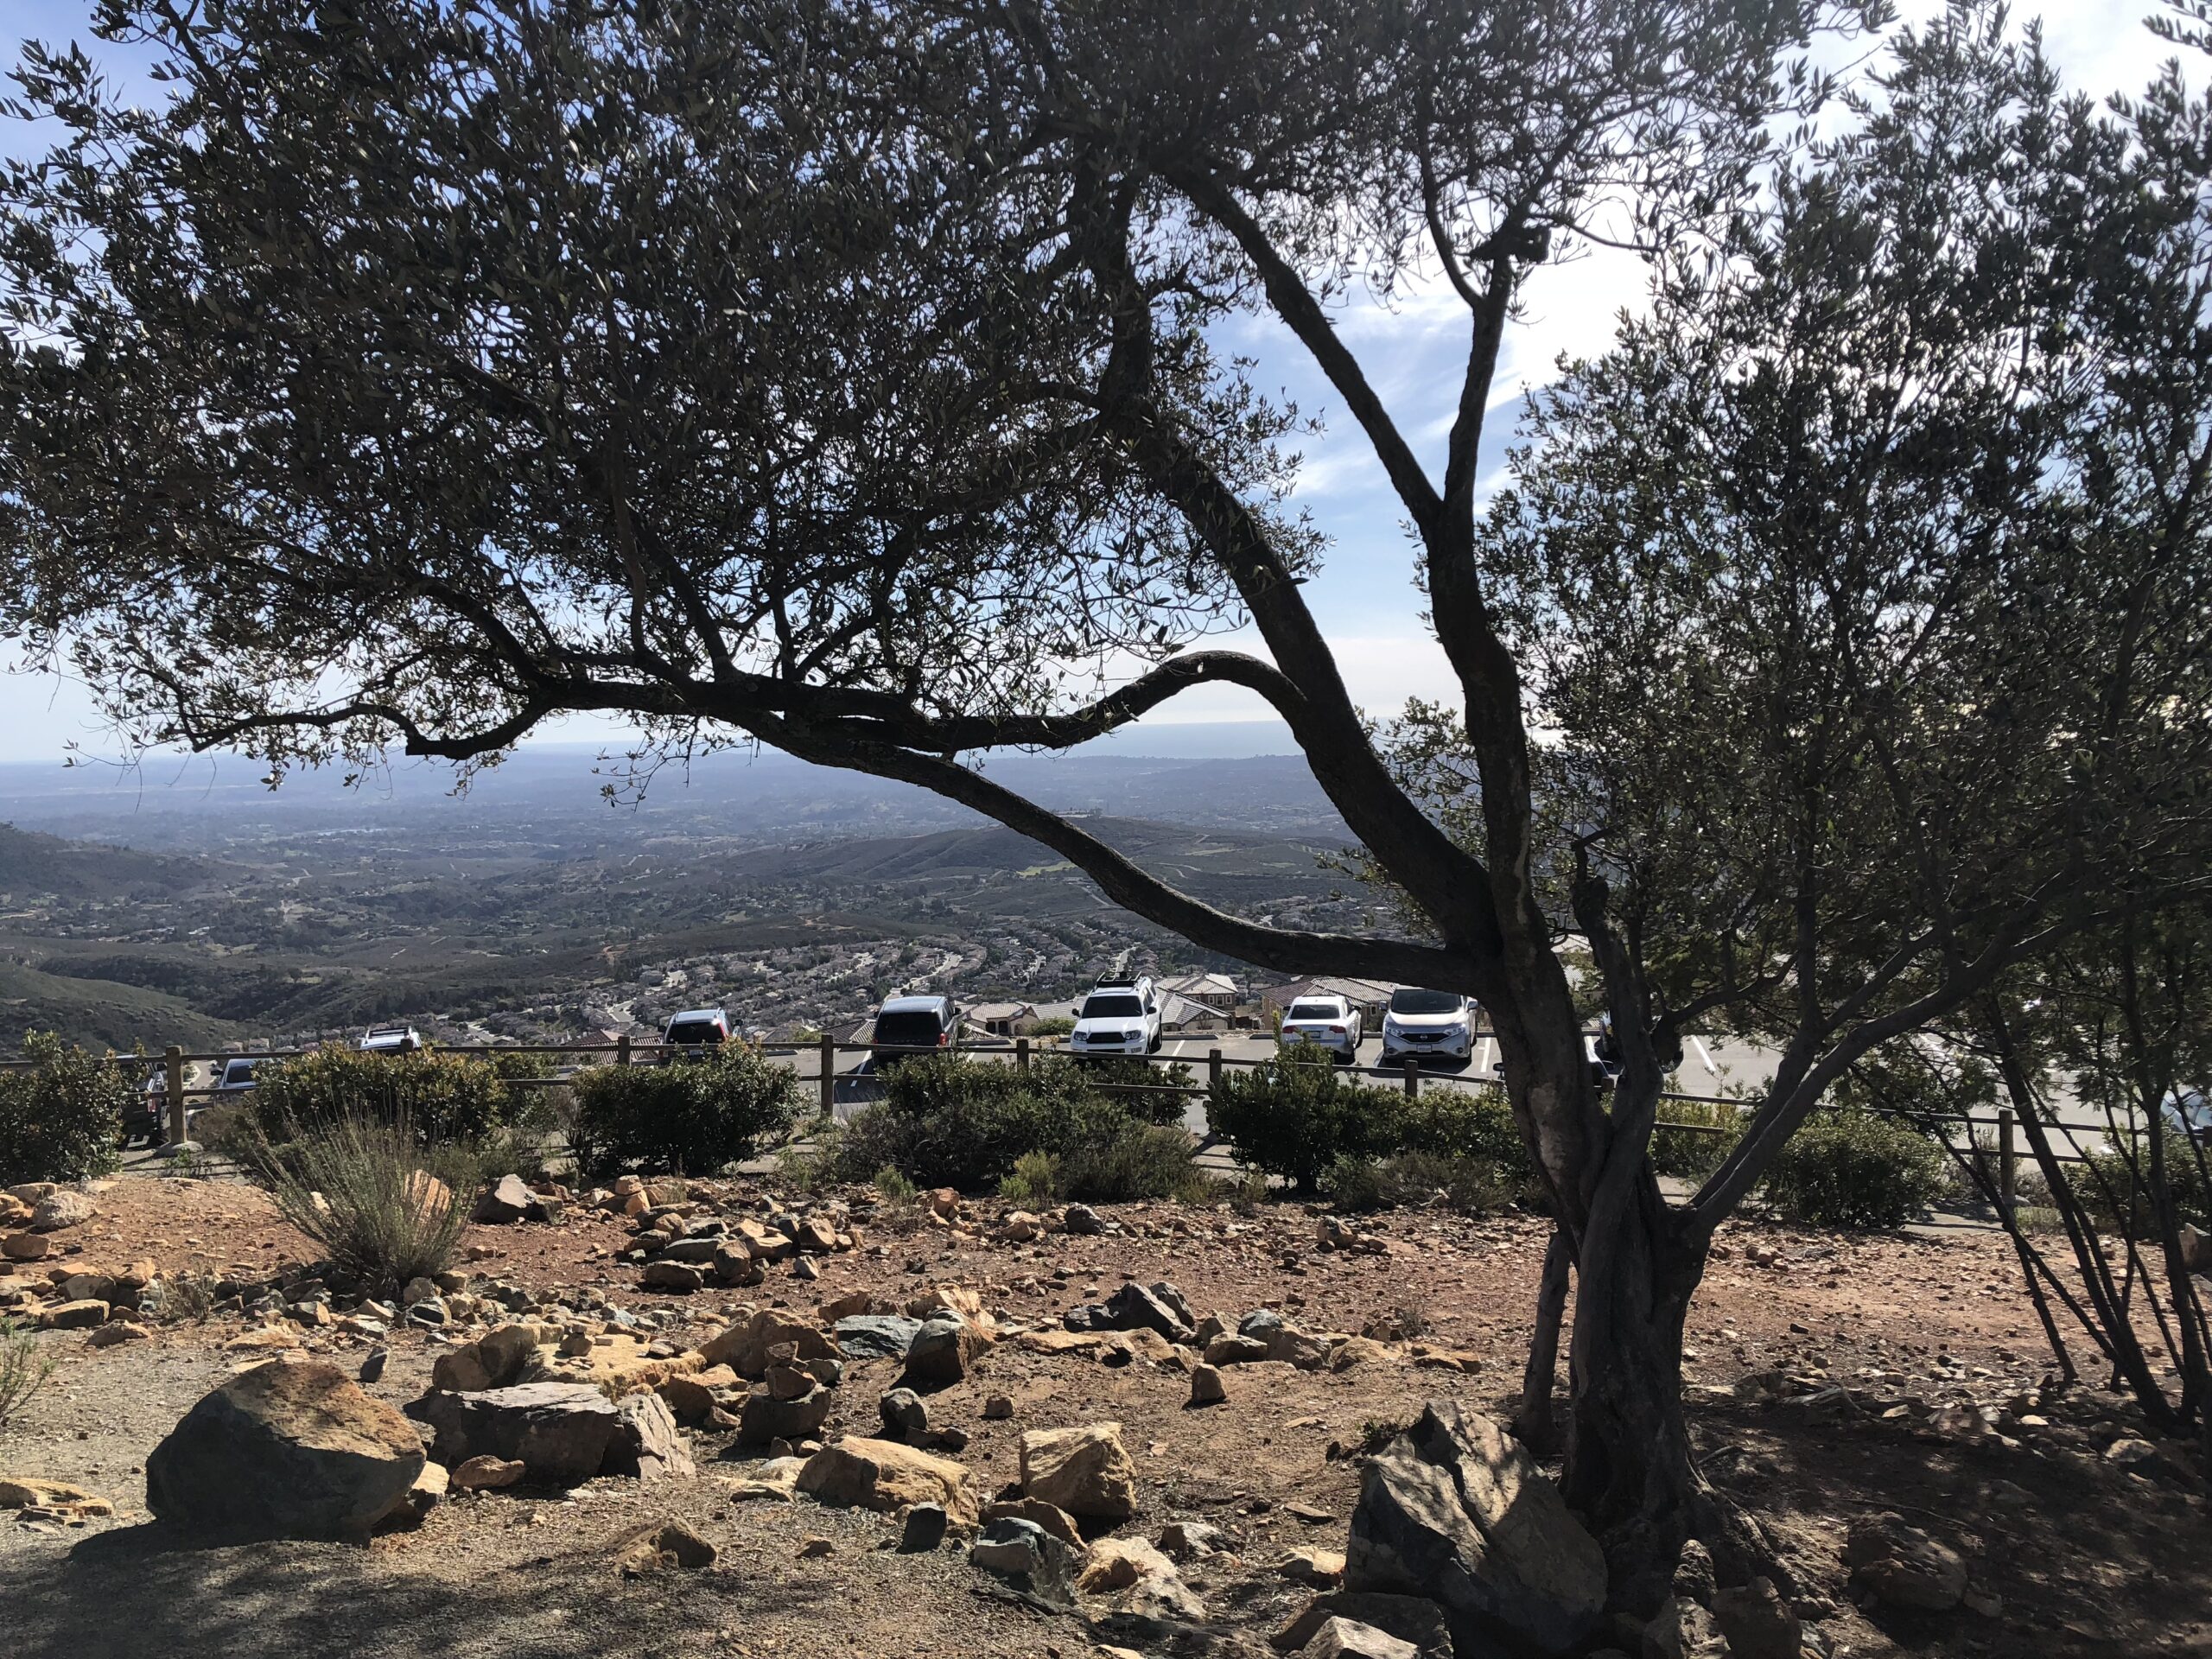
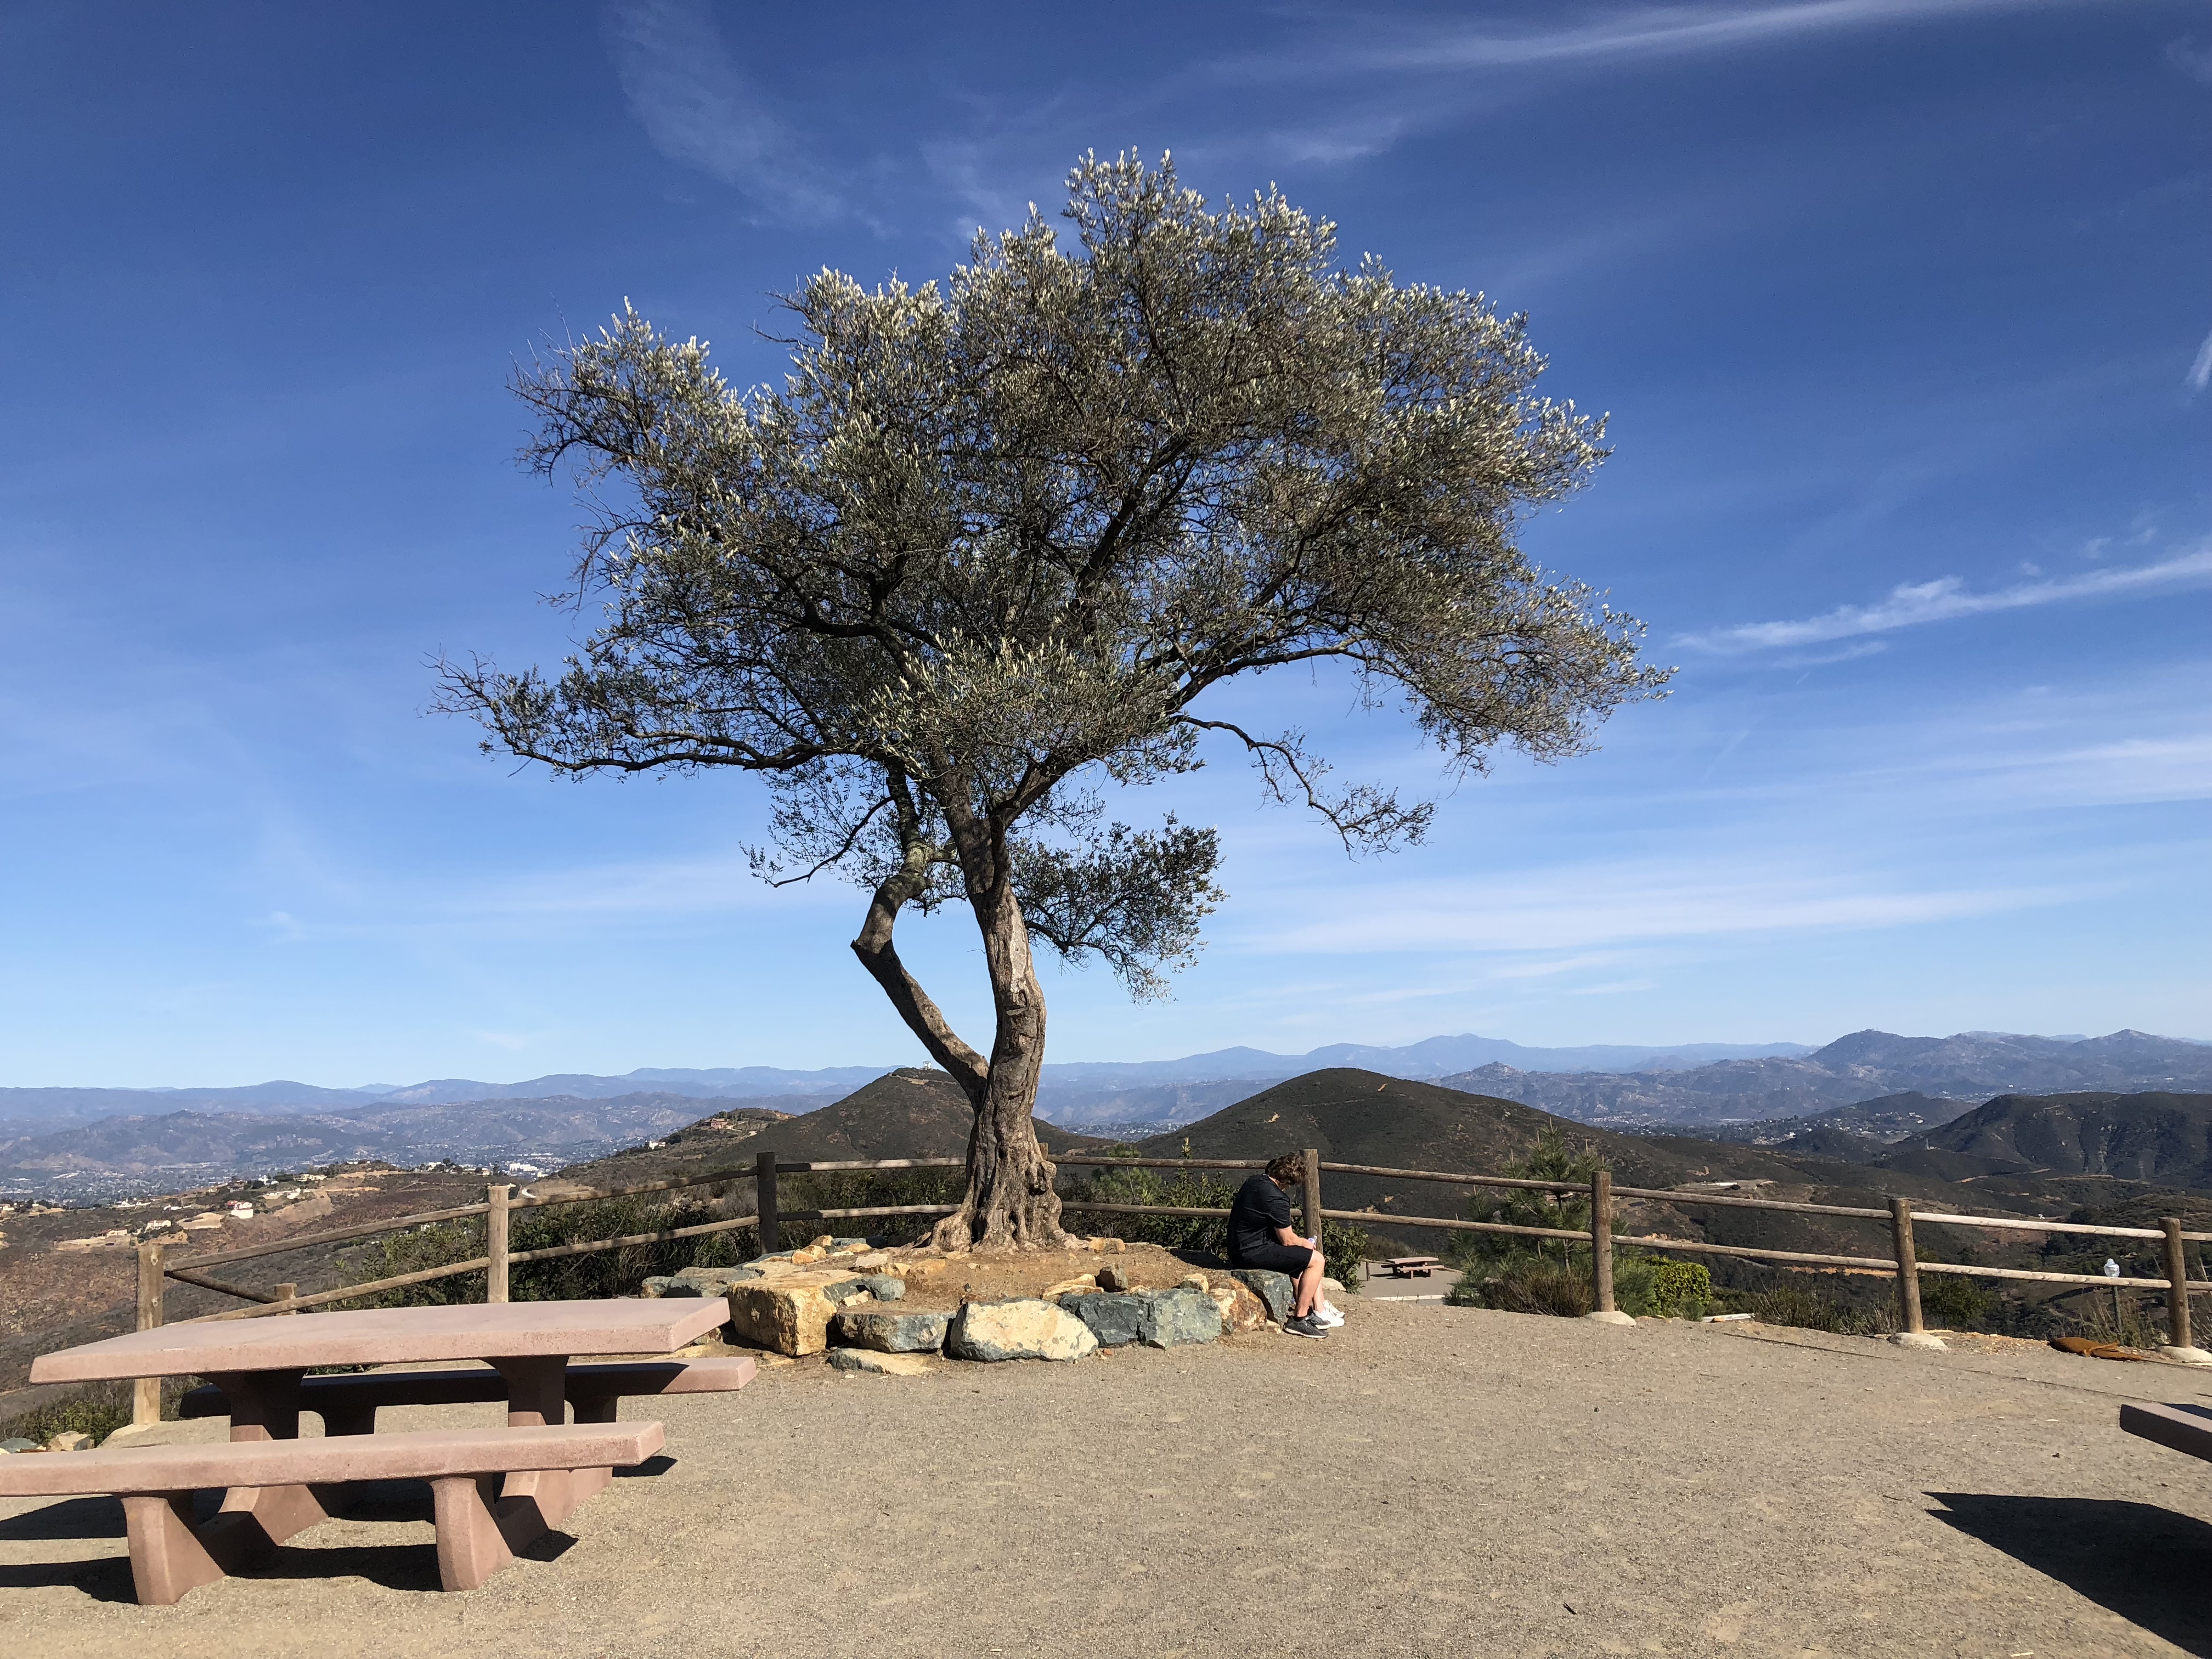
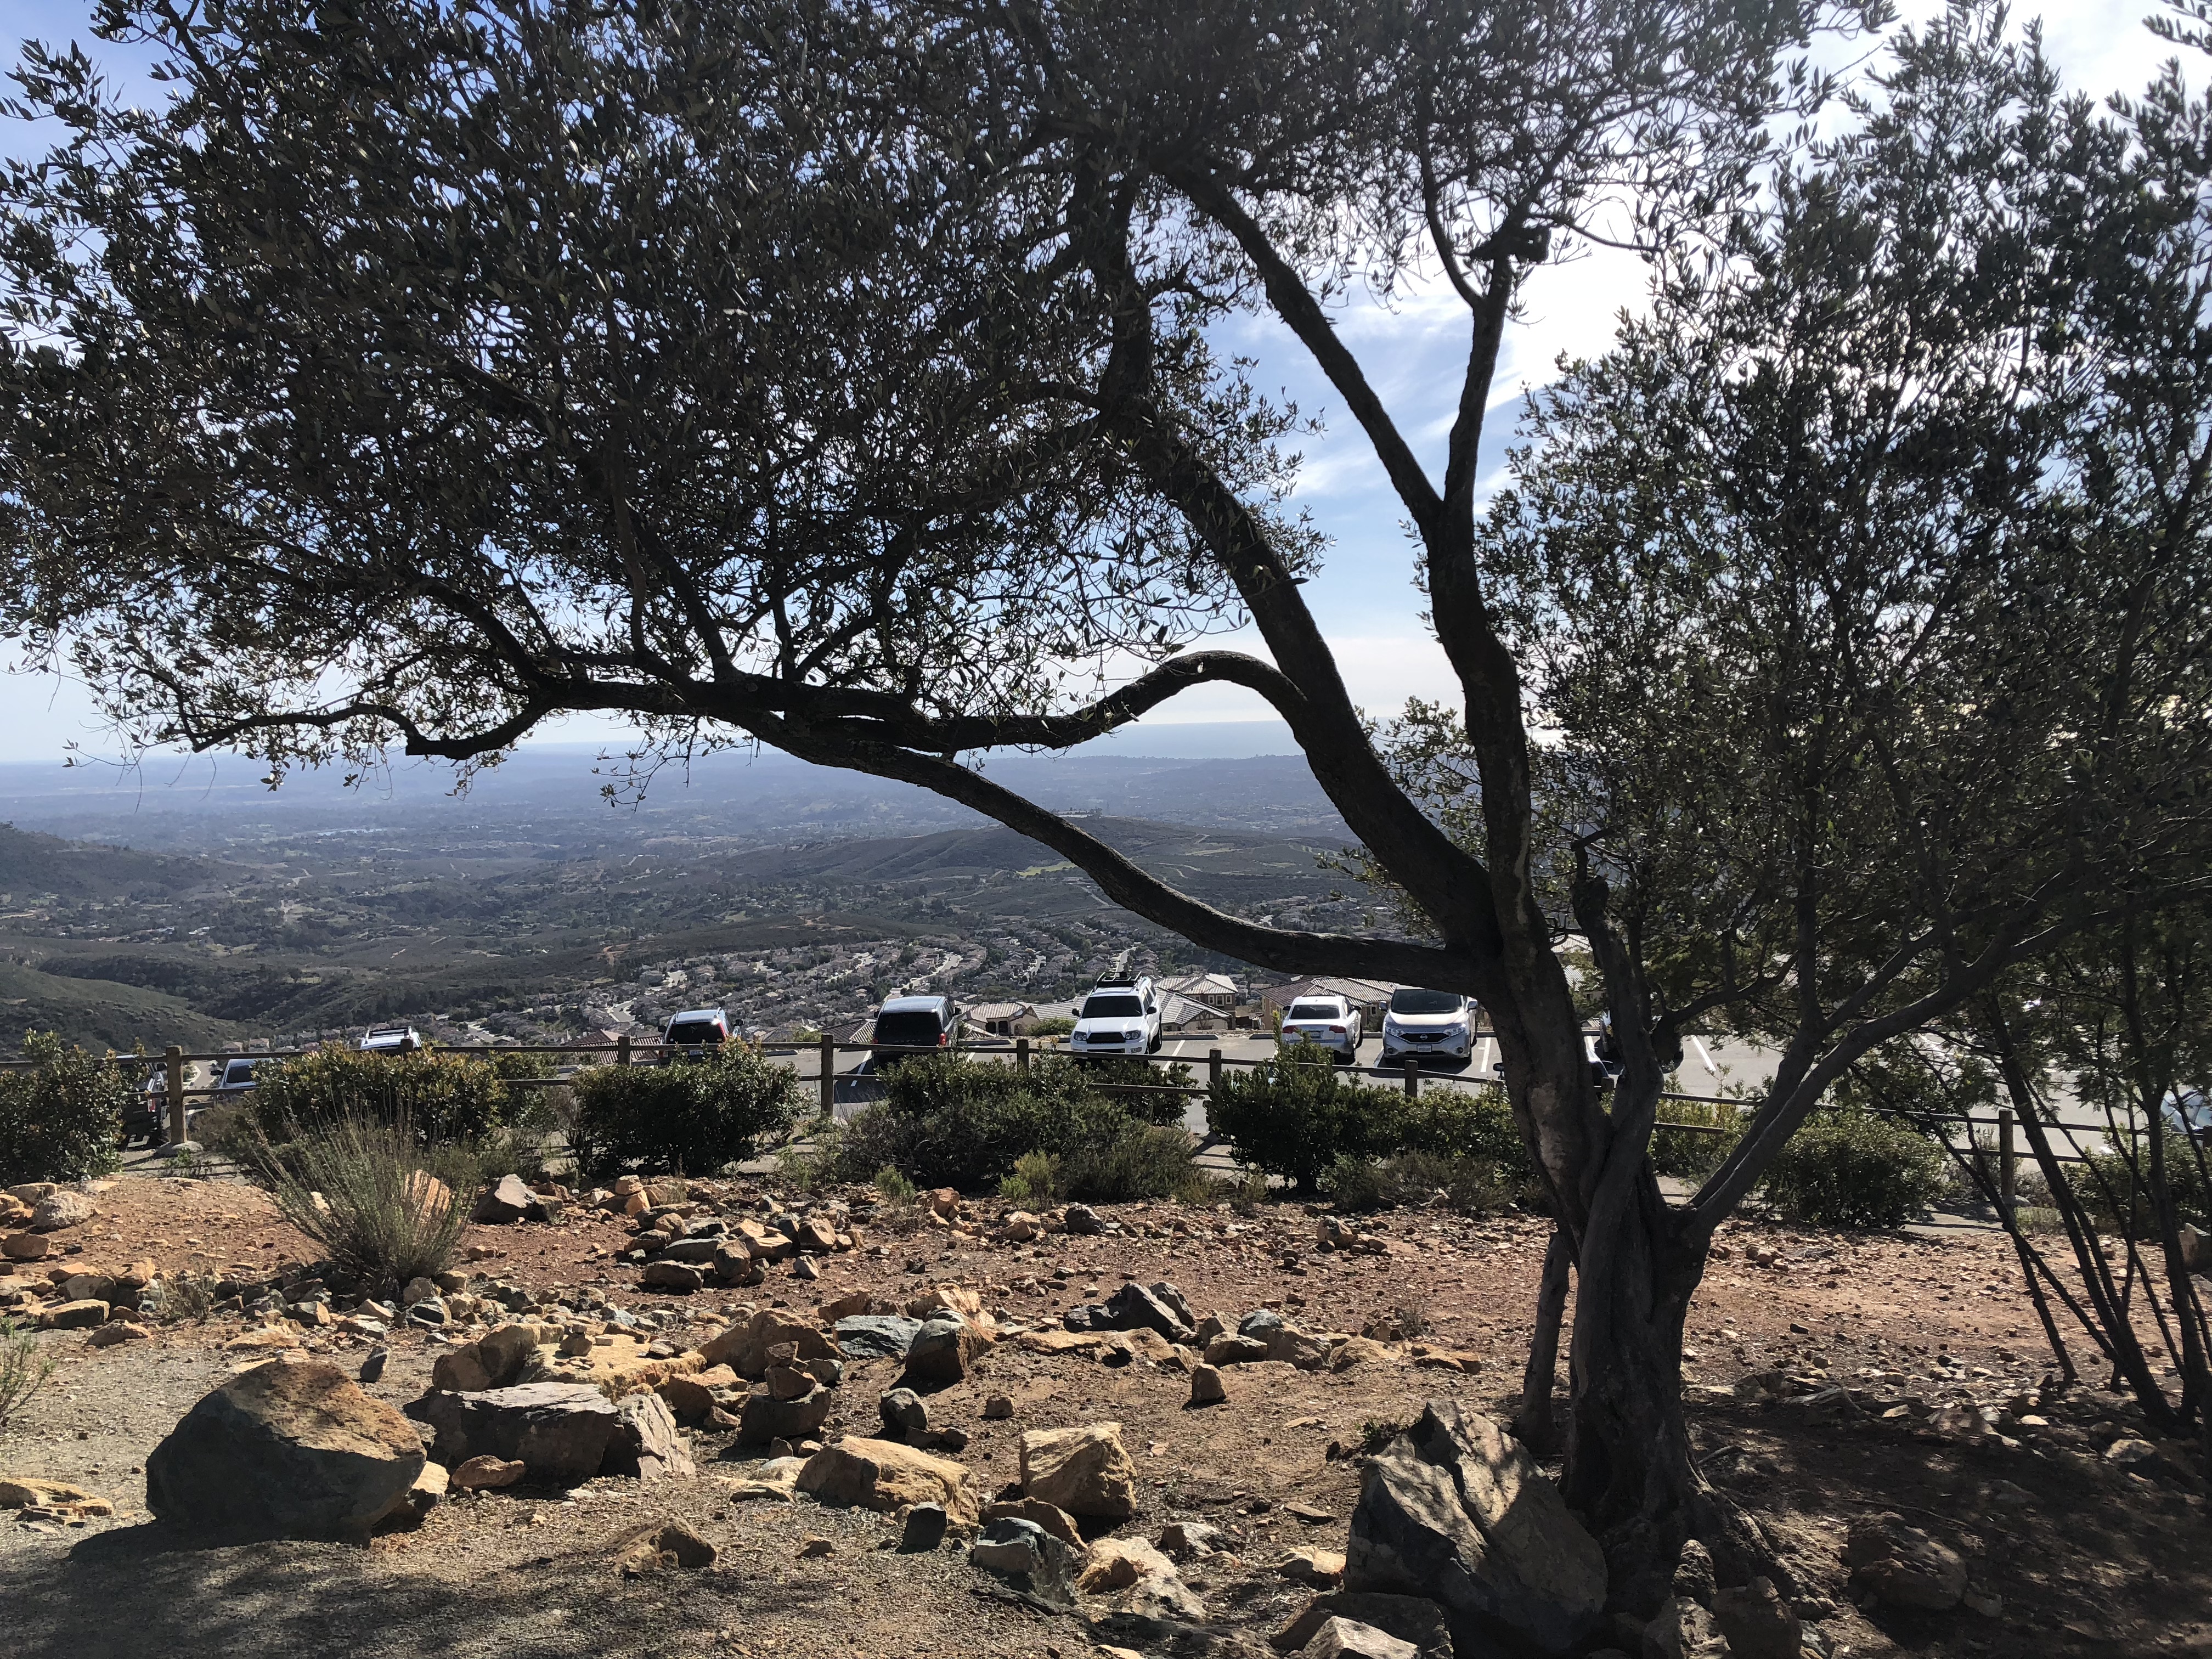
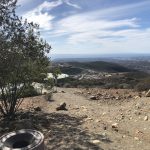
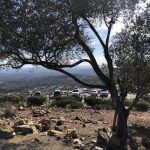
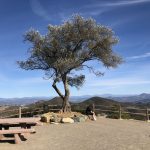
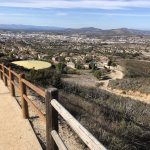
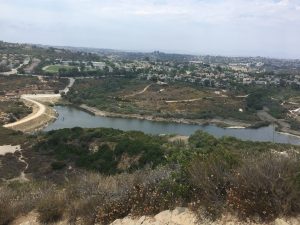
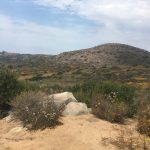
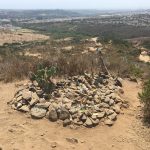
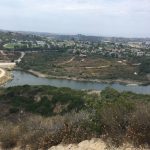
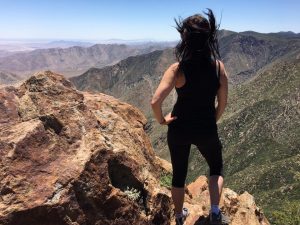
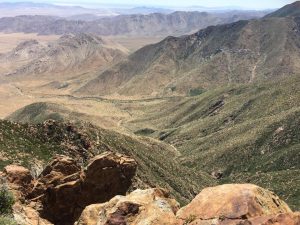
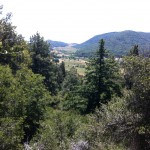
Monserate is one of my favorite Peaks.  The views are breathtaking as you look west to the Pacific Ocean and east to the Palomar Mountain Range and The Cleveland National Forest. Sign in at the ammo box which contains the Summit Journal.  Relax and enjoy your accomplishment, rest, hydrate and exchange conversation with other hikers sharing this moment with you. The descent back is the same trail.  

Once you hike Monserate, you too will add it to your go-to list of hikes in San Diego County…… HIke On!   

[/et_pb_text][/et_pb_column][/et_pb_row][/et_pb_section]

Oakzanita Peak via East Mesa Fire Road Trail: Cuyamaca Rancho State Park, East Mesa Trailhead 01/10/2019

Distance: 7.14 mi Steps:  16128  Elevation Gain: 1150′ Hike Time: 3:09:22min Temp: 70’s Hikeability:  Moderate Strenuous  

Water & Snack: 1.5 liters out of 2 taken, Probar, Orange. 

Directions: East Mesa Fire Road Trailhead:  Take I-8 East toward Alpine and continue east to exit 40, signed as Hwy 79/Japatul Rd.  Exit here. Go north on Hwy 79 about 4 miles to Cuyamaca Rancho State Park East Mesa, which is on the right. There is side of the road parking on an asphalt turnout. no facilities or drinking water.  (Please see photo below for TrailHead Sign) 

Another route if coming from North County: Take I-5 south to SR 78 in San Diego County. Go east on SR 78 through Escondido to the junction with SR 79 just past the town of Julian. Turn right (south) on SR 79.Go south on SR 79 for 9 miles to the Cuyamaca Dam.Continue 2.7 miles to the entrance to Paso Picacho Park on the right. Continue 5.6 miles further (mile marker 4) to a gated dirt road on the left side. Park on the left just before this road.


Hiking the North Eastern back country of San Diego County offers such unique, scenic and beautiful trails to hike.  Im always enthusiastic  to explore what this area has to offer and the personailty of each trail. 


This was my first time hiking Oakzanita Trail, which is part of the Cuyamaca Mountain Range.  However, I am familiar with some of the other trails in the surrounding Julian and Cuyamaca State Park area such as: Stonewall Peak, MIddle Mountain, Cuyamaca Peak and to the West and North:  Eagle Peak, Three Sisters and Cedar Creek Falls, Vulcan Mountain and Santa Ysabel. All great trails to consider if you havent done them.


The trailhead to Oakzanita Peak  starts by taking the East Mesa Fire Road Trail which is clearly marked at the trailhead start (see above photo).  From here we stayed on the road the entire 2.9 miles up the trail until it links into the Oakzanita Trail which is a 1.5 mile hike over to Oakzanita Peak.

My three favorite hiking colors in nature, brown, green and blue were on full display this Thursday morning.  The rich beige and browns of the hard packed earth and sand Fire Road Trail trail, the vivid bright blue sky and natures various shades of green on full display as the vegetation of the Cuyamaca Rancho State Park area was brought to life by recent rains.  


There is an alternative trail which branches off of the Fire Road called Upper Descanso Creek Trail which links in about .6 mi from the trail head start point and in fact is the trail we took down from the Peak.     Upper Descanso Creek Trail will link you into the Oakzanita Trail.  Taking this way up is a much steeper ascent but does knock of nearly .75 mile off the hike.  Thus if you took this section up and back your hike would be about 1.5 miles less in distance than doing the Fire Road out and back. 


As we made a right turn at the Oakzanita Trail sign, we knew we had about 1.5  mile to go over to Oakzanita Peak.  This was my favorite part of the hike.  As you gaze left you see wide open meadows, the East Mesa, that seemingly stretches for miles.  To the right, the view of Oakzanita Peak becomes clear and its boulder encrusted summit juts out in majestic form.  


Soon you will come to another marker that states .6 to Oakzanita Peak.  From here the trail gets rockier but well worth the last push and ascent to the peak.  Beautiful 360 views from the peak including views of Stonewall Peak, Cuyamaca Peak and Middle Mountain as well as in the distance Eagle Peak.


To descend go back .6 mile to the Oakzanita Trail  marker and decide if you want to go back the same way up along the Fire Road Trail the 2.9 miles or turn left at the marker and join  the Upper East Mesa Creek Trail which will take you 1.6 miles  to the Fire Road and back to the trailhead start.  This route is somewhat less in distance and a narrower rockier trail.  However, I liked going back this way to add more diversity of vegetation and scenery.  


Love my first time hiking Oakzanita.  My son, better known as the Trailmaster due to his ability to find these rich and fulfilling hikes had hiked this before and wanted to introduce me to this adventurous hike.  Great challenge of trail, love the diversity of vegetation and scenery as well as incredible views.  Not to mention being out in nature and the calming theraputic effect nature provides.   
Hike on!

Cedar Creek Falls Trail Julian, CA 04/28/2018

Distance:  5 .5 miles   Elevation Gain: 1100′ Date and Time:  Friday March 29. 2018  9:45am to 1:115pm  Temp:  70’s  Hikeability:  Strenuous  

Best Hiking Months:  November through early May  Water & Food: 4 Liters of water, lunch, snacks, orange for electrolytes


Hiking Cedar Creek Falls requires a permit, 75 daily issued.  Here is the link to get permit online

Cedar Creek Falls Hike is located on the Fringes of Julian and Ramona in the Cleveland National Forest  back county of San Diego County.  This is  “The Waterfall Hike” in our county.  It is also a hike of some noteriety due its recent years of being closed due to individuals dying on this hike.  Both from intoxication and jumping of the rocks at the Waterfall pool.  Also, some have died due to heat exhaustion, dehydration and a lack of water.  A caution sign at the trailhead speaks to these dangers and absolutely something you need to be aware of this hike. 


Direction to Cedar Creek falls; From Santa Ysabel(Dudley’s), take Highway 78 east towards Julian to Pine Hills Road, turn right (from this turn it is 30+ minutes to the trailhead). Turn right onto Eagle Peak Road.   The last 8 miles of Eagle Peak Road are dirt but part of the beauty of this hike is getting to the hike.  The back country of the Julian Ramona area is gorgeous.  This time of year it was green and flowers were out. Eagle Peak Rd will dead end into the cult-de sac trailhead start.


You can park alongside the road edge but be aware that on the weekends the road gets pretty full.  After you park walk towards the cul-de-sac with the tree in the middle of the road and veer right to the trailhead start. Interestingly on this weekend day (Saturday), there was not one car along side Eagle Peak Rd. as we arrived.  This was both a blessing and a question point for me.  Where is everyone, its 9:30am?  That said it seems since this hike has opened back up 5 years ago, many use the Thornbush Rd trailhead start in a neighborhood area of Ramona. So, the fact nobody was here was a good thing parking wise, it only added to the ominous feeling of this hike right from the start.  So much open vastness, rolling high peaked hills, and lots of it for miles in each direction. 


This trail is unique in many ways including the fact that unlike most hikes, the start to this hike immediately begins to descend for the next 2.75 miles it takes to get the waterfall.That’s the good news, but like anything that must go down, you must also go up.  Although not a steep ascent it is long and can get very hot.  I will take the opportunity to stress the importance of taking a lot of water on this hike; a gallon per person is what I suggest along with snacks and oranges. The caution sign in the phot indicates the dangers of this hike.  Cedar creek is very doable, but it can get ruhot, dry and rugged which adds to the difficulty level of this hike by at least 3 points.  0-10 this hike is a 6-7 difficulty wise, add heat its a 8-9.


The topography on this hike creates a sense of vastness and an open feel that adds to the majestic views that surround you. You are essentially descending the entire trail to a valley surrounded by the local mountains of the Cleveland National Forest.  The trail is very hike-able and although it is strewn with rocks in places the vast majority of the trail is made up of soft earth and sand.  On the decent you have the mountainside to the left of the trail and the drop-off to valley floor below on your right.  


We all have our own definition of difficult, but whatever the is for you, this hike is very challenging.  That said its a beautiful trail, great views and lots of opportunities for great photos, and thats even before you get to the water fall.  The trail is very easy to track with posted signs along the way indicating distance traveled and the distance to the waterfall below.


 Once you reach the valley floor at about the 2 mile mark or so signs will navigate you left towards the waterfall.     The vegetation changes here and becomes denser with California Scub Oak and low-lying brush.  Beware of Poison Oak which are those deep red leaves growing from the low lying plant, bush.   


As the trail down in th Valley has flattend out for you, you will approach a canopy of tress and brush to invite you in and on your way towards the falls.  You will come across a river bed of rock which help you navigate you across a creek.  

The next “obstacle” on the trail is a few climbs over boulders rocks and up to a spot where you soon see splashing water, the sounds of people jumping and swimming and if there is water running in the falls, the sounds of the falls themselves crashing down to the rocks and “watering hole” area below.  On this day there was only a trickle of water running down the falls, but plenty in the pool below. 


Once you are done enjoying the falls, replenishing your water and fuel, it will be time to return and the ascent back.  Take your time, ascending is a one step at a time process. Keep hydrating, break with snacks along the wy and soon you will have hiked out the 2.75 miles out and back to your car at the trailhead.  


As Always hike with a partner, know your limits, know your partners limits, take more than you need water

and know your trail route, use a map and or compasss if you must. 

Hike On!

Double Peak Trail San Marcos, CA 03/04/2018

Distance:  4.6 mi   Hike Time: 1:15pm to 3:45pm  Steps: 9972  Elevation at peak: 1646′

Elevation Gain:  1000′ Water:  1.5 l  Snacks: Redd bar and hard boiled egg 

Hikeability: Moderate   Getting there: Take Highway 78 to San Marcos Boulevard. If coming from the coast, turn right. If from the 15, turn left. Turn left onto Bent Avenue, which will turn into Craven Road. Turn right onto Foxhall Drive, and then turn right into the Discovery Lake parking lot or park along the street.

Discovery Lake                            
Hiker Therapy


Double Peak Trail is one of my top 4 hikes in North County San Diego along with Lake Calavera Preserve, Oceanside, Daly Ranch, Escondio and Monserate Mountain Fallbrook, CA.  Double Peak offers a very clean trail, well marked, easy access, excellent trail conditions and the famous “Tree” at the peak which can be seen from miles around.


Double Peak Trail is part of the Discovery Lake Park system, which includes Discovery Lake and Discovery park.  Both of which offer a great family place to play, fish, picnic and hangout on a weekend day or any day for that matter.

Double Peak Trailhead
Hiker Therapy

The trailhead to Double Peak starts at Discovery Park and its beginning trail leads you right alongside Discovery Lake.  If you prefer you can start at the opposite or top end of the park and wind around the lake and join back up with the main trail up to the peak.


In fact the beginning part of the trail is a service road that leads up into a local neighborhood and then up a residential street which connects you to the “Real” trail. This beginning service road always is the most challenging part of the hike for me.


 Its a steep climb and its right when you start out, so be prepared for some “legburn” before the trail evens out and heads into the local neighborhood. The neighborhood road up is about 1/4-1/3 of a mile before you reconnect with the Double Peak Trail.


Urban Hike part
Hiker Therapy

At the top of the street, you cross over to the main trail.  Once on this part of the trail you are hiking on hard packed sand up most of the way to the peak.  As you wind up halfway to the peak the trail does turn to a rockier composition but then again returns to the hard packed sand trail composition.


 Soon you will climb high enough to start picking up good views of North County as well as California State University San Marcos to your east.  Much of this trail surrounding vegetation has been burned in recent years fires, but much of the brush, plant life and chaparral has grown back.


Trail spur left, steep trail in background, road up to Peak
Hiker Thera

As you continue to climb and at the 1.8 mile mark you will come to Double Peak Rd.  This is your final climb up as you stay left on the sidewalk.  At the 2 mile mark you will come to a trail spur that dips down to the left.

 This is an option that will get you to the peak, (of the three ways up I say this is the most challenging option) and well worth getting off the main trail.  This spur will take you to the opposite side of the Double Peak summit.  

Trail to Steep Sign
Hiker Therapy

You can also continue on to the “Steep Sign” marker, you can take this dirt trail up but beware its a leg burner and as the signed has warned us  its steep.  Most who ascend Double peak take the sidewalk along side Double Peak road up.


 But come on! This is a hike! and the more adventure and spice you can add to the hike the better  I usually go up the “Steep” trail sign way.  Although recently I have been going the trail spur to the left and the first of the 3 options that you come to.  

Double Peak Summit Tree Hiker Therapy

Either one of the three ways you will summit Double Peak and enjoy the 2.3 mile hike up and the views of the distance Palomar Mountains and on a clear day Mt. Baldy and the San Gabriel Mountains.  


To your immediate east you will see a pointed peak, thats Mt. Whitney, not “The” Mt Whitney. You will also come face to face with the Double Peak Tree!  Looking west the pacific Ocean and south the coastline of San Diego County.

Gorgeous View looking South East from Summit, parking lot adjacent
Hiker Therapy

Most of the people at the peak have driven up Double Peak road, so congratulate yourself on your hike up and enjoy a snack and the gorgeous 360 degree views.  There is a restroom at this peak that is well kept by the local park ranger.


Me at the Summit Peak
Hiker Therapy

Double Peak is one of my go to local hikes and one that provides a good challenge, a nice sense of nature even though you are hiking through a suburban neighborhood some of the way.


A good sense of accomplishment and at roughly 4.6 miles a good enough challenge to make you think you’ve gotten a good workout, which you have, as most times a few hours after I get back home my legs will attest to.


As always, hike with a friend, respect your limits, respect your friends limits, take more water than you need, a snack and remember its not a race, enjoy each foot step along the trail 

Hike On!  


Lake Calavera Preserve and Volcano!: Sky Haven West Trailhead: 07/15/17

DISTANCE4.61 miles STEPS: 9877  Elevation GAIN: 690ftTIME: 2:21 WATER: 2 L SNACKS:  Orange, Hard-Boiled egg TEMP:  80

Trailhead Start:  I entered the preserve at the Sky Haven West Trail head, which is actually in Oceanside on the northern edge of the preserve.From state Route 78, exit at College Boulevard, heading south. Turn left onto Lake Boulevard, then right onto Sky Haven Lane. Sky Haven dead-ends at Azure Ladd Drive; park here on the preserve’s side of the road.

The Volcanic Plug at Lake Calavera Preserve     

Lake Calavera Preserve in the Tri-City North County area of Oceanside, Carlsbad and Vista is an ecological preserve and home to Calavera Mountain.  The word “Calavera” means skull, which probably comes from the unusual shape of the area’s centerpiece, Mount Calavera. The 513-ft. Mount Calavera is not really a mountain at all but rather a 22 million-year-old volcanic plug. 

The trail system here is vast and much of it would be classified as easy to moderate.  The trail composition for the most part is hard pcked sand and clay, however their are sections of the trail that get very rocky, washed out and unstable  Any way you go you will have hard time getting lost in the 10 miles of trails in the Preserve. 

I mixed up the route this time but for the most part I head west towards the dam, cross the dam and head up towards the Volcano branching left, then going straight right or climbing left.  Both will take you past Volcano.  Climbing left will take you to the base, branching right and then heading straight will take you along side the Volcano.

I usually branch off to the right and circle around the back of the Volcano, head east, hike around out in the “Field” make a left at the trail intersect, then head north until I hit the trail along the fence.  At this point I head west again until I hit the trail intersection with the Volcano right in front of me.  

Here I head south, turn left meet up with the trail I was on to get out into the “field”, turn right at that trail intersect, than lookout for the small trail on the right side that will lead you up to the Volcano.  You will hike along side a concrete wall here, the same one you paralleled earlier.  As I mentioned there are numerous ways to Summit Calavera Mountain all easy to find, all offering a new adventure. 

Trinket Garden at lake Calavera Preserve

Once you are up on top,  admire the view of the Pacific to the West, Oceanside to the North, Carlsbad to the South and Vista to the East.  Great views of the bowl of the Volcano too! 

As you meander around the Summit you will come to the “Trinket Garden’ a nice memorial and keepsake place for the many who have hiked these trails.   Looking down into the bowl you will see a Labyrinth, which is a maze offering yet more diversity to this Hike. 


Labrynth at Lake Calavera


Once you descend down back to the base, visit the Volcano and walk all around in the area of the Labyrinth to get a sense of the Volcano and the spiritual feel of the area.  This is a fun local trail offering a lot for such a “sububanized” parcel of land area.  


This hike offers you: a Volcano, miles of hiking trails, a labyrinth, if you can find it a small cave, numerous ways to summit the Volcano, an ecological preserve, wetlands, and great views of the surrounding Tri-City area. 

I call this one of my go to “Sunday” hikes in San Diego County and one I highly suggest for families and those looking for a good way to get a lot of miles in without burning yourself out and having to drive far if you are in the North County Area.

Garnet Peak: via Pacific Crest Trail at Penny Pines; Pine Valley, CA 05/28/2017

Garnet Peak via The Pacific Crest Trail at Penny Pines

Distance/Difficulty:  4.7 mi./easy/moderate  Time:  3:11 min including 45 minute break at peak.  

Steps:  12,119  Temp:  80 degrees  Water:  1.5L consumed, brought 3L Snacks:  always bring something for electrolytes;  energy bars, fruit, hard-boiled eggs, granola always work.

Elevation:  5900′  Calories Burned:  approx. 2000  Restrooms:  At Laguna Mtn. Lodge 4 miles south.

Driving Directions: From the I-5, I-15, and state route 67, travel east on I-8 and exit on the Sunrise Highway off-ramp. Turn left, and follow the sunrise highway up through the forest, past the village at Mt. Laguna, and park at the Penny Pines Trailhead.  Parking is free.

Garnet Peak Map

I love doing first-time hikes and Garnet is one I’ve wanted to do for a while now.  Located out in the Beautiful Laguna Mountains Cleveland National Forest area, half the fun of this hike is getting there driving through the Curvy Sunrise Mountainous Hwy., through Pine Valley which is comprised of Jeffrey Pines, gorgeous mountain scenery and at every tune views to die for, literally, so drive safe.  

You will pass the Laguna Lodge on the left, stop here to use the restroom and last-minute snacks and or liquids.  Continue on about 4 miles and the trailhead starts to Penny Pines is on the right between the 27.0 and 27.5-mile marker.  There is plenty of parking which is free with no need for an adventure pass.

The Penny Pines trail is the middle version of hiking Garnet Peak, as there are 10.4 (Pioneer mail)  and 2.5-mile (Sunrise Highway 0.1 miles south of Mile Marker 28, near Deer Lake Park Road.), roundtrip trails.  

I like this hike because the 4.7 miles offers a challenge, is not overwhelming and gives you enough trail to appreciate everything that the 10.4-mile trail offers and makes the drive out to the Laguna Mountains and Pine Valley worth your time and energy.


Penny Pines trailhead Start

The trailhead is well marked with a large Penny Pines trailhead sign, you will see the Penny Pines Information board and the trailhead start.  Pass by the sign onto the trail leading you to Garnet Peak along the Pacific Crest Trail.  PCT blue shield markers denote the Pacific Crest Trail.   Head northeast on the trail and you are on your way to the beautiful surrounding views of the desert before you and the rocky green landscaped mountain scenery all about you.  


The trail along the PCT will meander north heading for the Garnet Peak junction of the PCT.  Once you get to this point you will see a Garnet Peak Trail sign at mile mark approx. 1.85 miles, turn right and head east to Garnet Peak.      You will start to see the Peak as you again angle north, don’t be intimidated by the Peak, it’s more intimidating looking than it is.   You will come to a Garnet Peak sign, go right and head up the steep rocky trail to the Peak. you are now less than .50 mile from the boulder covered peak.  


The last trek of this hike, you do some bouldering to the top.  Take your time, before you know it you will have summited the beautiful peak of Garnet.   Although the Peak is small, there are plenty of places to sit, rehydrate, eat and take in the vast beauty that unfolds before you; the desert floor below, the green covered mountains all around and the trail you left behind all enrich this beautiful visual experience.  I love the Peaks!  

The journey back is the same route and the 2.35 miles back are easy ones.  I feel an added bonus to this hike is that the trail back, although of course the same trail, offers yet another variance to seeing the same you saw on the ascent yet a lot of what you did not see, again making this a totally fulfilling, challenging accomplishment of hiking Garnet Peak.

and the Flag at the Peak!


This is a must-do for any serious or not so serious hiker in San Diego County.  You have a choice of 3 routes to get to Garnet Peak, each for every level of hiker.  Also, the views at the Peak, as well as along the trail are breathtaking and I’d seriously rank as top5 views of any hike in San Diego County.

Have fun, be safe and as  always; Hike with a partner, respect your limits, respect your partners limits, bring more water than you need and be mindful where you step (snakes and rocks are plentiful on this hike) , one step at a time………..


After the Hike go to Alpine Beer Company for a well-deserved meal, drink and or both.


Hike it! @ Mt. Gower Open Space Preserve, Ramona, California…..November 2012

Trailhead start

Mt. Gower located 6 miles southeast of Ramona is a must hike if you consider yourself an avid hiker in San Diego County.  Even if you are not an avid hiker this hike is a great way to spend an afternoon out in nature.  Located in the 1574-acre Mt Gower Open Space Preserve, Mt Gower rises in the north high above the San Diego Country Estates. Mt Gower is the highest point in the preserve, climbing to 3,103 feet above sea level. With numerous routes and a variety of climbs to the summit, Mt Gower has outstanding views of nearly all of San Diego County’s high-points and beyond.

This is the second attempt at Mt. Gower as the first time was in September and way to hot, 100 degrees at 11am, to consider such a hike.  This time around the temperature was perfect as at hike’s start it was 60 degrees and even at hike end the temperature only climbed to 70 degrees.  The lower temp absolutely makes for a much more comfortable hike, although lots of water is highly recommended and I would highly suggest doling this hike in late fall to early spring.

As you begin the hike you get a great view of the summit of Mt. Gower and even much of the trail as it winds, dips and climbs all within site.

Heading into Scwartz Canyon

It then crosses the creek and winds up to the water tower and heads east along the ridge.  The ridge has a couple of undulations of about 100 to 400 feet in elevation. After this, the trail crosses the brush area and up another rise to a meadow.  To this point you will have hiked through various terrain changes consisting of low lying chaparral, numerous tree types, rocky vastness as well as narrow dense brush lined paths.  This time of year (November) the colors of the trees are fall in fall bloom with orange and red hues abounding!

Then hikers cross the meadow and climb up another rise to the mantle below the peak.  The mantle is a solid rock outcrop.  From here you are on your own as you look up to the peak of Mt. Gower.    On this day as we looked up at the peak we noticed two hikers descending.  We kept a keen eye so that we could retrace their route and as they came upon us we asked about the climb.  They were quick to say that although you pretty much are in a “mountain climbing mode”, the scramble up the rocky slope is an easy one so long as you watch out for the outcroppings of rock and or dirt to guide your steps and way.

Scramble to the Summit of Mt. Gower

Although not long in distance, it does offer a quite riggourous challenge to your ascent to the summit and completion of part I to this hike, part 2 being the trip back.  The scramble up is well worth the climb as once you get to the summit you are rewarded with amazing views at every degree you look.  360 Video of the Summit!    Although this day was cloudy you could still see the faint outlines of downtown San Diego as well as all the prominent peaks in the county.  I’ve talked to other’s who have made this trek to the top and they have said that many days you can see Mt Baldy in the distant northeast as well as far as the eye can see due east and out to the dessert floor.  Regarding distance of this hike, to the summit, the GPS reading on my iPhone pedometer app said 3.98 miles.


Stonehenge Look Alike!

After spending enough time for lunch and taking in the views we launched our descent back.  I always feel that the descent offers as many challenges if not more than the ascent on most hikes and this was surely evident here as scaling the rocky slope down to the solid rock mantle outcrop must be done slowly as footing, which I found out the hard way can be precarious in spots.  Once down to the solid rock shelf, take in again the unusual rock formations and views of distant mountains and vistas.  This area is quite unique and one can see imitations of stonehenge as well as with the keen eye openings to old mines and caves.


By tracing your steps back you will soon find the trail that took you to this point.  Again, once you are on the trail it is easy to follow, well carved and provides reassurance of the way back.   At this point your legs will remind you that you have put in a solid days work and accomplished a long difficult hike!


The Mt. Gower hike ranks right up there with Mt. Woodson, The Big Laguna Trail and the North and South Fortuna’s in Mission Trails Regional Park as one of the most physically challenging hikes in the county while providing amazing scenery, diverse geography, varied vegetation and a huge sense of accomplishment at hike’s end!

More Photos on Trail Shots!

Distance:  8 miles

Date and Time:  Saturday December 1, 2012  8:40AM to 1:40PM

Hikeability:  Strenuous to Difficult (in spots)

Water & Food: 3/4 gallon water, 1/2 bottle gatorade, lunch, oranges and snack bars


The Potato Chip Rock Hike! Mt. Woodson, Poway, CA

One of the most scenic and geographically diverse hikes in San Diego County is Mt. Woodson, near Lake Poway.  It is also one of the longer and more strenuous hikes to do and requires a half-day. On this early morning Monday start a few other hikers were on the trail but nothing in comparison to what the weekends bring in regards to the number of folks who hike Woodson.  The early morning start also provided a cool temperature of roughly 65 digress which was perfect for taking on this challenging hike. The trailhead we started at is on the Lake Poway west end in the recreation area parking lot.  There is a rest room near the trailhead to help you landmark the start.  The trail starts out taking a slight dip and then climbs with the scenic backdrop of Lake Poway on your left and the summit of Mt. Woodson straight ahead.

The trail then begins a steady and blood pumping incline ascent.   The scenery is a mix of brush and boulders with sloping hillsides on either side.   The trail itself consists of compacted earth and sand and is very easy on the knees and feet.   Markers along the way alert you of your destination as well as distance hiked and remaining to get to the summit.  As we hiked on, the gray of the morning gave way to mixed blue skies scattered with wispy clouds. At this point in the hike, at about the 1.5 mile mark, the trail steepens into a series of switchbacks; I’m reminded of the Cowles Mountain trail for a good visual example.  Im also reminded at this point in the hike why I like Mt. Woodson besides the natural beauty; it’s trail diversity! The last 1/3 of this hike the trail gets much rockier and the surrounding scenery turns to massive boulders amidst the plant life and brush.

The views are amazing as the open land, hills, and winding roads dotted with houses and ranches provide a stunning overhead panoramic, much like you might get from being in an airplane.

This is the second time I have done this hike and the difference between the two astounds me. Im in much better hiking shape, equating to “less sucking it up” which leads to more moments to enjoy the nature, scenery and rewards of this trail. As you get to know the personalities of each hike you can better absorb the nuances of the trail and expectations along the way. However, even the same trail can offer up something new, and a first time experience, the second time traveled. This happened on this hike as we took the viewpoint cutoff to get in a little more challenge and a different view as well as some “rock climbing.

As in life, its always a good idea to change it up, take on a new route and see the same things in a different way. This is especially a good idea if you find yourself not being challenged or getting comfortable with the status quo.  Having said that, for the most part that is why I like to hike anyways, if offers me a OLYMPUS DIGITAL CAMERAplace of serenity, peace and of being mindful, or in the moment which keeps me present. Hiking also provides me an “escape” from the stresses of the day and to get a new outlook on a familiar or ongoing situation, problem, or event that needs to be considered differently.

As we approach the summit of Woodson its peak is shrouded in a wispy overhang of clouds/fog that offers a magnificent view to our destination and goal! Potato chip rock appears on our left, which marks the 3.6-mile part of our hike. However, we do not consider our goal of being at the summit’s peak until we go an additional .2 mi up the road and to the right where a pine tree grove appears. Again, yet another scenic diversity this hike offers and my favorite part of the trail, a view through the pines to the landscape far below.

After spending a few moments here, we headed up the trail past Potato Chip Rock to our “break” station to sit, rest, snack and take in the views from the summit peak.  This high above view included looking over a vast sea of white clouds that stretched out as far as the eye could see.

At this point my son and I suggested we get up and move on or we may just sit here the rest of the day, a very rewarding choice but we do need to get to the “Chip.”

Although strenuous and demanding, the Mt. Woodson trail is a must on the upper tier hikes in San Diego County to add to your “Need to accomplish” list.  A must to do after this hike and a way of rewarding your accomplishment is a visit to a fantastic smoothie shop at the corner of Twin Peaks and Espola Rd.  

Great fresh homemade smoothies!

    Distance: 7.5 miles out and back

Hike Date and Time: Monday July 2, 2012  7:30am-11:30am

Hike-ability:  Strenuous

Water: 50 oz plus 1 liter of Gatorade 

Temperature: 60’s 

Directions to trailhead:  Exit I-15 go east on Ted Williams Pkwy to Twin Peaks road turn right to Espola Road turn left to Lake Poway Road turn right. You will pass water district on your right as you drive up hill. On weekends you have to stop at gate to pay $5.00 fee. Weekdays you do not. Drive to the right into parking area to far end, you will see restroom house on your left, park here. Trailhead is behind the restroom house.  Have fun!


Palomar Observatory Trail: A Hike to the Stars!

If you are looking for a hike that offer’s you three amazing varied experiences in one, then the Palomar Observatory Trail is the hike for you!

This trifecta trail offers a great aerobic workout, beautiful scenery, and at trails end, one of the truly magnificent scientific wonders in the country, the Palomar Observatory, which houses one of the largest telescopes in the world.

Although “only” 4 miles in length, this out and back trail is a good aerobic jaunt with an elevation gain of 900 feet up Palomar Mountain in the backcountry of San Diego County, east of Interstate 15.  The drive in itself to this hike is an adventure offering landscape that passes through vast open fields bordered by orange groves, hills dotted with avocado orchards and the nearby Palomar Mountain Range which is a high peninsular mountain range in northern San Diego County of Southern California.

There are numerous hikes in the Palomar Mountain area, but the trailhead to the Observatory Trail is in the observatory campground, which is 3 miles from the intersection of S6 & S7.  The entrance to the campground is on the right hand side of the road.  Drive to the back of the campground, where you will see a brown fence and park bulletin board, which marks the trailhead start.  The trail is very straightforward, pardon the pun, and leads you all of the way to the Palomar Observatory gate.

One of the differences about hiking in the backcountry versus the coast or coastal mountains, is there is a good chance that you will see a mountain lion or rattlesnake along the way.  Part of me very much wanted to experience seeing either one, the other part of me was VERY glad I didn’t.   Backcountry hiking also offered me a different experience as far as terrain as well.  Most of my previous hikes have been in a “open” environment on trails that are rocky, cree or gravel covered surrounded by rock, boulders, coastal and dessert type vegetation.

The Palomar Observatory trail is dirt and pine needle covered and moves through a wooded forest like terrain, which at times takes on a feel of “mystery.”  But the smell of pine and the various sounds emanating from the stillness of the forest offers a very tranquil, peaceful hike.  The vegetation along this trail reminded me of what much of my home state of Michigan is like as you go off into the wilderness.  The presence of gnats buzzing about, while at times annoying, does not take away from the pleasurable experience this hike offers.

As you approach the trails end the alabaster white dome of the observatory starts to appear on your right signaling that you are near.  One of the fun things of hiking for me is to see and chart your progress as far as your timing and physical fitness.

Although this hike offers it’s own set of challenges such as the elevation, this is a fairly easy hike.  I covered the 2 miles from trailhead start to the observatory gate in 46 minutes, the quickest I have done 2 miles, fast but not at the expense of enjoying the hike, afterall the peace and mindfulness of the hike are a great part of the journey for me as well.

Focus on the journey, not the destination. Joy is found not in finishing an activity but in doing it. -Greg Anderson


The third reward to this hike is the observatory itself.  From the trail end you can walk over to the pristine white dome and go inside and see what astronomical wonders this building offers.   After that take a lunch break, tour the museum, then head back down the trail and complete your adventure.  A final stop before heading down the mountain on your drive home would be the general store and Mom’s Café which is on the right hand side of S6 at the intersection of S6 &S7

This is a good hike to change it up that not only offers the physical fitness and mental health benefit of a hike but you get the bonus benefit of learning about the Stars!  Have a great time!


Distance:  4 miles

Hike Date and Time:  Thursday June 7, 2012  11:30AM – 2:00PM

Hike-ability:  Easy moderate, the elevation gain and attitude make a difference on your breathing if you are not used to it, even if you are it still does!

Food and Water:  Sandwiches for lunch, an orange and about 50 oz of water.

Tempature:  80’s

Trailhead: From Interstate 15, near Fallbrook, drive twenty-one miles east on Highway 76. Turn north on Road S6 (South Grade Road), continue 6.5 miles to the junction with Road S7, then continue three miles north along Road S6 to the Observatory Campground (located across from the Forest Service Sign on the right side of the road). The parking area for the trailhead and the amphitheatre is located toward the back of the campground “loop” and is signed. A Forest Service Adventure Pass is required to park at the trailhead.