Master’s Level Life Coach (MA Psychology) | Nature-based healing for mental wellness, addiction recovery in parks, on trails, or via telehealth.
Author: Mark
My name is Mark Lees and I was born in Detroit, Michigan and moved to San Diego in 1976. I now live in Oceanside, California. I have a son age 26 who is my hiking parter, and thankfully got me started into hiking four years ago. I have a Masters degree in psychology with an emphasis in Marriage and Family Therapy from Chapman University, as well as a certification from the California Association of Addiction and Recovery Resources as an Addiction Recovery Specialist. For fun and self-care I like to Hike, Starbucks to both energize and relax and see as many baseball games as I can each season. The spirit of this website is the same passion that led me to create HikerTherapy.... "Hiking for the Mind, Body and Soul..."
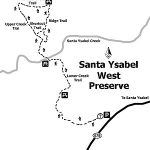
Distance: 7.4 miles without the loops, 10 miles with the loops ; West Loop is 1.3 Miles, & Kanaka Loop is 2.3 miles Elevation Gain: 1200 feet. Time to complete: 4 hours
Directions To The Preserve: East – Farmer Staging: Take Highway 78/79 into Julian, to Main Street. Going north, Main Street turns into Farmer Road. Take Farmer Road to Wynola Road and turn right, then a quick left back on to Farmer Road. Pass the Volcan Mountain Wilderness Preserve sign on your right. Santa Ysabel Preserve will be on the left side, approximately one mile from the Volcan sign. Parking is available in the staging area. West: Take Highway 78 to Santa Ysabel. Staging Area is one mile west of Santa Ysabel on Highway 78 at call box #495 or across the street from 29313 Hwy 78.
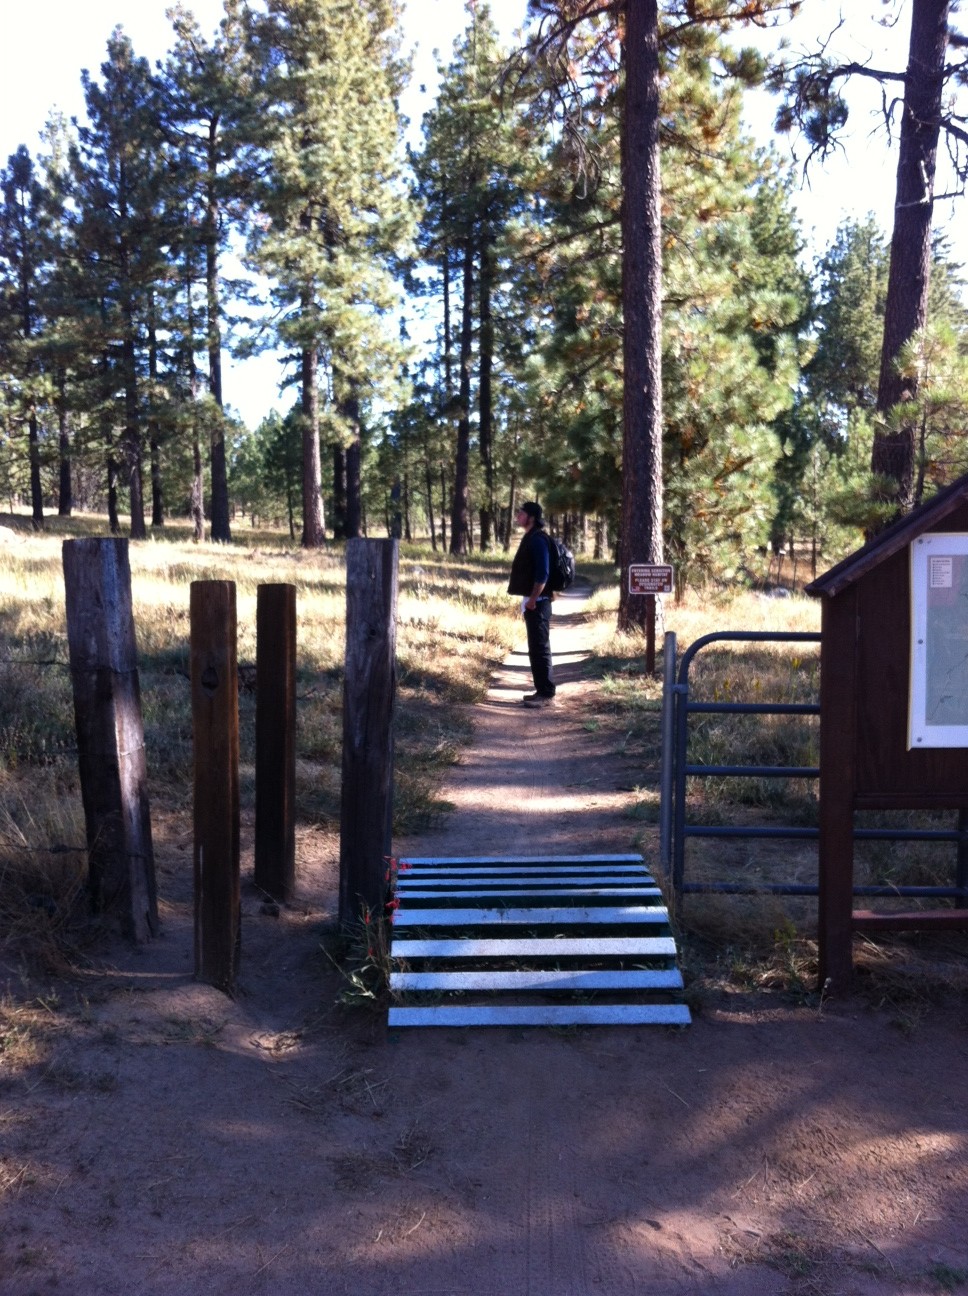
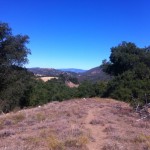
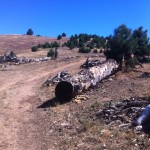
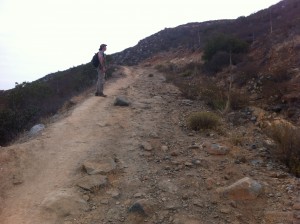
The Coast to Crest Trail and the trail we took this day, the Kanaka Loop Trail, which is the East approach off of Farmers Rd. One of the benefits of hiking Santa Ysabel Preserve is just getting out there, driving the one lane country roads through Ramona past the hill, into Julian you definitely get the feel of being in the back country surrounded by vast open beauty, pine and oak trees and of course a mountainous terrain.
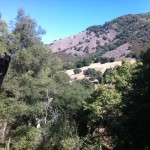
The Santa Ysabel Preserve really reflects the area, both in vastness and vegetation as well as offering views at many spots along the trail of other hikes in the county, including, Mt. Woodson and Iron Mountain, Mt. Gower, and far off in the distance Palomar Mountain.
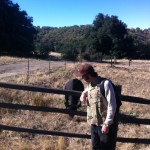
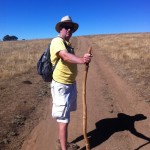
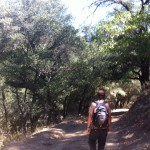
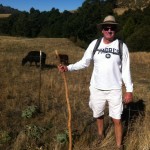
The first thing that strikes you about the Kanaka Loop trail-head start, is that you are greeted by the local 4-legged creatures. In fact as you walk through the gate that starts you onto the trail, you will more than likely be greeted by a bovine friend chopping away at the grasses and vegetation along the trail. The start of this trail is pretty flat and open but soon you are heading uphill through a covered forested area with a creek on your left.
Palomar Mountain and observatory in distance
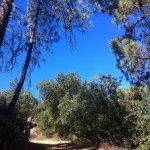
The trail continues to climb to a point where looking to the north far off in the distance is Palomar Mountain and if clear the white dome of the observatory. As you continue to the left a wide-open expanse of a meadow/field is upon you, at this point the trail makes a huge loop and is marked guiding you to veer off to the right beginning the loop section of the hike.
From here you can take a small detour up an easily climbable grade to get good views of Mt. Woodson and Mt Gower off in the distance.
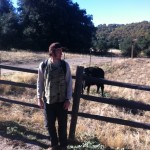
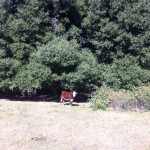
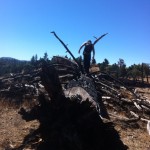
As you wind back down you come upon a small herd of resting cows that gather at a watering hole. Continuing on you will come across good-sized downed burnt charred trees, which are left over remnants of the Cedar Creek fire of 2005. From here you will climb a steep grade through pines and other vegetation, the trail will wind down and then will lead you to an open area that provides amazing views of the surrounding hills and mountains.
Charred trees from 2005 Cedar Fire
and done
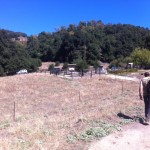
You can see Volcan Mountain, which trail-head start is just down farmers road from Santa Ysabel Reserve. Ascending from this point you will so join up with the start point of the loop and the ascent down and back to where you started.
On this day that we hiked the sky was blue, no clouds and the temp was high 60’s when we started and near 80 when we ended in early afternoon. Bring at least 2 quarts of water, snacks a lunch and as always good hiking shoes/boots. …..A gorgeous day for hiking and a gorgeous hike to do. Have fun…..Next… the hike up the road from Santa Ysabel…Volcan Mountain.. See you on the summit…..Hike on!
Here’s a secret tip for the best pie shop in Julian
Time to Hike: 12-3pm Distance: 3.5 miles out an back Hikeability: moderate to difficult in spots
Snacks/Water: Orange, snack bar, 2L water and bottle of Gatorade at the end Temp: 70’s
Monserate Trailhead Start HIker Therapy
I’m always so impressed with the amount of quality hiking in our county and no matter what part of the county you live; you can find a hike that will fit the need.I recently moved up to Oceanside from Encinitas and have been looking for hikes up here in the northern section of the county.
I had been used to heading south to such trails as; Cowles Mtn. and the Mission Trails system, Iron Mt. and Mt Woodson in Poway, and even out to the eastern part of the county and the Laguna Mt.’s and the Big Laguna Loop trail.
However, many of the hikes up in the North part of the county were unfamiliar to me.A trail I just discovered through 100peaks.com was Monserate Mountain Loop in Bonsall/Fallbrook area of the county.The Fallbrook Land Conservancy has done an outstanding job of providing a hiking trail in the San Diego North County.
This out and back hike covers about 3.5 miles and has some serious climbing in spots.. This hike has a trailhead to summit net elevation gain of 1,183′ in 1.6 miles so it gets steep quick and exceeds that of Cowles and Iron Mountain as far as steepness.The trail is only 1.75 miles to the 1567 ft. summit but a few side side trips such as a the Red Diamond trail off the main trail, add to the total distance.
Though short and sweet Id consider this hike more short and steep as right from the trail-head start you begin a rather an uphill climb for the first .75 miles.Even after that as the trail twists and turns, flattens and dips, you are on a continual inclined ascent. The rugged composition of this rocky trail really adds to the feel of being on a mountainous hike as well as offering to the physical demands of the hike.
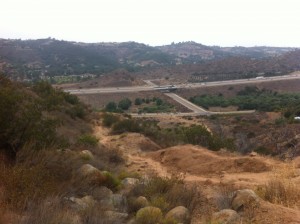
Freeway 15 in distance
going up at .75 miles
Halfway
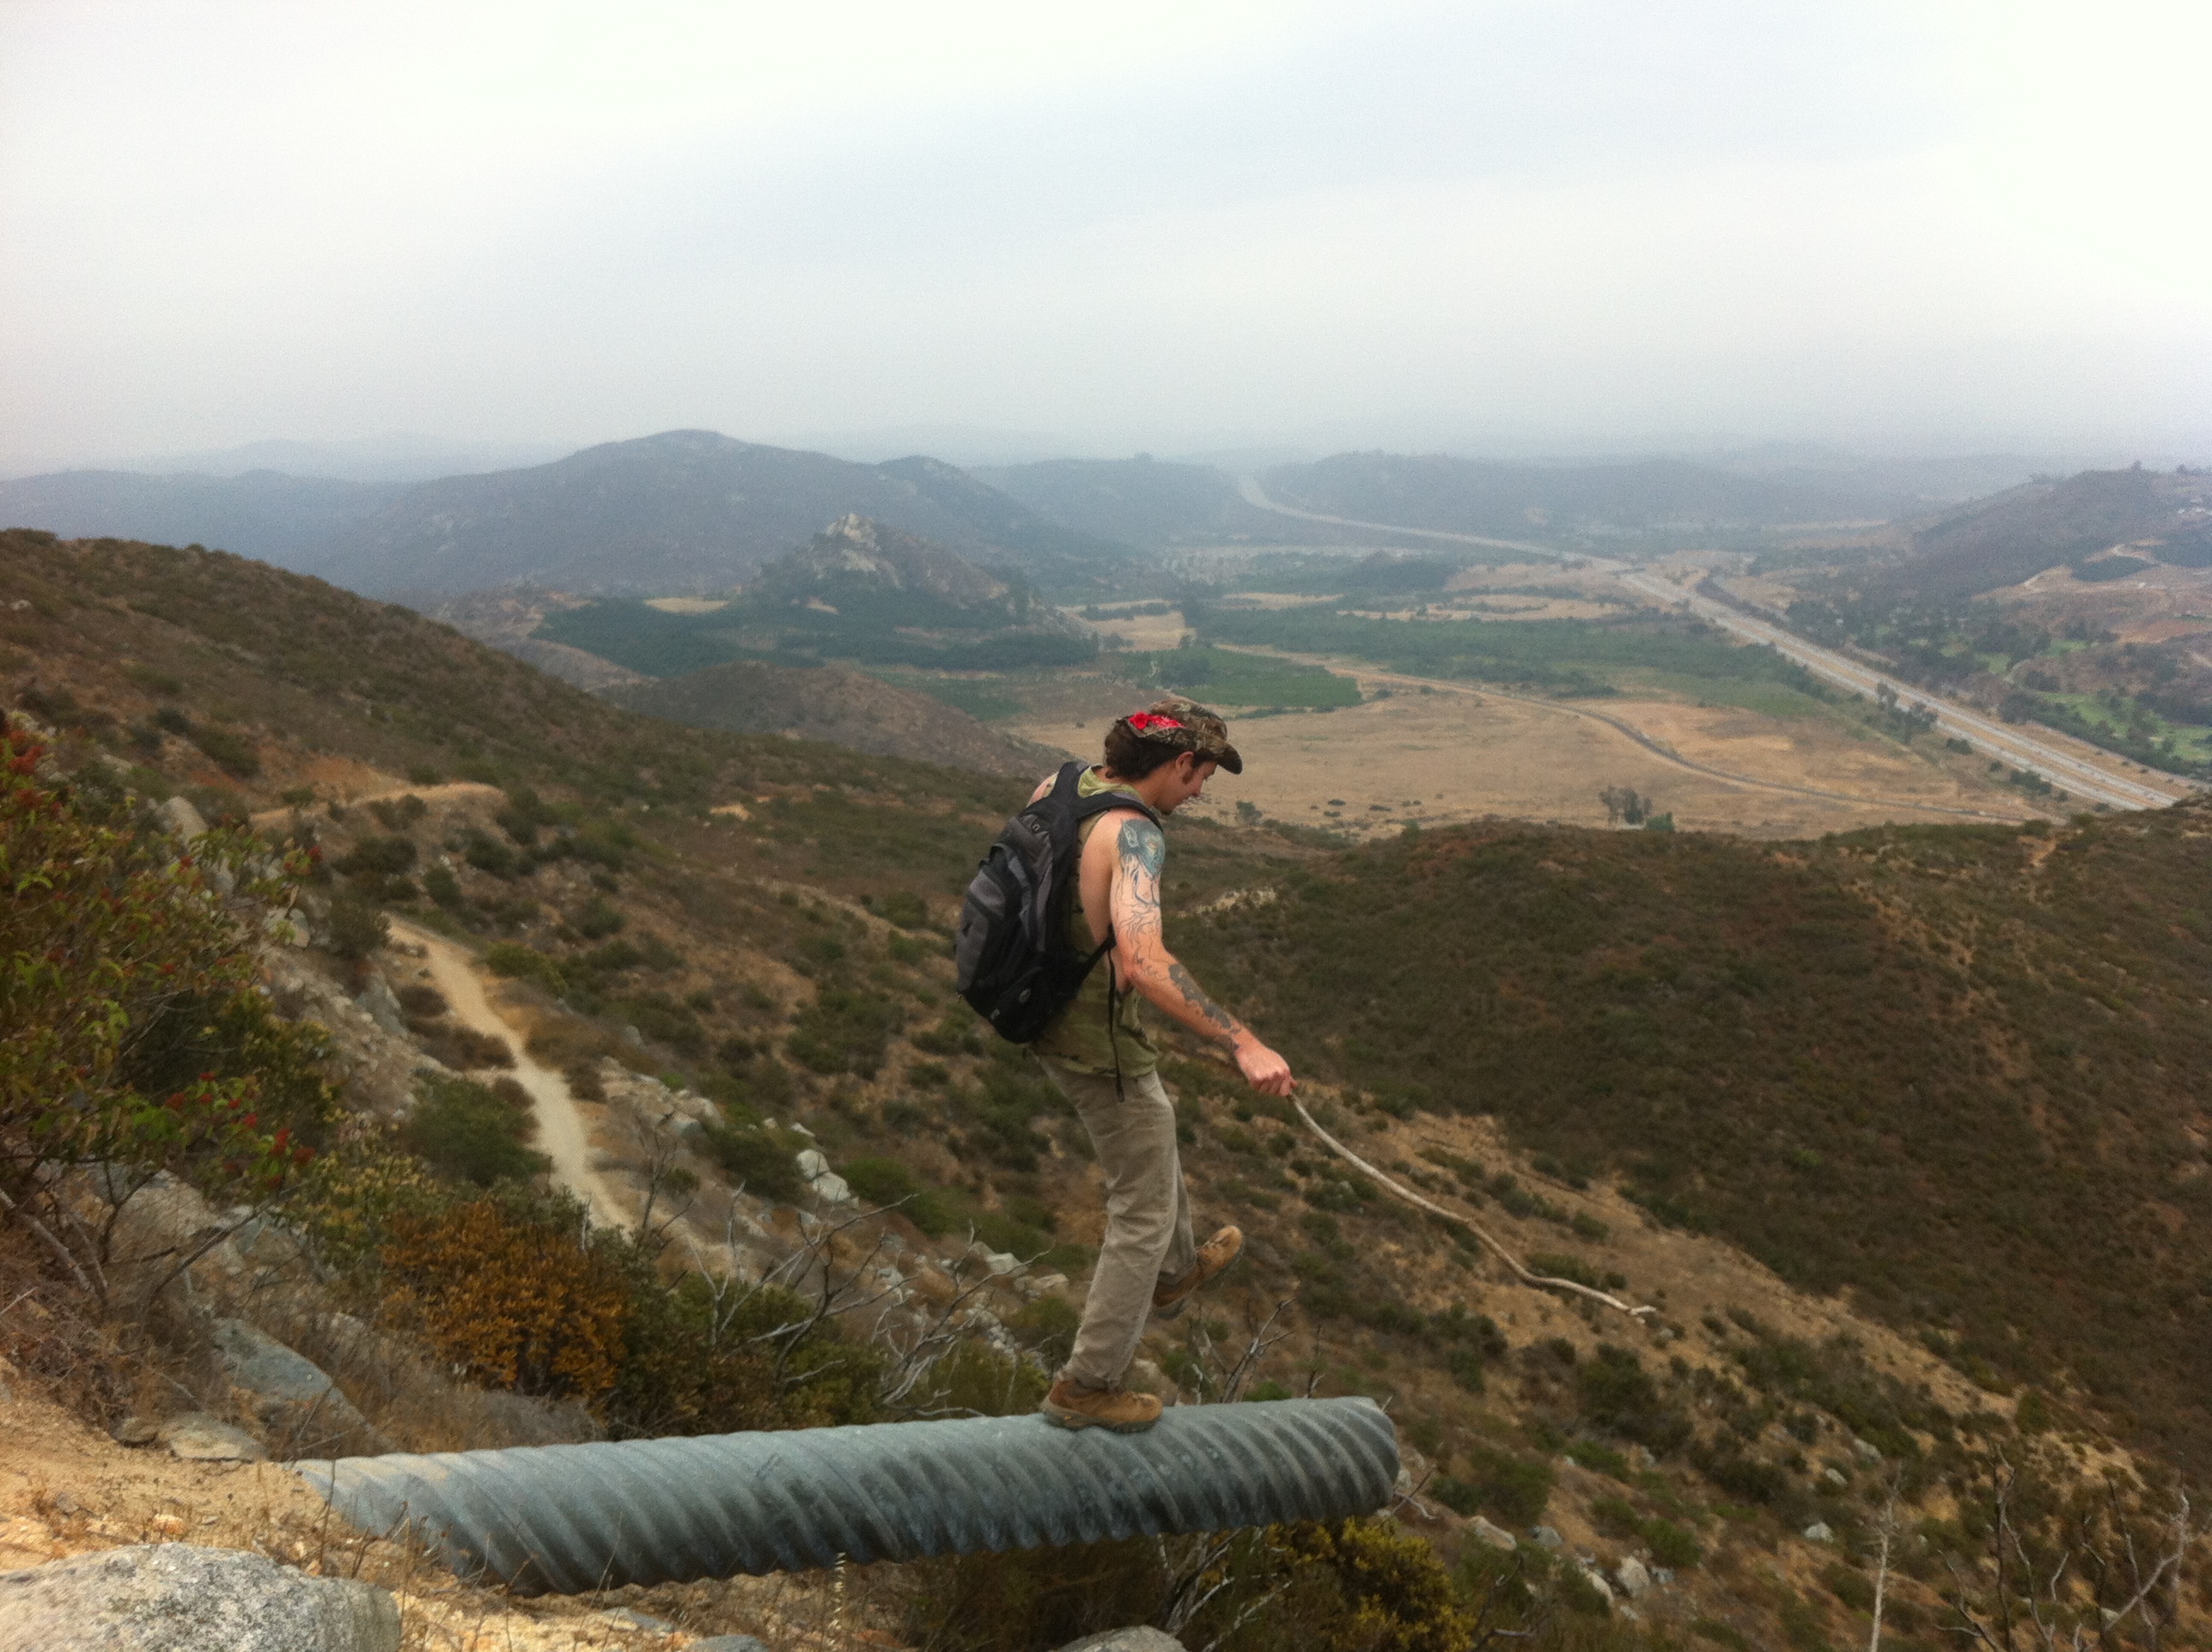
Sam taking in view
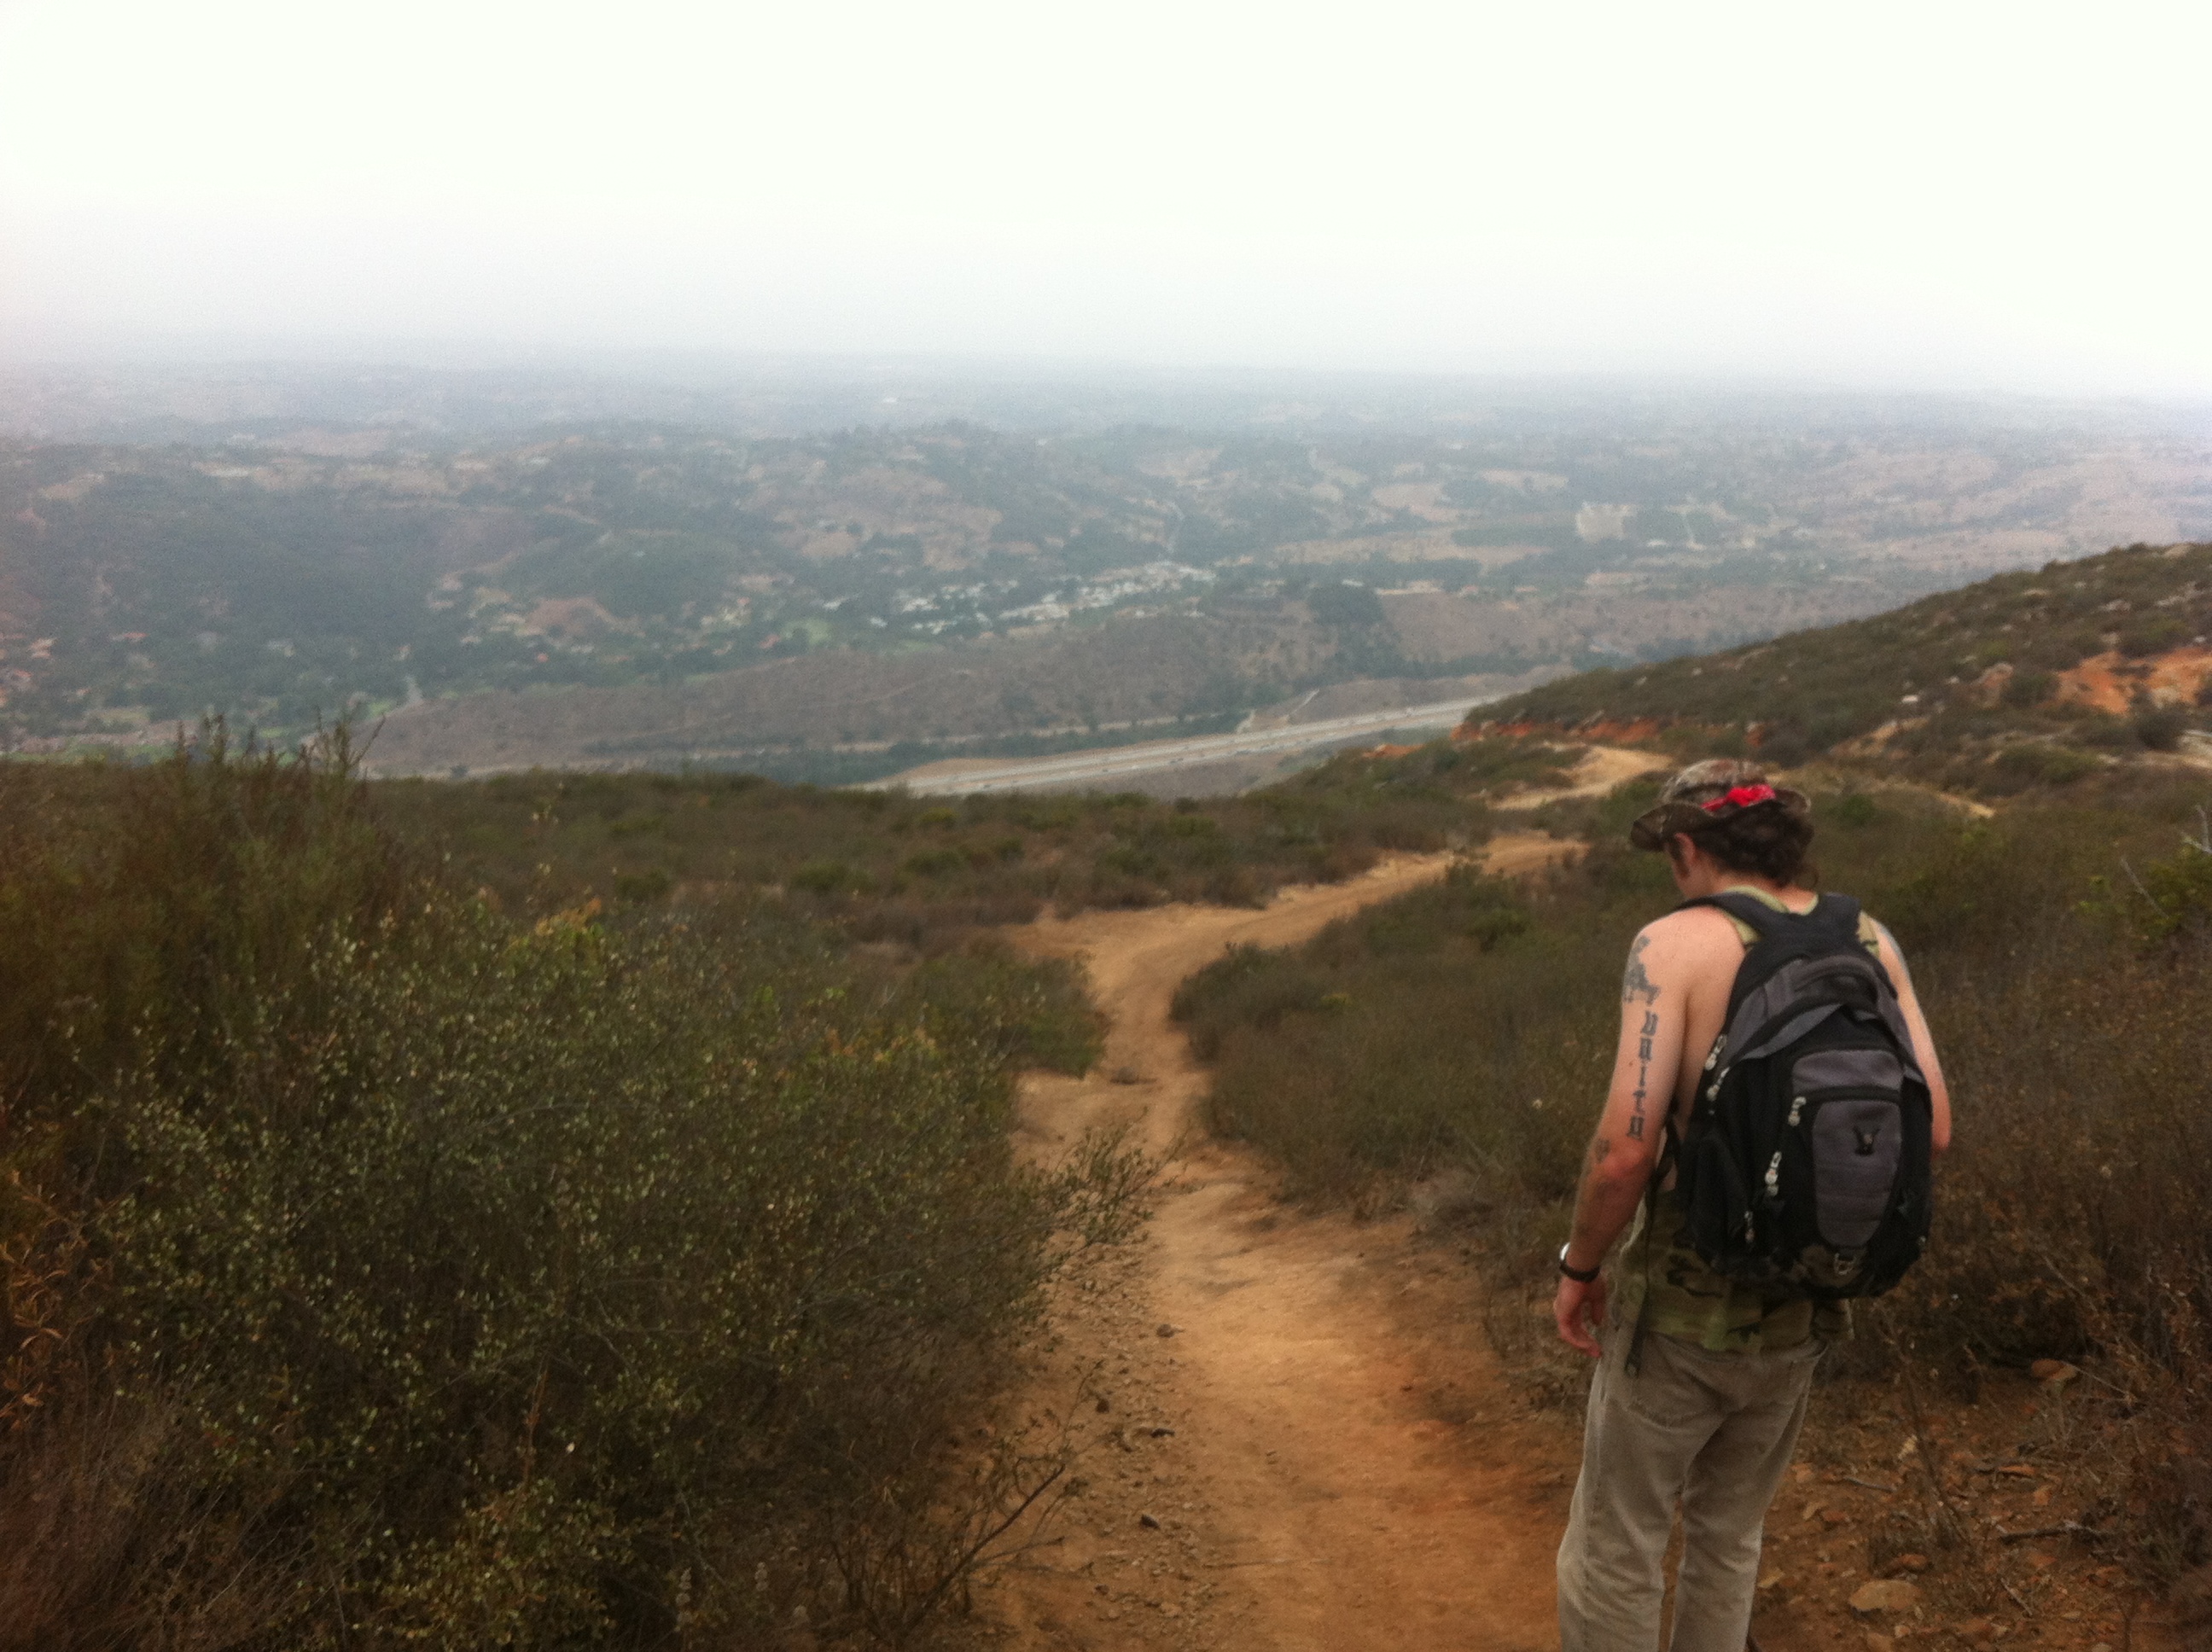
Even though the I-15 freeway is in sight for much of the first .75 miles, the noise from the cars starts to dissipate as you climb.In fact, as you turn left at the .75 mile marker and head north east the noise pretty much is nonexistent and the views become even more eye catching, beautiful and absorbing.
On this day the haze and marine layer kept us from seeing the Ocean and some distant mountain ranges, but even with that you still could het a good sense of the vast openness, mountains and green avocado orchards this part of our county geographically consists of.As you continue the ascent the trail twists and you will come to an arrow made of small rocks, trusts its direction and you will soon be at the summit.
Walk this way
Summit of Monserate,
Sam at Peak
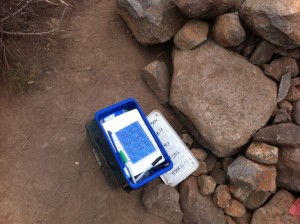
Journal Box
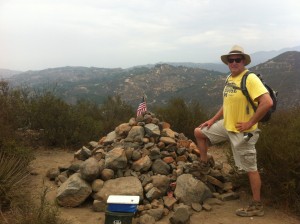
I especially like the summit of Monserate Mountain, not only because of the wonderful views it provides, but this peak also gives you the chance to journal your thoughts or simply sign that you made it to the top!I’d say about 30% of the hikes I do have a journal box atop the summit; a one that immediately comes to mind is Iron Mountain in Poway.Great idea that started this concept and one my son and I took advantage as we always do.
Stepping into nature
After a lunch and 30 minute break we started our descent back.Steep up means steep down, and I usually find this the harder part of the hike for me.However, after a side trip on the short red Diamond trail we were soon heading back down to the trailhead start.The 1.7 plus miles back goes pretty quick.
It had been a few weeks since I had hiked and once again I was in need to be reminded what getting out into nature does for me.Anxieties slip away, purpose and accomplishment are always achieved not too mention the physical aspects and challenges that a hike, and certainly this one in particular, present.
The reward of being up to the challenge both mentally and physically out in a beautiful natural setting surrounded by the sights and sounds that touch all the senses are why the sport of hiking is such a therapeutic gift.Give yourself this same gift and hike Monserate Mountain.
Great Views
Directions to hike : Exit from Interstate 15 at 76/ Pala Road and drive west to Old Highway 395 and turn right (north). Drive 2.6 miles then turn right on Stewart Canyon Road and go east under the Interstate to Pankey Road. Turn right and park on the right. The start of the trail is across the street and is marked by a sign
An invigorating and challenging hike for those in the North County is the Lake Calavera Preserve, which is located in the Tri-City area of Vista, Carlsbad and Oceanside. The trailhead start is located off of Skyhaven Lane near Lake Blvd. The trail system’s focal point is Calavera Mountain which although very accessible it presents more of a challenge than first appears.
The word “Calavera” means skull, which probably comes from the unusual shape of the area’s centerpiece, Mount Calavera. The 513-ft. Mount Calavera is not really a mountain at all but rather a 22 million-year-old volcanic plug.
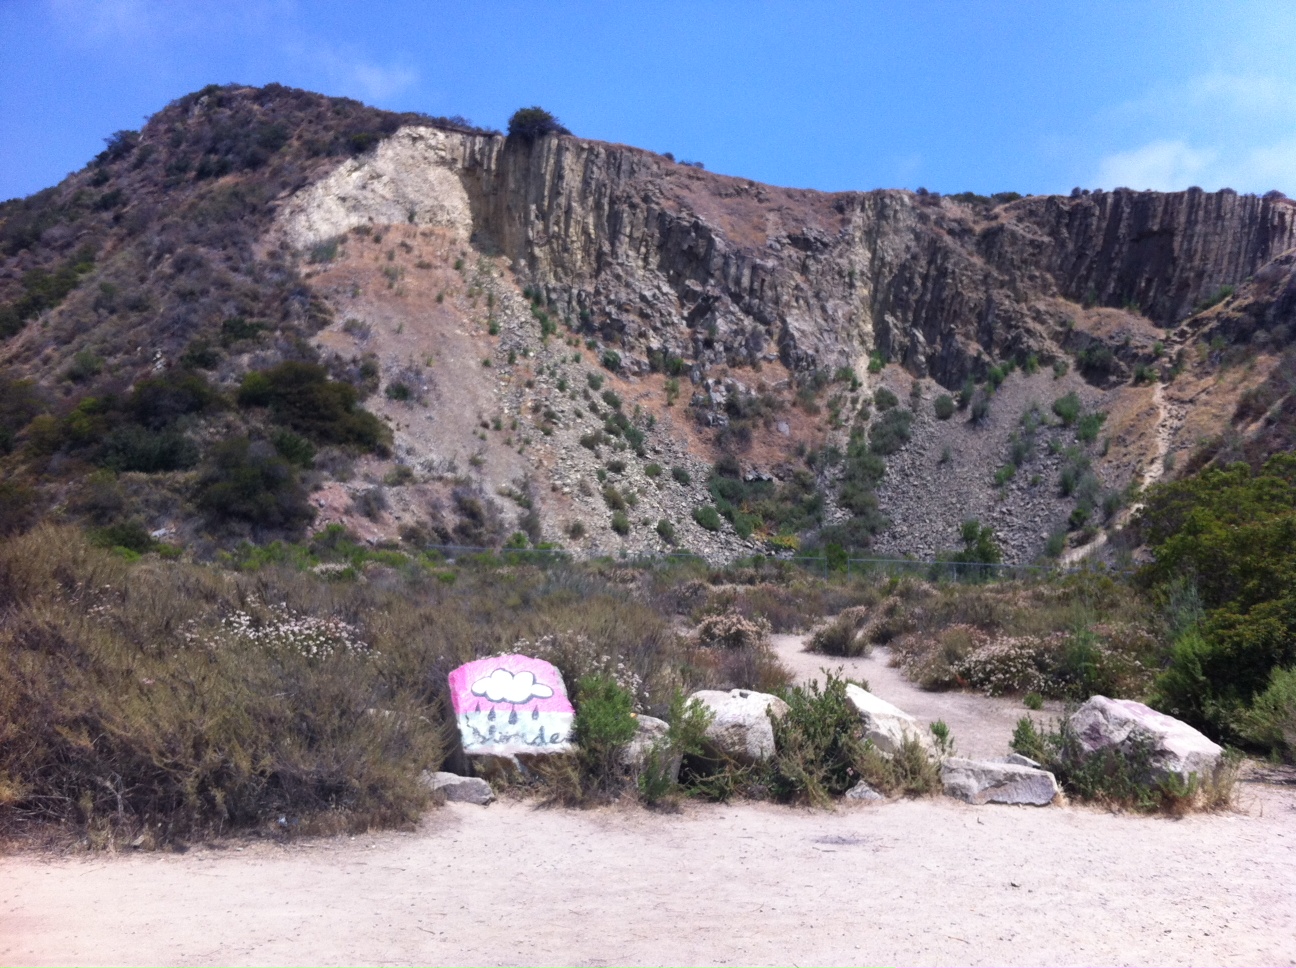
Mini Grand Canyon
A volcanic plug is a mass of volcanic rock that solidified in it’s vent and feeding system millions of years ago. When the volcano becomes extinct and starts to erode away, the “plug” is all that is left behind. Mount Calavera is one of only three volcanic plugs in Southern California. In the early 1900’s, the ancient plug was mined for gravel. The mining was accomplished by stripping away it’s west face and continued into the 1930’s. What is left is a rather remarkable blemish on the side of the mountain that somewhat resembles the Grand Canyon. As you approach this point on the trail, you will soon come to an artery of the main trail that will lead you up to the summit of Mount Calavera. The trail gets much more rocky and uneven, as always focus on the trail. Soon you will come upon the ridgeline I spoke of earlier. Enjoy the great view before you head off. Head towards the open field to your right, you can’t miss it, its huge and once you are in it you feel like you are strolling through a Midwestern, Iowa wheat field.
Great diversity on this hike
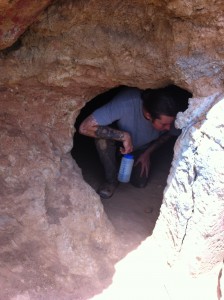
What struck me most about this hike is that there are so many ways to go, each offering a completely different experience. Although surrounded by a housing tract and the local high school you still experience a hike that offers open fields, rocky steep ascents, and a cave,
The beauty of this hike, you can’t get lost so long as you use Mount Calavera as a landmark you can pretty much venture anywhere in this 14 mile trail system and always find your way back to a main trail that will lead to the trailhead start.
Have Fun…Hike Safe!.
Trailhead Start: From state Route 78, exit at College Boulevard, heading south. Turn left onto Lake Boulevard, then right onto Sky Haven Lane. Sky Haven dead-ends at Azure Ladd Drive; park here on the preserve side of the road.
h 29. 2013 11:30AM – 2:30AM Temp: 80’s Hikeability: Strenuous
Best Hiking Months: November through May Water & Food: 1 gallon water per person, 1 bottle gatorade, lunch, oranges and snack bars
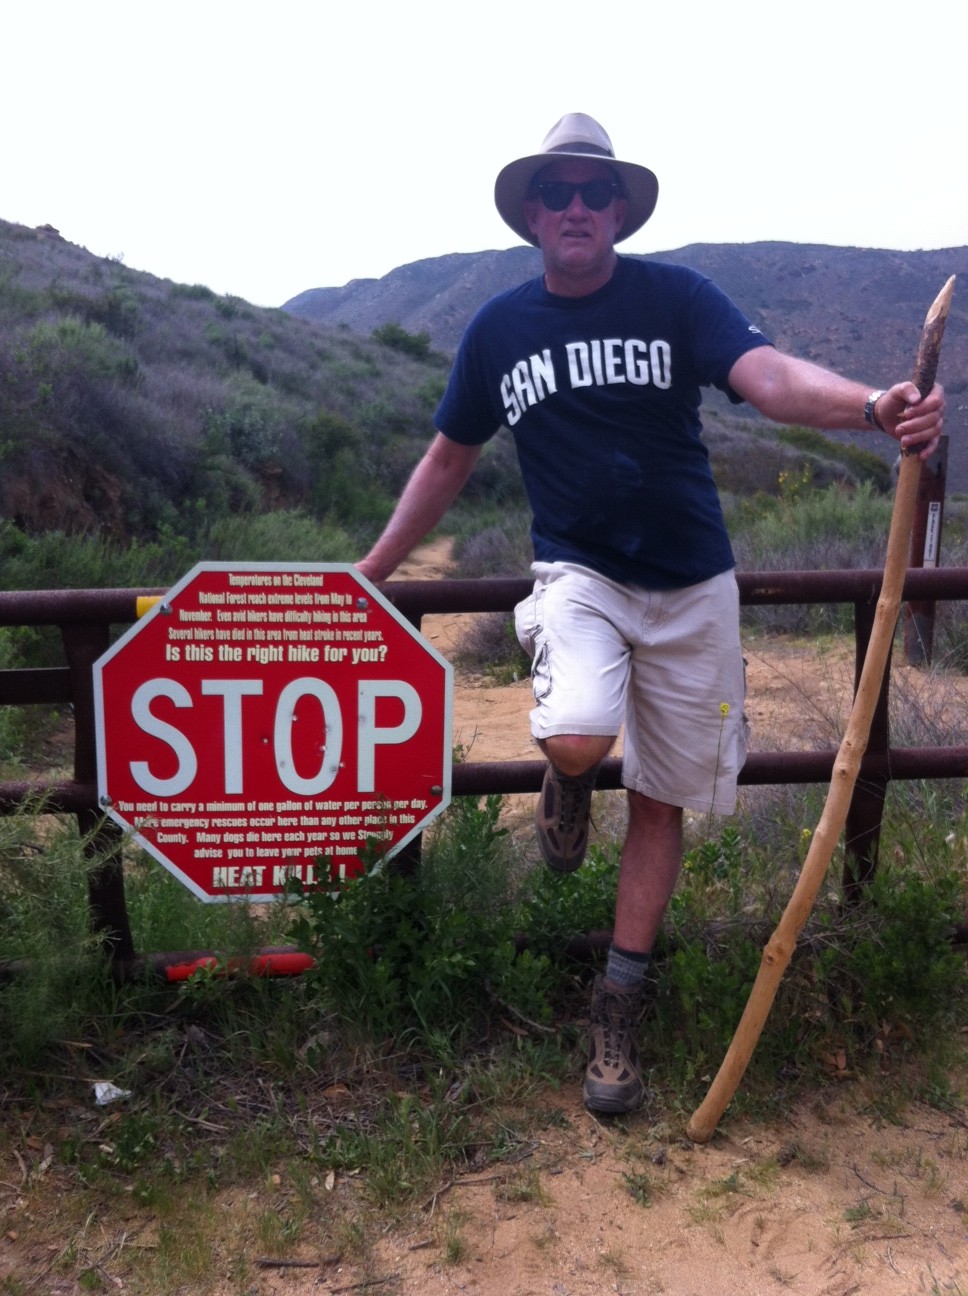
If you want to add some thrill and excitement to your hiking repertoire than the Cedar Creek Falls trail is the one for you.
Of all the trails I have hiked in our county I have yet to go on one that posts a sign at trailhead start that warns “HEAT KILLS! and IS THIS THE HIKE FOR YOU?
Cedar Creek Falls
Going Down!
Beautiful!
It is no wonder that besides Torrey Pines and Cowles Mountain Cedar Creek Falls has the highest amount of rescues in the San Diego County Sheriff jurisdiction.
Luckily I didn’t read this sign until I had completed the hike. All warnings aside, this may be one of the most scenic and beautiful trails I have hiked.
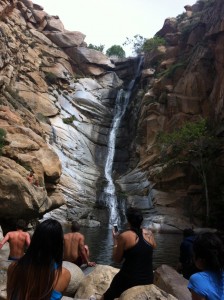
Not only does this trail offer great mountain views, diverse vegetation and dessert chaparral, but the undeniable reason anyone hike’s this trail is the 90 foot cascading waterfall at the midpoint of this out and back hike.
Even the drive to the trailhead start provides mile after mile of the natural raw beauty that the area surrounding Julian, CA is known for.
There are two approaches to Cedar Creek Falls and the hike detailed here is from the East approach. From Santa Ysabel(Dudley’s), take Highway 78 east towards Julian to Pine Hills Road, turn right (from this turn it is 20+ minutes to the trailhead). Turn right onto Eagle Peak Road.
The last 8 miles of Eagle Peak Road are dirt but this does not detract from what this hike offers and in my opinion adds to the remote beauty of the adventure. Once you come to the end of Eagle Peak Rd, you will dead end into a cul-de-sac and the trailhead start.
You can park alongside the road edge but be aware that on the weekends the road gets pretty full. After you park walk towards the cul-de-sac with the tree in the middle of the road and veer right to the trailhead start.
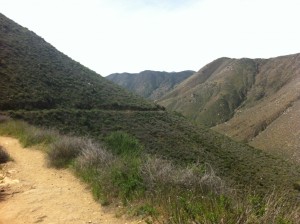
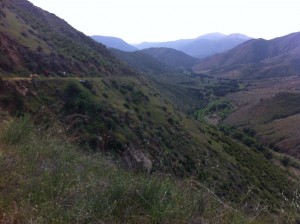
This trail is unique in many ways including the fact that unlike most hikes, the start to this hike immediately begins to descend for the next 2.5 miles it takes to get the waterfall.
You are essentially descending this trail to a valley surrounded by the local mountains of the Cleveland National Forest.
The trail is very hike-able and although it is strewn with rocks in places the vast majority of the trail is made up of soft earth and sand.
On the decent you have the mountainside to the left of the trail and the drop-off to valley floor below on your right.
The topography on this hike creates a sense of vastness and an open feel that adds to the majestic views that surround you.
Signs along the way will chart your progress and before you know it you will be at trail end as you approach the valley floor.
A signpost to the left will guide you to the waterfall. The vegetation changes here and becomes denser with California Scub Oak and low-lying brush.
Beware of Poison Oak which are those deep red leaves growing from the low lying plant, bush.
You will come to a few places where rockbeds indicate you are crossing a river and depending on the time of year and rain/snow fall the depth of the river at these crossings will vary.
When I did this hike at the end of March I had no problem stepping across the river on rocks that were dry and easy to maneuver.
The trail will lead you right up to the falls along with more and more hikers as you approach.
Enjoy a long break here with lunch as you take in the sounds and sights of the falls and the people watching of the cliff divers and others who join you at this oasis amidst the rocks, scub and the good size waterfall pool.
Once you are done enjoying the reason why you are doing this hike, it will be time to return and the ascent back.
Take your time if you must, drink a lot of water and enjoy the accomplishment of hiking Cedar Creek Falls!
Although this hike is highly touted as one of the most dangerous hikes in the County, so long as you are well prepared with lots of water, good hiking shoes, and plenty of common sense you will be rewarded with a great hiking experience!
DISTANCE: 5.5 mile LOOP TIME 3 HOURS INCLUDING STOP AT PEETS COFFEE HILLCREST SNACKS: ORANGE, SNACK BAR (SCONE AT PEETS)
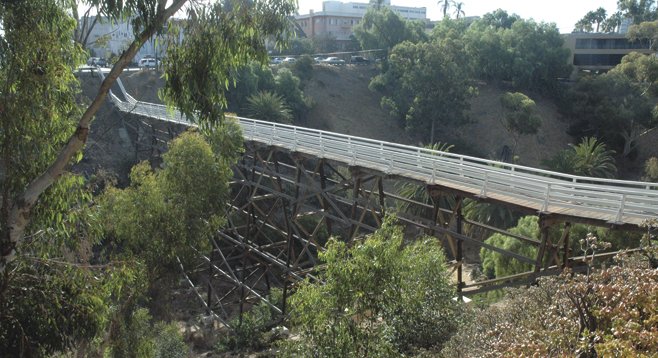
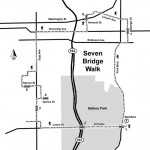
I have always thought that the only way to see a city is by walking or as I like to call it urban hiking. Urban hiking allows you to see the small details, hear the sounds and feel the energy that city life vibrates. Houses and buildings that you may previously zoomed past in your car, take on certain richness and come to life when hiked by. An urban hike that provides all this and more is the 7 Bridges of San Diego.
The “trail” starts at Bridge #1 on the east side of Park Blvd between Presidents way and Village place. An early start is highly recommended for prime parking, less traffic, and lower temperatures for this urban hike that is a blend of historic to current bridges and houses along former streetcar-access routes in San Diego.
After crossing the Park Blvd. Bridge #1, hike straight ahead to El Prado passing Balboa Park museums and the lily pond, continuing across Bridge #2, the 1914 Laurel St. bridge,
Laurel St bridge #2 Hiker Therapy
the first multiple-arched cantilever bridge built in California. If you are used to hiking the mountains and more natural trails of San Diego County and Southern California like me the beginning stages of this “hike” may fee strange to you. However, as you leave the crowds of people and tourists visiting this area behind, you will soon develop an appreciation of what Americas finest city has to offer as seen on this “trail”.
Along the way you will pass fun city restaurants that are tucked into the neighborhood, along with ornate architecture in the form of buildings, churches and houses.
First St. Bridge #3 Hiker Therapy
The first right turn on the trail is First Street, which will lead you to the First Street Bridge, bridge #3.After crossing this bridge continue on First Ave to Quince St., turn right on Quince St. hike for two blocks to the Quince St. bridge entrance, bridge #4. The wooden-trestle bridge was built in 1905 and really has that turn of the century very old school feel to it, but very fun none the less.
After crossing to Fourth Ave., retrace your steps to Second Ave. and turn right (north) for two blocks to Spruce Street, then turn left crossing First Street to the Spruce Street Bridge, bridge #5.
Quince St. Bridge #4 Hiker Therapy
This section of the hike takes you First St. through neighborhoods lined with houses each offering a unique flavor of their own and a collective peace and quiet amidst the hustle and bustle of city life.
The Spruce Street Suspension Bridge is not only historic, but it is a popular San Diego icon. Crossing the bridge is an experience onto its own as with each step the bridge will sway and slightly twist.
Spruce St.Bridge #5 Hiker Therapy
On this Sunday afternoon Hillcrest was very busy with locals and tourists each filling the local popular establishments such as Urban as well as Peets.
After taking in the people watching sites it was time to get back on the trail, quick left turn out the front door of Peets put me back onto University Ave heading east to our next left turn at Vermont Avenue. Cross University here heading north to Vermont St. Bridge, bridge # 6.
Vermont St. Bridge #6 Hiker Therapy
For me this modernly constructed bridge provided me with words of inspiration that I usually get with each hike I do, interestingly these words came in the form of a sign, literally, and yet another quality of uniqueness this urban hike provided me. After crossing the bridge turn right on Lincoln and cross University going east to Georgia Street.
Turn right at Georgia Street going south towards the final bridge on our hike and the 7th bridge on the 7 bridges of San Diego urban hike. After crossing this bridge you can turn right on any cross street to get you back up to Park Blvd. and then head south on park for the final mile of the hike and back to bridge 1 from which you started from.
Georgia St Bridge #7 Hiker Therapy
I absolutely suggest this urban hike as a great way to see the diverse and interesting neighborhoods of San Diego which are linked together with 7 bridges of historical significance each with their own unique beauty embedded in the nature of the city.
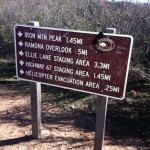
A hiking trail to consider in San Diego County is the Iron Mountain/Ellie Lane Trail in Poway, CA. The trail head is located on the east side of Highway 67 and Poway Road. There is a small gravel parking area with restrooms available.
Let’s Hike!
This trail offers a challenging hike amongst the diverse beauty of a mountain trail. The “typical” trail to the top of Iron Mountain is the most popular route to take, and offers great scenery, a strong workout, and a very doable hike with the reward at the summit of an amazing view of our County.
Iron Mountain
However, a hybrid hike that can add some diversion and spice from the main trail is the Ellie Lane Trail. To access this part of the hike, which is roughly 1.25 miles from the start of the Iron Mountain trail-head, you will come to large signboard directing you to the various trails that branch off of the main Iron Mountain trail.
Trail system sign board
The Ellie Lane Trail winds to the left of the sign board and steadily ascends from here leading you through a trail of low lying dessert chaparral. The duration of this hike is well marked with “Ellie Lane Trail” signs posts, which will guide your route. The beauty of hiking this part of the trail are the views which stretch out in front of you both near and distant.
Another bonus to branching off onto this trail is the much more rugged aspects offered. The Ellie Lane trail lives up to the definition of rugged as its, broken, rocky, and uneven surface adds to the surrounding beauty and the “roller coaster” terrain offers a workout that of a hike double in distance. However, this section of the trail system is very doable, and while a strenuous physical challenge, you will be absorbed by the peace and quiet that this hike offers. In fact on this particular afternoon, only 6 other hikers chose this part of what Iron Mountain has to offer.
Ascending the Ellie Lane Trail
After, making the initial ascent onto the Ellie Lane Trail and winding around the dips, climbs and twists of this trail you will come to a Eucalyptus grove which not only adds a distinct change in topography but signifies that you have descended to the home stretch segment to the trail and have a little less than a mile to Hwy 67.
Eucalyptus Grove
As you hear the road noise in the near distance and the sight of Iron Mountain off to the left start making your way south towards the initial trailhead start of Iron Mountain. There are no trail identifiers but you will see a sign marked for a horse trail and road which is the best path to take and one that will lead you to the Iron Mountain Trailhead start. At trails end I was surprised to read that my GPS indicated a total distance hiked of 4.2 miles. This hike has a much bigger hike feel to it due to the ruggedness of territory at certain areas along the way as well as the numerous ascents and descents the Ellie Lane Trail presents. Besides that route I have talked of here, you can also start the Ellie Lane Trail at the Ellie Lane Trail Staging area, which is on the east side of Highway 67 approximately 0.7 miles north of the Highway 67/Poway Road junction.
Iron Mountain is one of my favorite hikes in the county for numerous reasons, chief amomg them being the added options of trails you can create and blend together depending your “hiking mood” that day.
Distance: 4.2 miles
Date and Time: Monday January 6. 2013 10:30AM-1:10PM
Mt. Gower located 6 miles southeast of Ramona is a must hike if you consider yourself an avid hiker in San Diego County. Even if you are not an avid hiker this hike is a great way to spend an afternoon out in nature. Located in the 1574-acre Mt Gower Open Space Preserve, Mt Gower rises in the north high above the San Diego Country Estates. Mt Gower is the highest point in the preserve, climbing to 3,103 feet above sea level. With numerous routes and a variety of climbs to the summit, Mt Gower has outstanding views of nearly all of San Diego County’s high-points and beyond.
This is the second attempt at Mt. Gower as the first time was in September and way to hot, 100 degrees at 11am, to consider such a hike. This time around the temperature was perfect as at hike’s start it was 60 degrees and even at hike end the temperature only climbed to 70 degrees. The lower temp absolutely makes for a much more comfortable hike, although lots of water is highly recommended and I would highly suggest doling this hike in late fall to early spring.
As you begin the hike you get a great view of the summit of Mt. Gower and even much of the trail as it winds, dips and climbs all within site.
Heading into Scwartz Canyon
It then crosses the creek and winds up to the water tower and heads east along the ridge. The ridge has a couple of undulations of about 100 to 400 feet in elevation. After this, the trail crosses the brush area and up another rise to a meadow. To this point you will have hiked through various terrain changes consisting of low lying chaparral, numerous tree types, rocky vastness as well as narrow dense brush lined paths. This time of year (November) the colors of the trees are fall in fall bloom with orange and red hues abounding!
Then hikers cross the meadow and climb up another rise to the mantle below the peak. The mantle is a solid rock outcrop. From here you are on your own as you look up to the peak of Mt. Gower. On this day as we looked up at the peak we noticed two hikers descending. We kept a keen eye so that we could retrace their route and as they came upon us we asked about the climb. They were quick to say that although you pretty much are in a “mountain climbing mode”, the scramble up the rocky slope is an easy one so long as you watch out for the outcroppings of rock and or dirt to guide your steps and way.
Scramble to the Summit of Mt. Gower
Although not long in distance, it does offer a quite riggourous challenge to your ascent to the summit and completion of part I to this hike, part 2 being the trip back. The scramble up is well worth the climb as once you get to the summit you are rewarded with amazing views at every degree you look. 360 Video of the Summit! Although this day was cloudy you could still see the faint outlines of downtown San Diego as well as all the prominent peaks in the county. I’ve talked to other’s who have made this trek to the top and they have said that many days you can see Mt Baldy in the distant northeast as well as far as the eye can see due east and out to the dessert floor. Regarding distance of this hike, to the summit, the GPS reading on my iPhone pedometer app said 3.98 miles.
Stonehenge Look Alike!
After spending enough time for lunch and taking in the views we launched our descent back. I always feel that the descent offers as many challenges if not more than the ascent on most hikes and this was surely evident here as scaling the rocky slope down to the solid rock mantle outcrop must be done slowly as footing, which I found out the hard way can be precarious in spots. Once down to the solid rock shelf, take in again the unusual rock formations and views of distant mountains and vistas. This area is quite unique and one can see imitations of stonehenge as well as with the keen eye openings to old mines and caves.
By tracing your steps back you will soon find the trail that took you to this point. Again, once you are on the trail it is easy to follow, well carved and provides reassurance of the way back. At this point your legs will remind you that you have put in a solid days work and accomplished a long difficult hike!
The Mt. Gower hike ranks right up there with Mt. Woodson, The Big Laguna Trail and the North and South Fortuna’s in Mission Trails Regional Park as one of the most physically challenging hikes in the county while providing amazing scenery, diverse geography, varied vegetation and a huge sense of accomplishment at hike’s end!
More Photos on Trail Shots!
Distance: 8 miles
Date and Time: Saturday December 1, 2012 8:40AM to 1:40PM
Hikeability: Strenuous to Difficult (in spots)
Water & Food: 3/4 gallon water, 1/2 bottle gatorade, lunch, oranges and snack bars
As I was hiking the compacted rock and hard packed sand trail of Cowles Mountainthis past weekend, I felt a sense of being grounded to the earth with each step I took…………..
This grounded feeling triggered a thought of being ground in life. When we are grounded we are in balance with our Mind, Body and Soul
We all have the essentials that have to be done; work, school, family, extracurricular activities and relationships that consumes much of our time. With all these life demands draining us of our peace of mind, how do we achieve this grounded place of mental and physcal heath well being?
I feel an essential step in being grounded starts with self-care.
In the work that I do with HIker Therapy, I make it a point early on when developing a therapeutic relationship with my client/s to ask them, “So, what do you do for you, just you?” I am always amazed when most respond, “Nothing, I don’t do anything just for me.”
In fact when I ask this question to friends, even relatives, most of them cannot come up with something they do just for themselves to get peace or relaxation which are essential elements that self-care provides.
Many say that they do things such as go to a movie, do a family activity or go out to eat but it is in the company of other’s. That is fine, life is meant to be shared, however, many times when we are in the company of other’s our attention is on the group or those we are with, thats an easy ditraction away from self.
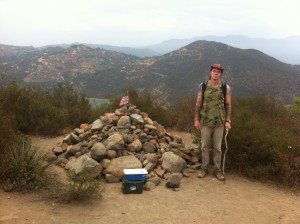
The “Monument” Hiker Therapy
By self-care I mean doing something such as; exercise, deep breathing, meditation, journaling, a walk on the beach, playing the guitar, taking a class, anything that gives you time to focus on yourself so that you can relax, gain peace and recharge.
For me, this is one of the great benefits of hiking. Hiking gets you out into nature, provides you with physical exercise, supports your mental well being by reducing anxiety and depressed mood. Hiking also offers a sense of purpose and accomplishment as you hike the trail from beginning to end and back.
Cowles Mountain Trail-head Hiker Therapy
Self-care also provides time to take a look at our “groundedness” or life balance to see if we are too heavily vested in one area of our lives that distracts us from people, relationships, or ourselves.
For example many times people get out of balance by working too long, too hard or too much. Yes, work provides us with purpose and money so that we can enjoy life, survive and take care of that which needs to be taken care of, but often times work can serve as a distraction that keeps us from being grounded in our lives.
In fact, in my experience those who are constantly working; whether that be at a job or volunteering or running from this activity to the next are also the same individuals who answer,” I don’t do anything for me.” These are also the same people who are not grounded and many times not good with themselves, content with life or comfortable in their own skin. They are not balcned in Mind, Bosy and Soul.
Self-care helps alleviate the anxieties that come from our day-to-day activities such as work, taking care of our homes and families as well as other endeavors we consume ourselves with. So often overwhelming anxiety debilitates us and keeps us from being present in what we do and whom we are with. Often time individuals associate doing something for themselves as a selfish act or activity. In fact, many of my clients have voiced this to me that they feel selfish because they do something just for themselves.
I don’t see self-care or doing something for ones self as selfish at all. Self-care in order to become grounded is an act that others will benefit from greatly. After-all the better we are with ourselves the better prepared we are in taking our “groundedness” out into our lives, which can only reflect positively with our families, friends and relationships.
Being less stressed, being good with us, feeling comfortable in our own skin and having a positive sense of well-being is a real benefit of consistent self-care. This consistency is unique to each individual and the activity, however I feel that self-care should be a daily consideration, even if for 15-30 minutes in duration.
I would Challenge those of you that are reading this article to ask yourself
“What do I do that is just for me that offers Peace, Love, and Respect and Self Care for Myself?”
Remember self-care involves only one person, you!
Give yourself a gift and take advantage of this wonderful opportunity to get to know the most important person in your world, you! It will reward you many times over and provide you with the inspiration and motivation to be the best you can be which will lead you to a grounded life.
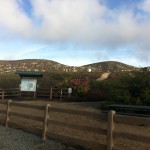
Cowles Summit in distanceBig Rock Rd. trailhead start
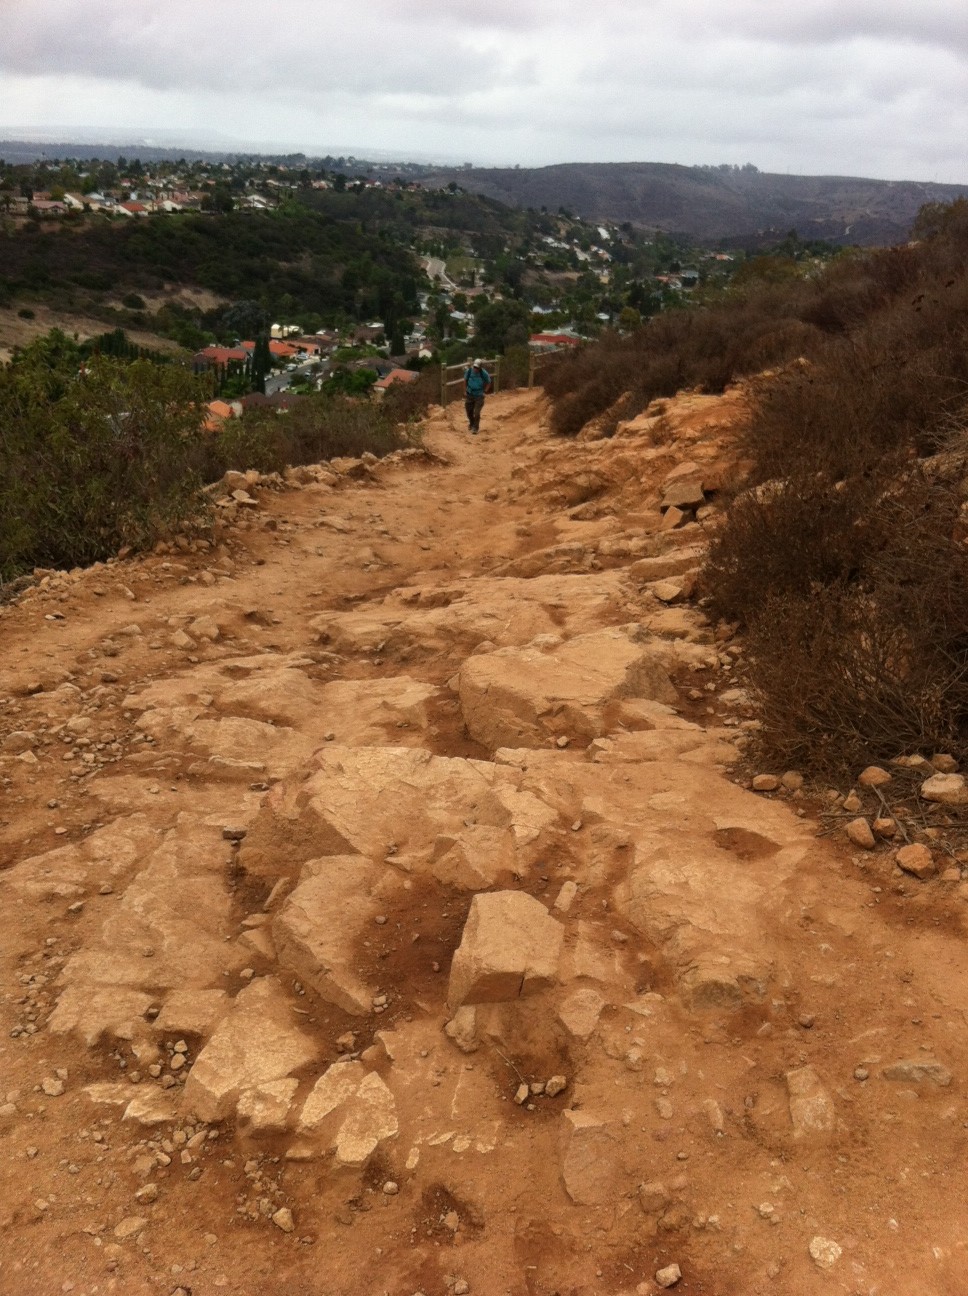
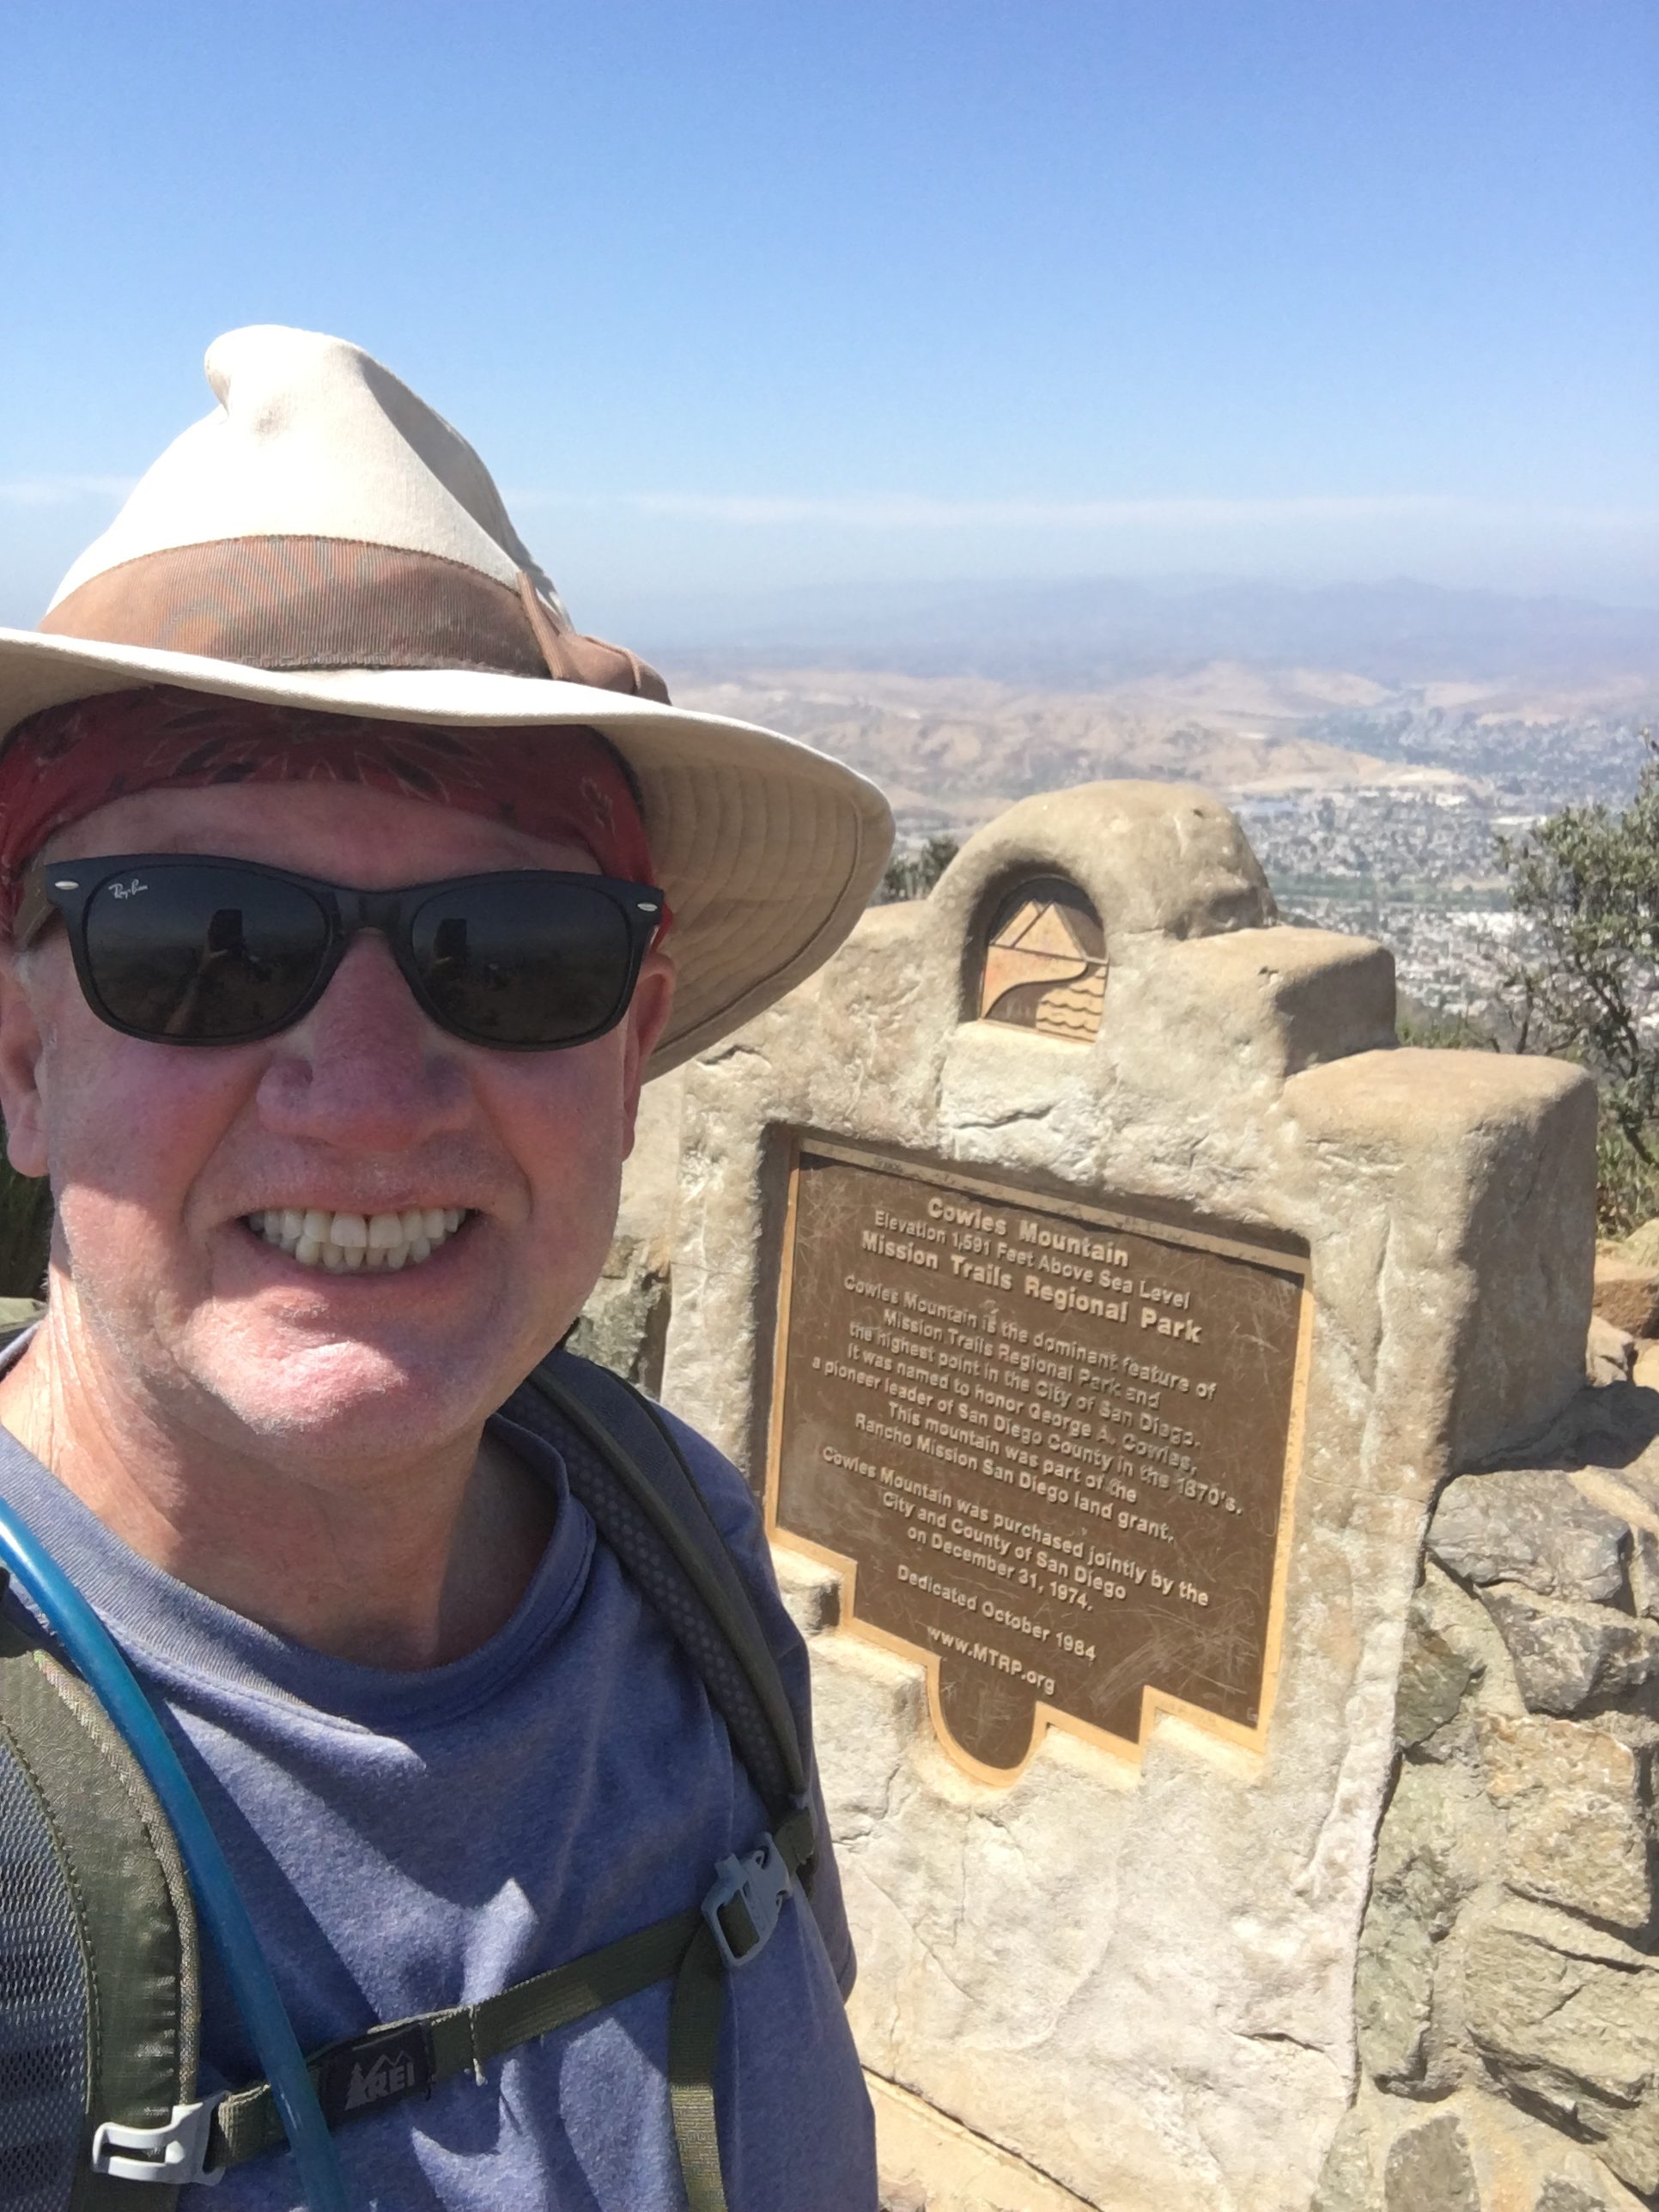
Cowles Mountain, part of the MIssion Trails Regional Park system in San Diego , is by far the most popular hike in the County and a hike I refer to as the Disneyland of hikes due to its heavily traveled trail especially the main trailhead off of Golfcrest Drive which is the preferred starting point of the masses, however there are other trailhead starts including the one I will speak about here. The Big Rock Rd. trailhead beginning offers a rarely used start to hiking Cowles Mountain as well as offering the most scenic and unscathed view of the Cowles Mtn summit. To access the Big Rock Rd. trailhead you can exit from Hwy 52 at either Mast Blvd or Mission Gorge Rd. Big Rock Rd. intersects MIssion Gorge Rd. and is a traffic light landmarking where you need to turn. Take Big Rock Rd to the end where it dead ends at the trailhead beginning. Houses line this neighborhood area and parking is curbside and very much available as opposed to the Golfcrest starting point that again reminds one of the crowds at Disneyland. The Big Rock Rd. trailhead is one of four starting points to trails that lead to the summit of Cowles Mtn. along with Barker Way, Mesa Drive as well as the mentioned Golfcrest Rd. Entrance. The trail starts out near an information board that will list the different trails and their distances to the summit. This particular trail is 2.5 miles from the summit and offers enough challenge in both distance and climb to make the Hikeability of this trail strenuous. One of the strengths of the Cowles Mtn hike as well as others on the Mission Trails regional Park system is the trails are well marked with well placed signs to guide you towards your destination. The Big Rock Rd, trail is no different as signs along the way clearly route the trail and show you where other trails join in and possible alternte trials that may interest you with the same destination at trails end. The start of this hike offers a trail composition of compacted red dirt and sand wandering through low lying brush of various plant life.
Flora and FaunaService road connectionThe Top!
It is here that the trail becomes much more challenging and physically demanding. Keep your eye on the prize and the accomplishment and reward that lay ahead to motivate yourself up this steep ascending Rd. Before you know it you will be at the familiar rock strewn summit of Cowles and a 360 view of the County. On this particular day, although gray skies, we were still able to see Qualcomm Stadium, Mt. Soledad in La Jolla, MIra Mar air-station, Gillespie Field in El Cajon, as well as the various peaks in the distant mountains including Lyons, Miquel, Viejas and the faint outline of San Antonio, San Jacinto and San Gabriel. This vantage point at 1531 feet is the highest Peak in the City of San Diego and offers one of the if not the best view of the area . After taking a twenty minute break for gatorade and a snack bar we head down the more “traditional” descent from the Cowles Mtn summit and the familiar rocky cragged trail. Be careful in this section of the descent as ive heard more than one story about twisted ankles and falls. As you continue the descent you will join up with the Barker Way, Big Rock Rd. sign that alerts you to switch trails and head back towards the original trailhead start. Once you change trails you will come to the same service road taken on the ascent and a much less strenuous travel this time around. Not long after being on the service rd you will meet up with a fence line and the entrance to the Big Rock Rd trail that will lead you back to the trailhead beginning. This route back was a shade less mileage wise than the ascent and totalled about 2.3 miles. Speaking of shade, the day we did this hike gray skies at 10am gave us 75 degrees, at the end of our hike at about 12:45 back at the car it was 95 degrees. However, it did not seem that hot as previous times I’ve hiked Cowles, but as always makle sure you bring plenty of water, at least 75 oz., and a few snacks to keep yourself hydrated and recharged on this somewhat arid hike.
Manzanita Tree
Cowles Mountain always offers a good challenege a scenic route and a summit that provides sweeping views of our county and the city of San Diego. The Big Rock Road trailhead is a preffered start to the Cowles Mountain hike and besides the Barker Way start one I highly suggest. Next I’ll have to do the Mesa Rd trailhead start to comnplete the four routes available. I Always like what MIssion Trails Reginoal Park has to offer, and Cowles does not dissapoint and always lives up to its reputation as a saught out trail among avid hikers in san Diego both young and old.
If you are looking for a hike that offers you three trails in one each offering its own unique scenery, challenge and physical make-up than the Big Laguna Loop hike is for you. Located in the Laguna Mountains roughly one hours drive from downtown San Diego on the Sunrise Highway, this recreational area has something for everyone, especially those of us who love to hike. However if you are an avid trail rider and or runner this area has the trail for you.
As the Big Laguna Loop Trail map shows you can get on the Big Laguna Loop at various points however, we began at the Sunset Trail trail-head, which is just opposite the Meadows Information Center near mile marker 19 on Sunrise Highway, S1. To get to the Trail-head: From Interstate 8 heading east, exit at Sunrise Highway, S1, heading north. In about 5.6 miles from the freeway, near mile marker 19.1, park along the wide shoulder near the Meadow Information Center. Make sure you have a California Adventure pass if you choose to park right near the trailhead start, which I recommend. Look for the fenced area and information board along with the small steel “bridge that welcomes you to the trail and off you go! If you are using the map suggested here on the link, keep in mind that the trail that we choose, the Sunset Trail, is not outlined in highliter as shown on the map at the link, however you get the idea!
Sunrise Trailhead start
The start of the trail winds through a forest of pines and various other tree types. The trail is compacted earth dotted with occasional rock. Although the trail dips and climbs on this portion of the hike you are never dipping below 5400 feet of elevation nor rising to more than 5900 feet the entire time you are on the hike and the three trails I am mentioning here. The views seem to go on forever as you are surrounded by green, trees and off in the distance gorgeous mountain views.
Breathtaking views all around!
The forested feel of this hike gives way to a mountainous terrain and as the trail becomes rockier it weaves through boulders and drops a couple of hundred feet down.
PInes, mountains and boulders
About 1.5 miles from the trail head, you come onto the lower edge of the huge Laguna Meadow and that little pond, Water of the Woods (sometimes referred to as Lake of the Woods).
Water of the Woods
According to a detailed map near the trail-head, Water of the Woods is fed by Agua Dulce Creek and ultimately connects to Big Laguna Lake and Little Laguna Lake, both to the east of Sunset Trail. The views from this point on the trail are one of my favorite. The distance pines flank the vast area of Laguna Meadow, all this topped by a semingly endless blue sky. In fact if you didnt know you were in the middle of the Laguna Mountains, you could be Big Sky country in Montana! At this point in the hike you will turn left at the marker sign that will lead you continuing onto the Sunset Trail. The rocks are big and the Jeffrey Pines are numerous as this trail dips and climbs steadily through a forest of different vegetation and open trail.
Big Laguna Meadow
Continue about three more miles on Sunset Trail, which connects at 4.6 miles to the northern edge of Big Laguna Trail. This section of the trail offers a wide open view of Laguna Meadow to the right and the contiued trail dotted with Jeffery Pines, brush and rock. The trail continues like this for about another mile as you lose site of the meadow and the trail narrows throough thick vegetation untill you get to an old iron gate that marks this section of the trails end. Soon you will come to the Sunrise Highway S1, crossing which will lead you to the Pacific Crest Trail (PCT). The trail is marked but be alert as you may pass the trail entrance on the immediate right.
Beginning of PCT
The trail parallels Sunrise Highway so your instincts will kick in and guide you. The PCT piece of the Big Laguna Loop offers a whole different perspective of the area and immediately takes on a desert feel, not only in temperature, but scenery and ruggedness as well. Off to the distant east beautiful vistas lead to the beginning of the Anza Borrego Desert floor. The trail’s composition changes to a more desert mix of rock, red dirt and is uneven. The approaching Manzanita Grove offers a sea of green amidst this arid part of the trail. The trail winds and climbs and in my opinion offers the more challenging part of the Big Laguna Loop.
On the PCT
As you continue on the PCT, which is well marked with sign posts, your goal is to get to Foster Point. Not only does this section of the trail give you a good view but it alos signifies that soon you will be leaving the PCT and heading back towards the Big Laguna Meadow and trail. Within 100 feet you will come to a trail junction and you will want to head southwest or right on this spur of the trail. Continue hiking to the Sieera Club lodge and retrerat area on what is now a service road. THis road will junction with the Sunrise Highway, which you will cross to the right and at any point turn into the Al Bahr Shriners Camp. Follow the road to the left, you will come to picnic tables on the left hand side of the road, which is where my son and I ate lunch. This marks about the 7.5 mile part of the loop with a little more than 3 miles to go on the hike. Continue on into the Horse Heaven Group Camp and from here head to the right along the asphalt road. You will see a left segment branch off and a landmark is the original rangers station on the right hand side of the road. Continue past the restrooms to a large information board which has a large map of the meadow to help guide you back into the meadow and towards Big Laguna Lake. You want to head towards the southern tip of Big Laguna Lake, there is a spur of the trail that sits on a raised ridge that crosses over just south of the edge of Big Laguna Lake, at spurs end turn left and follow the Big Laguna Trail back towards the “pond” or the Lake of the Woods. Hiking along the northern edge of the “Pond” will lead you back into the Sunset Trail and the original starting trail of this hike. You will now head back to the trailhead start and the Sunrise Highway area where you parked.
This was a challenging hike in that it offers you enough diversity of trail, scenery, and distance to make it my second favorite strenuous hike after the Mt San Antonio (Baldy) hike. A word of advice or suggestion would be on this hike to make sure you bring a map of the area and trails. Although the Big Laguna Loop is well marked there are many spurs on this hike to divert you. The good news is that the beautiful meadow layed in the middle of this hike oofers you a good landmark as to where you are and where you need to go. Follow the map and you wil be good!
Great Hike, Have Fun!
Distance: 10.5 miles
Date and Time: Saturday Sept. 3, 2012 9:40AM-2:30PM


 g a completely different experience. Although surrounded by a housing tract and the local high school you still experience a hike that offers open fields, rocky steep ascents, and a cave,