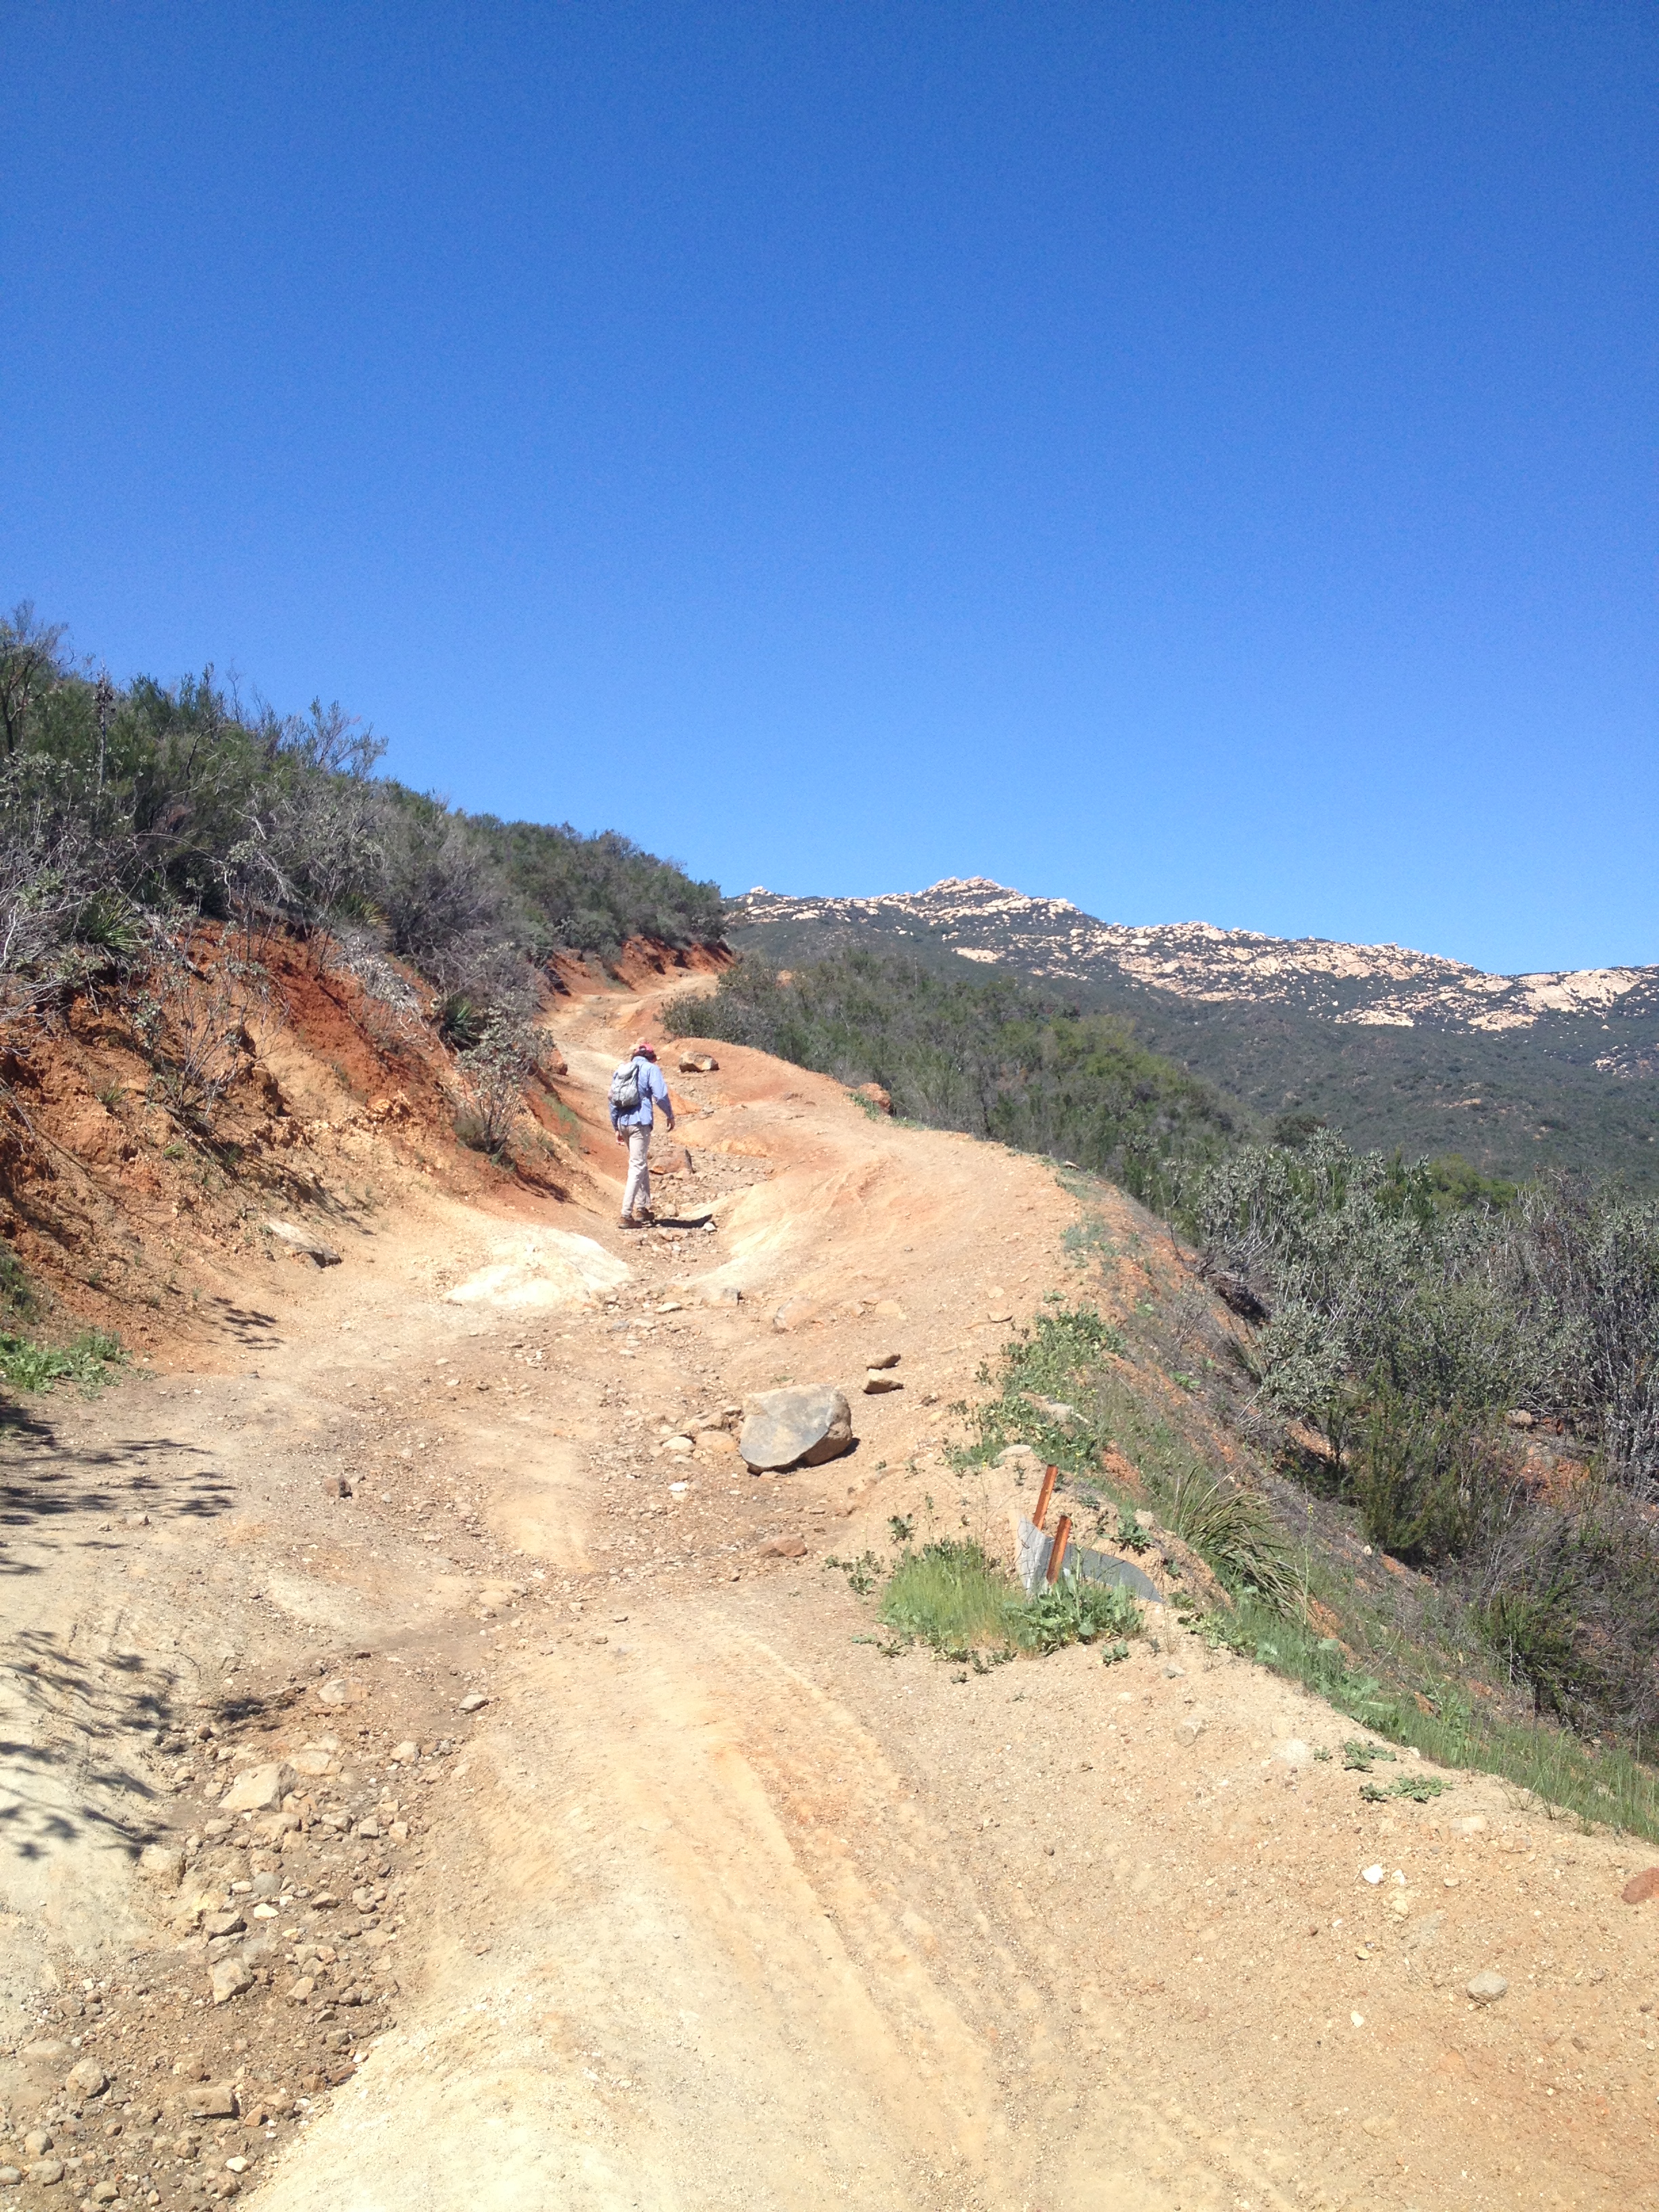
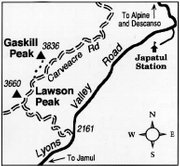
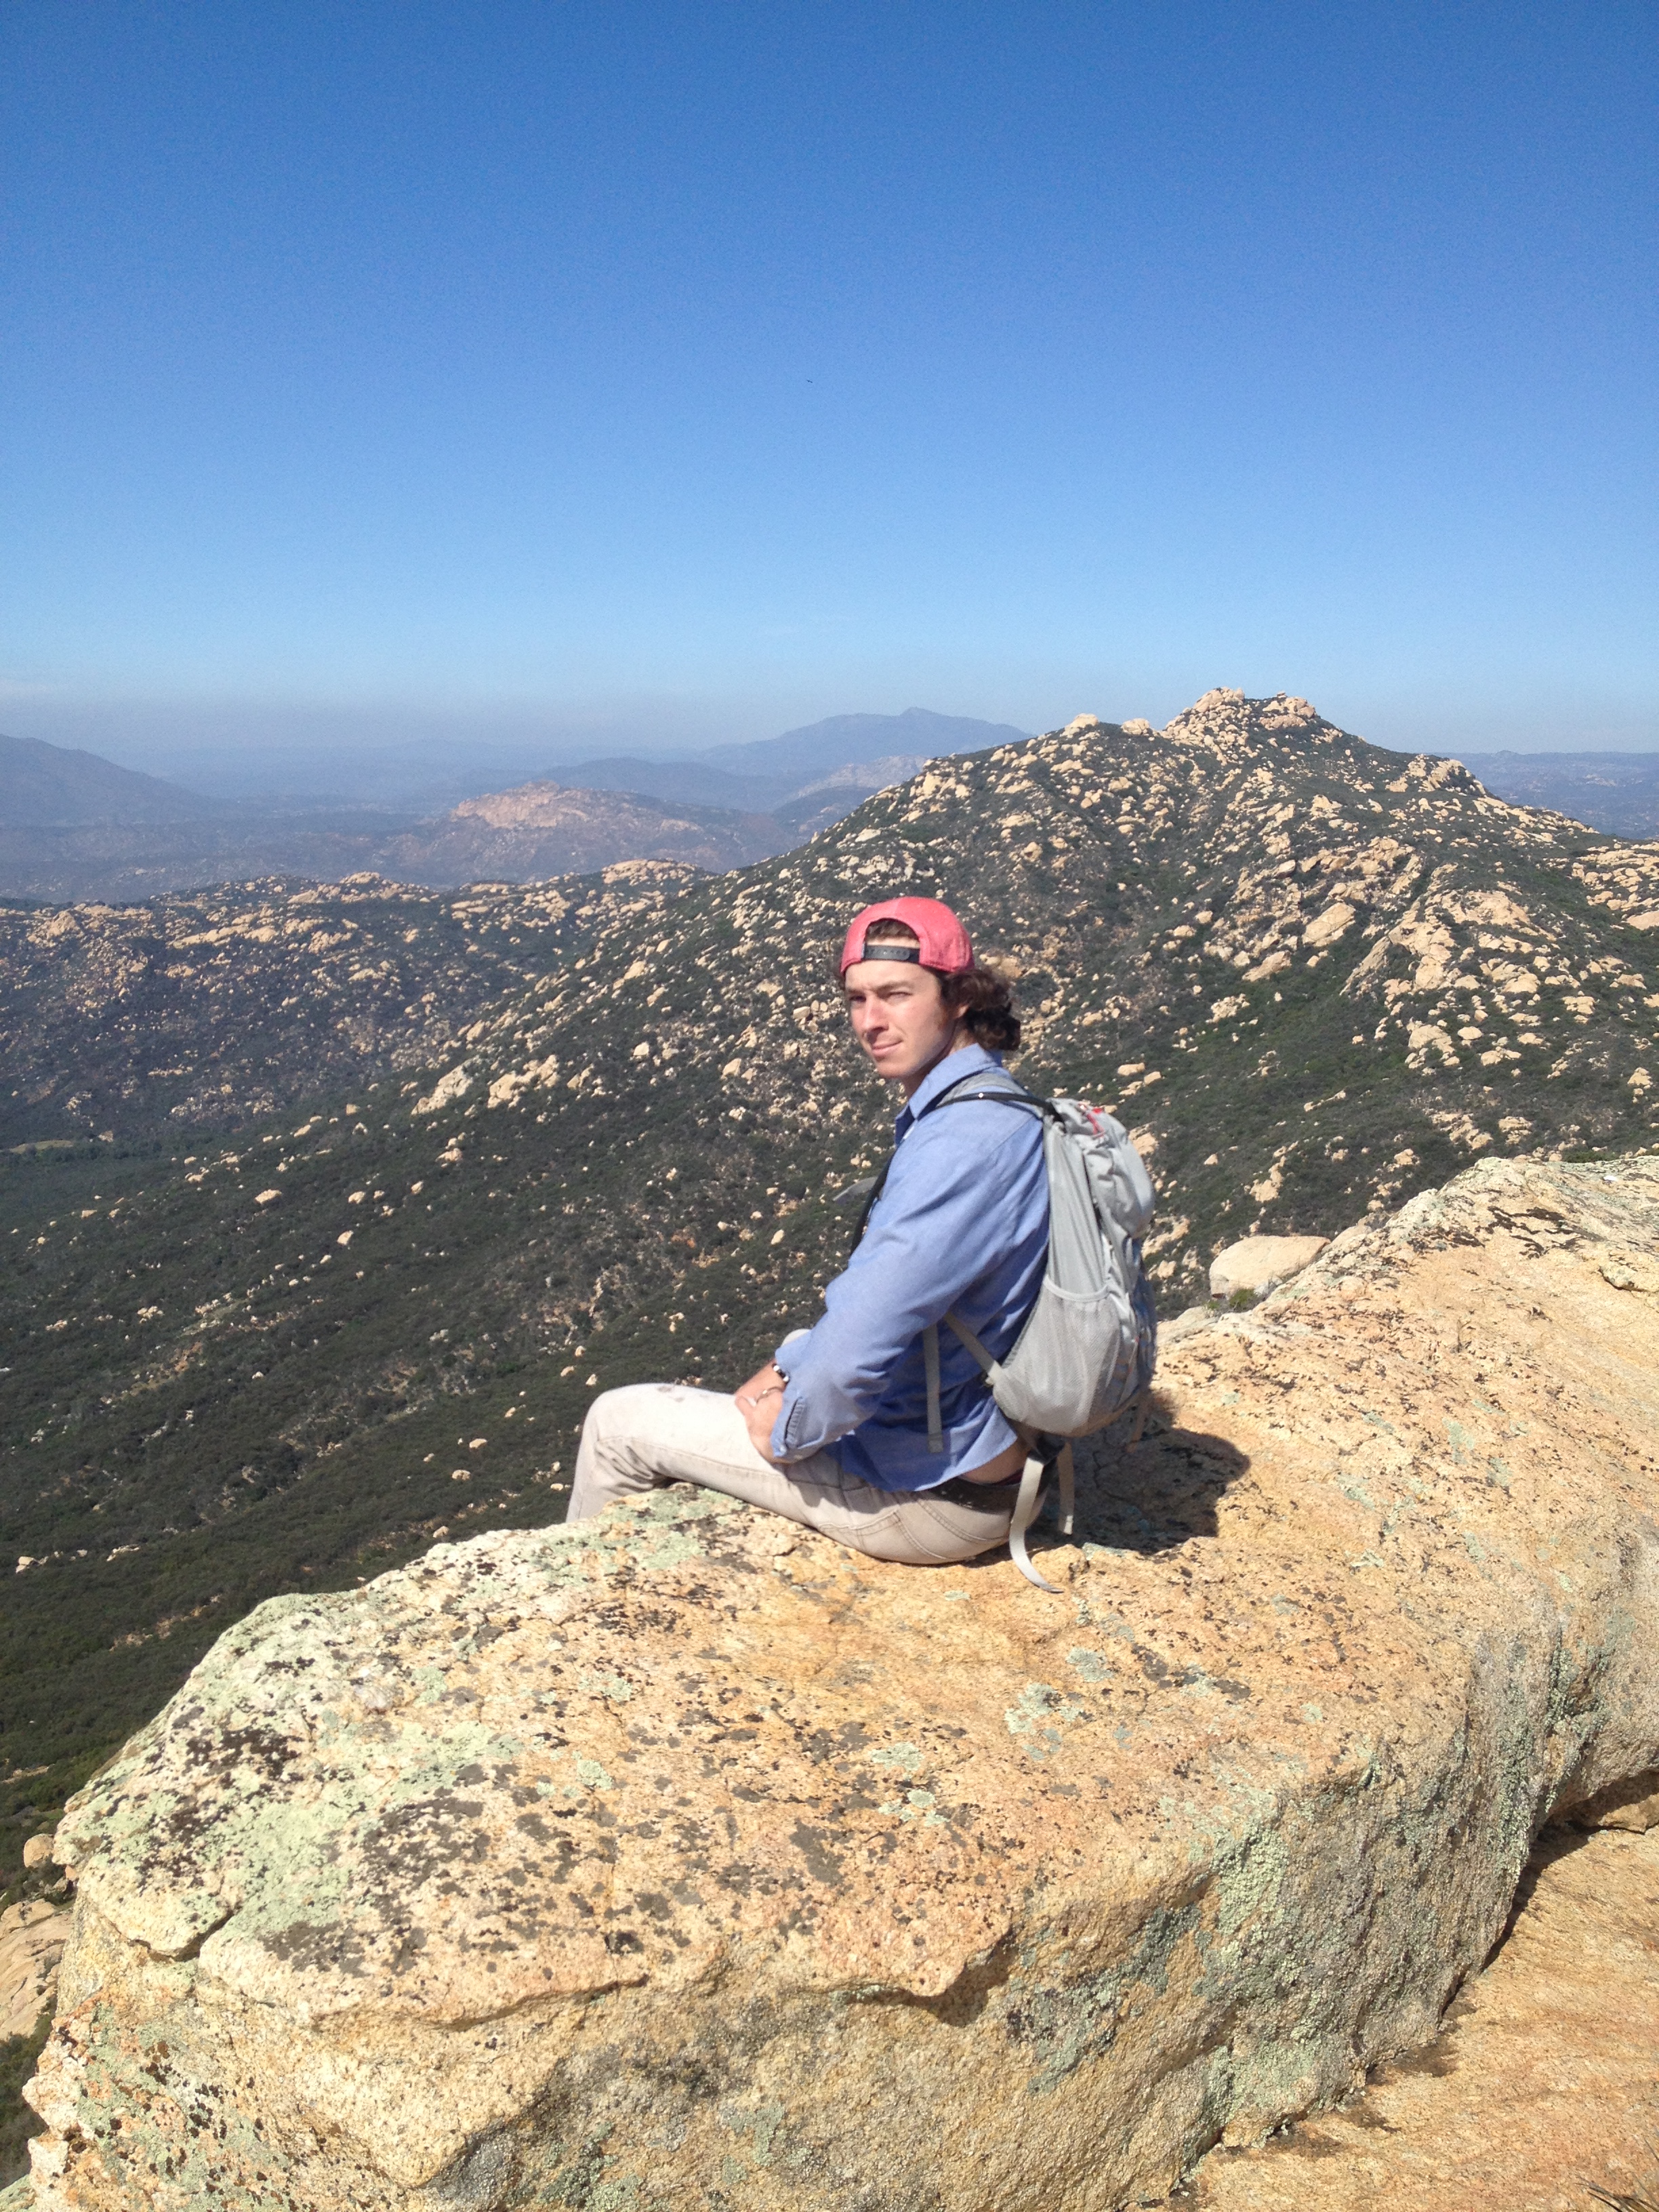
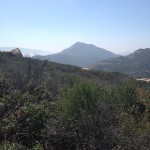
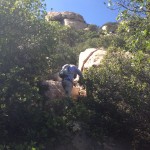
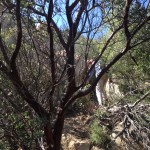
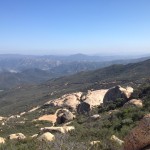
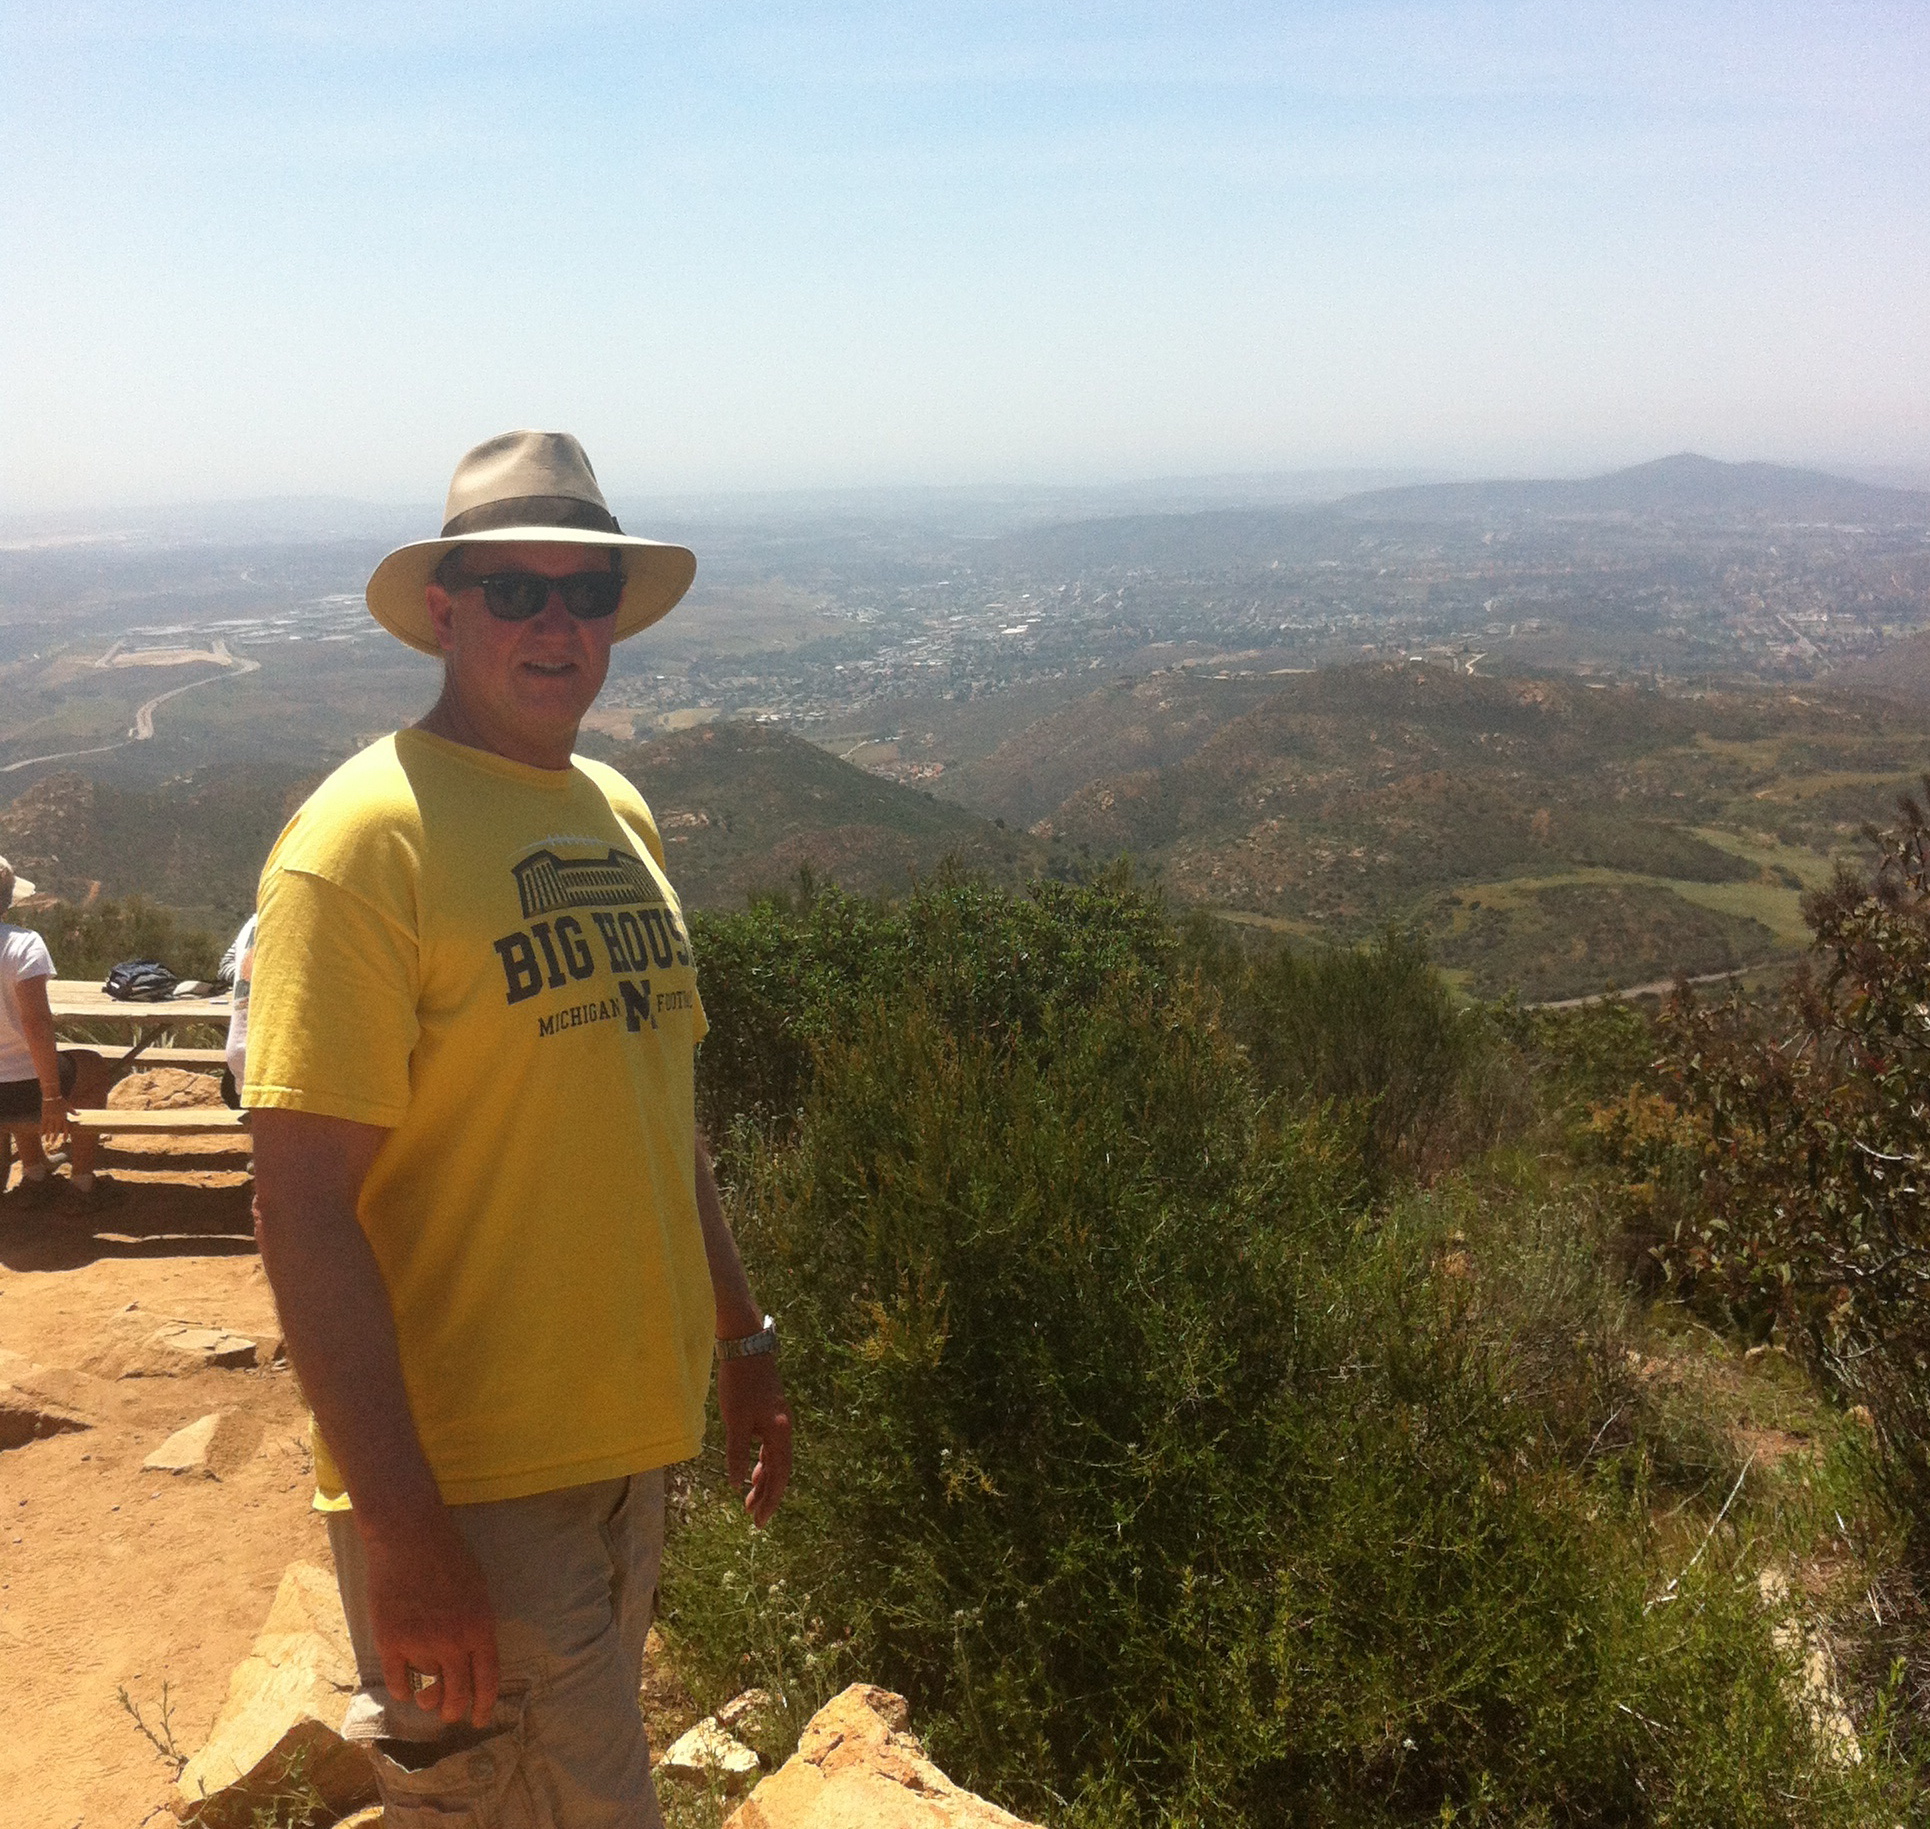
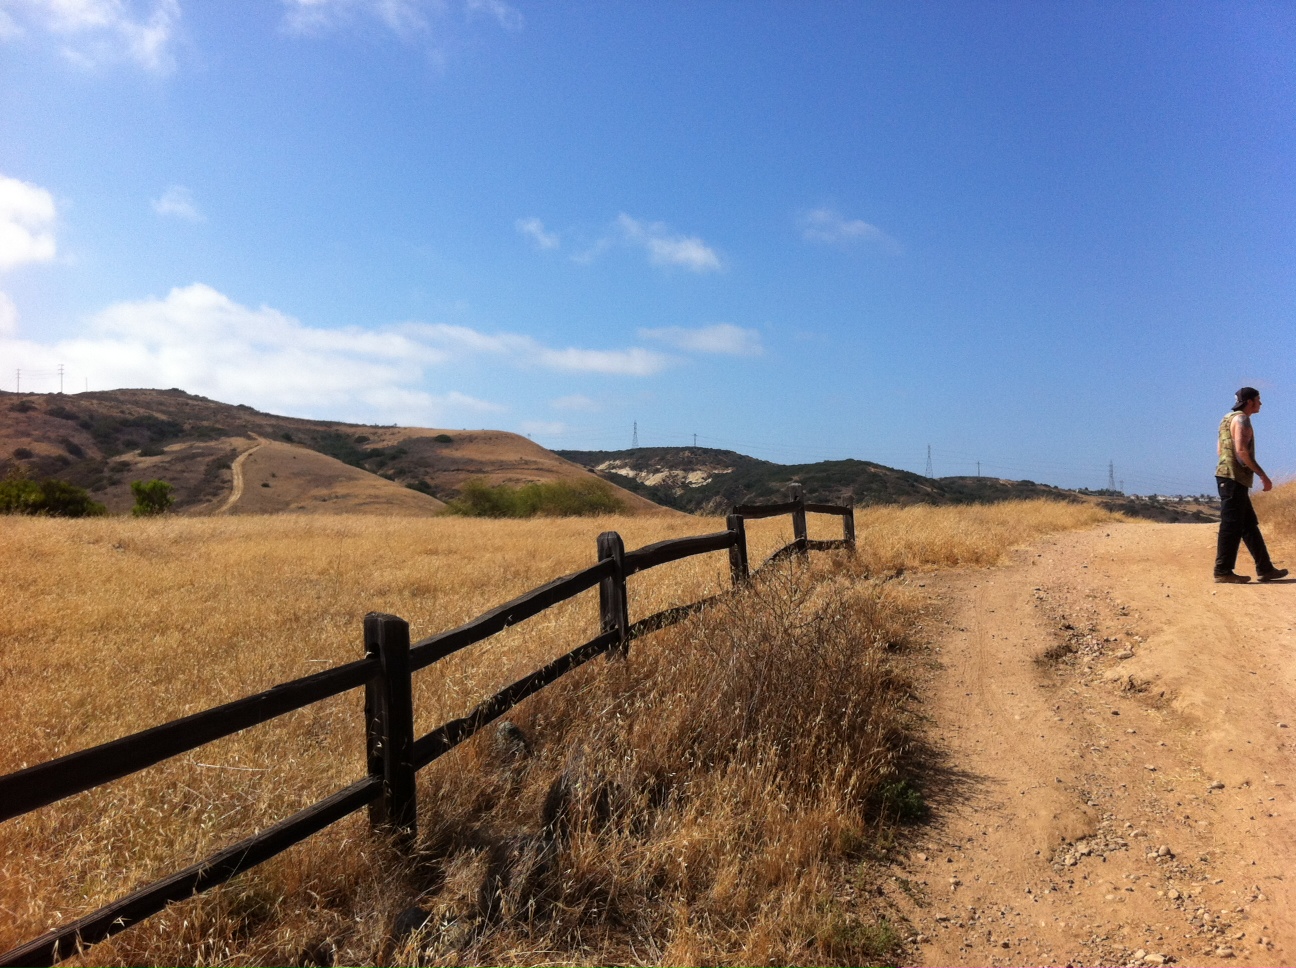
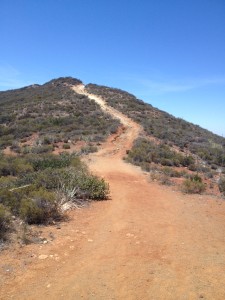
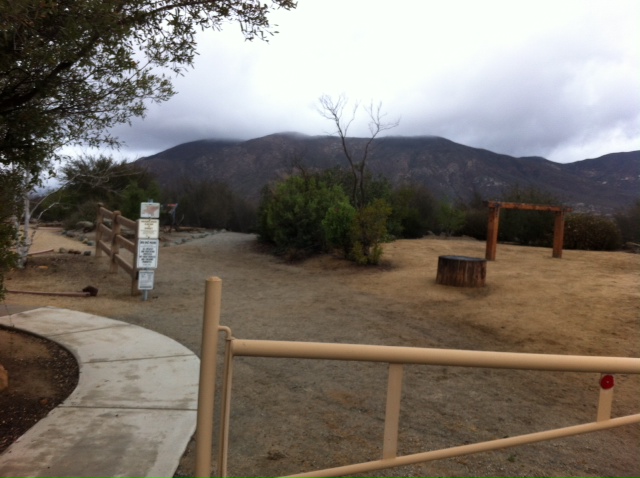
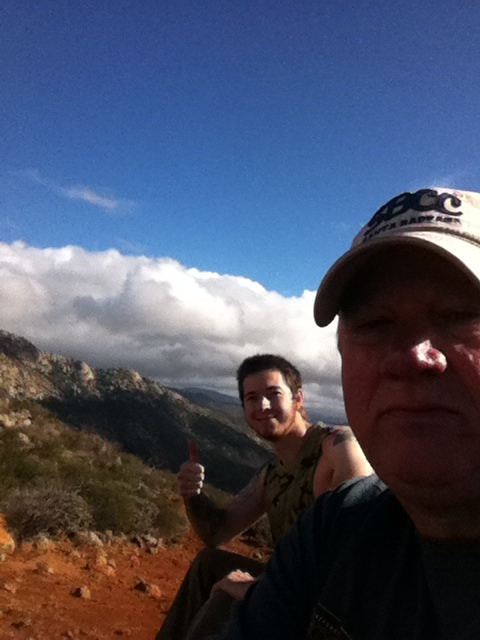
Hiking out in the East County has become my favorite place to find a trail. The biggest reason for me is that everywhere you are surrounded in mountain scenery and great views. Just driving to these trails provided you with that. Lawson and Gaskill Peak do not disappoint here , as the drive out as well as the hike itself offers beautiful scenery. Gaskill and Lawson peaks are located SE of Alpine, CA and about 10 miles north of the International border. They stand right at the SW boundary of Cleveland National Forest’s Descanso district.
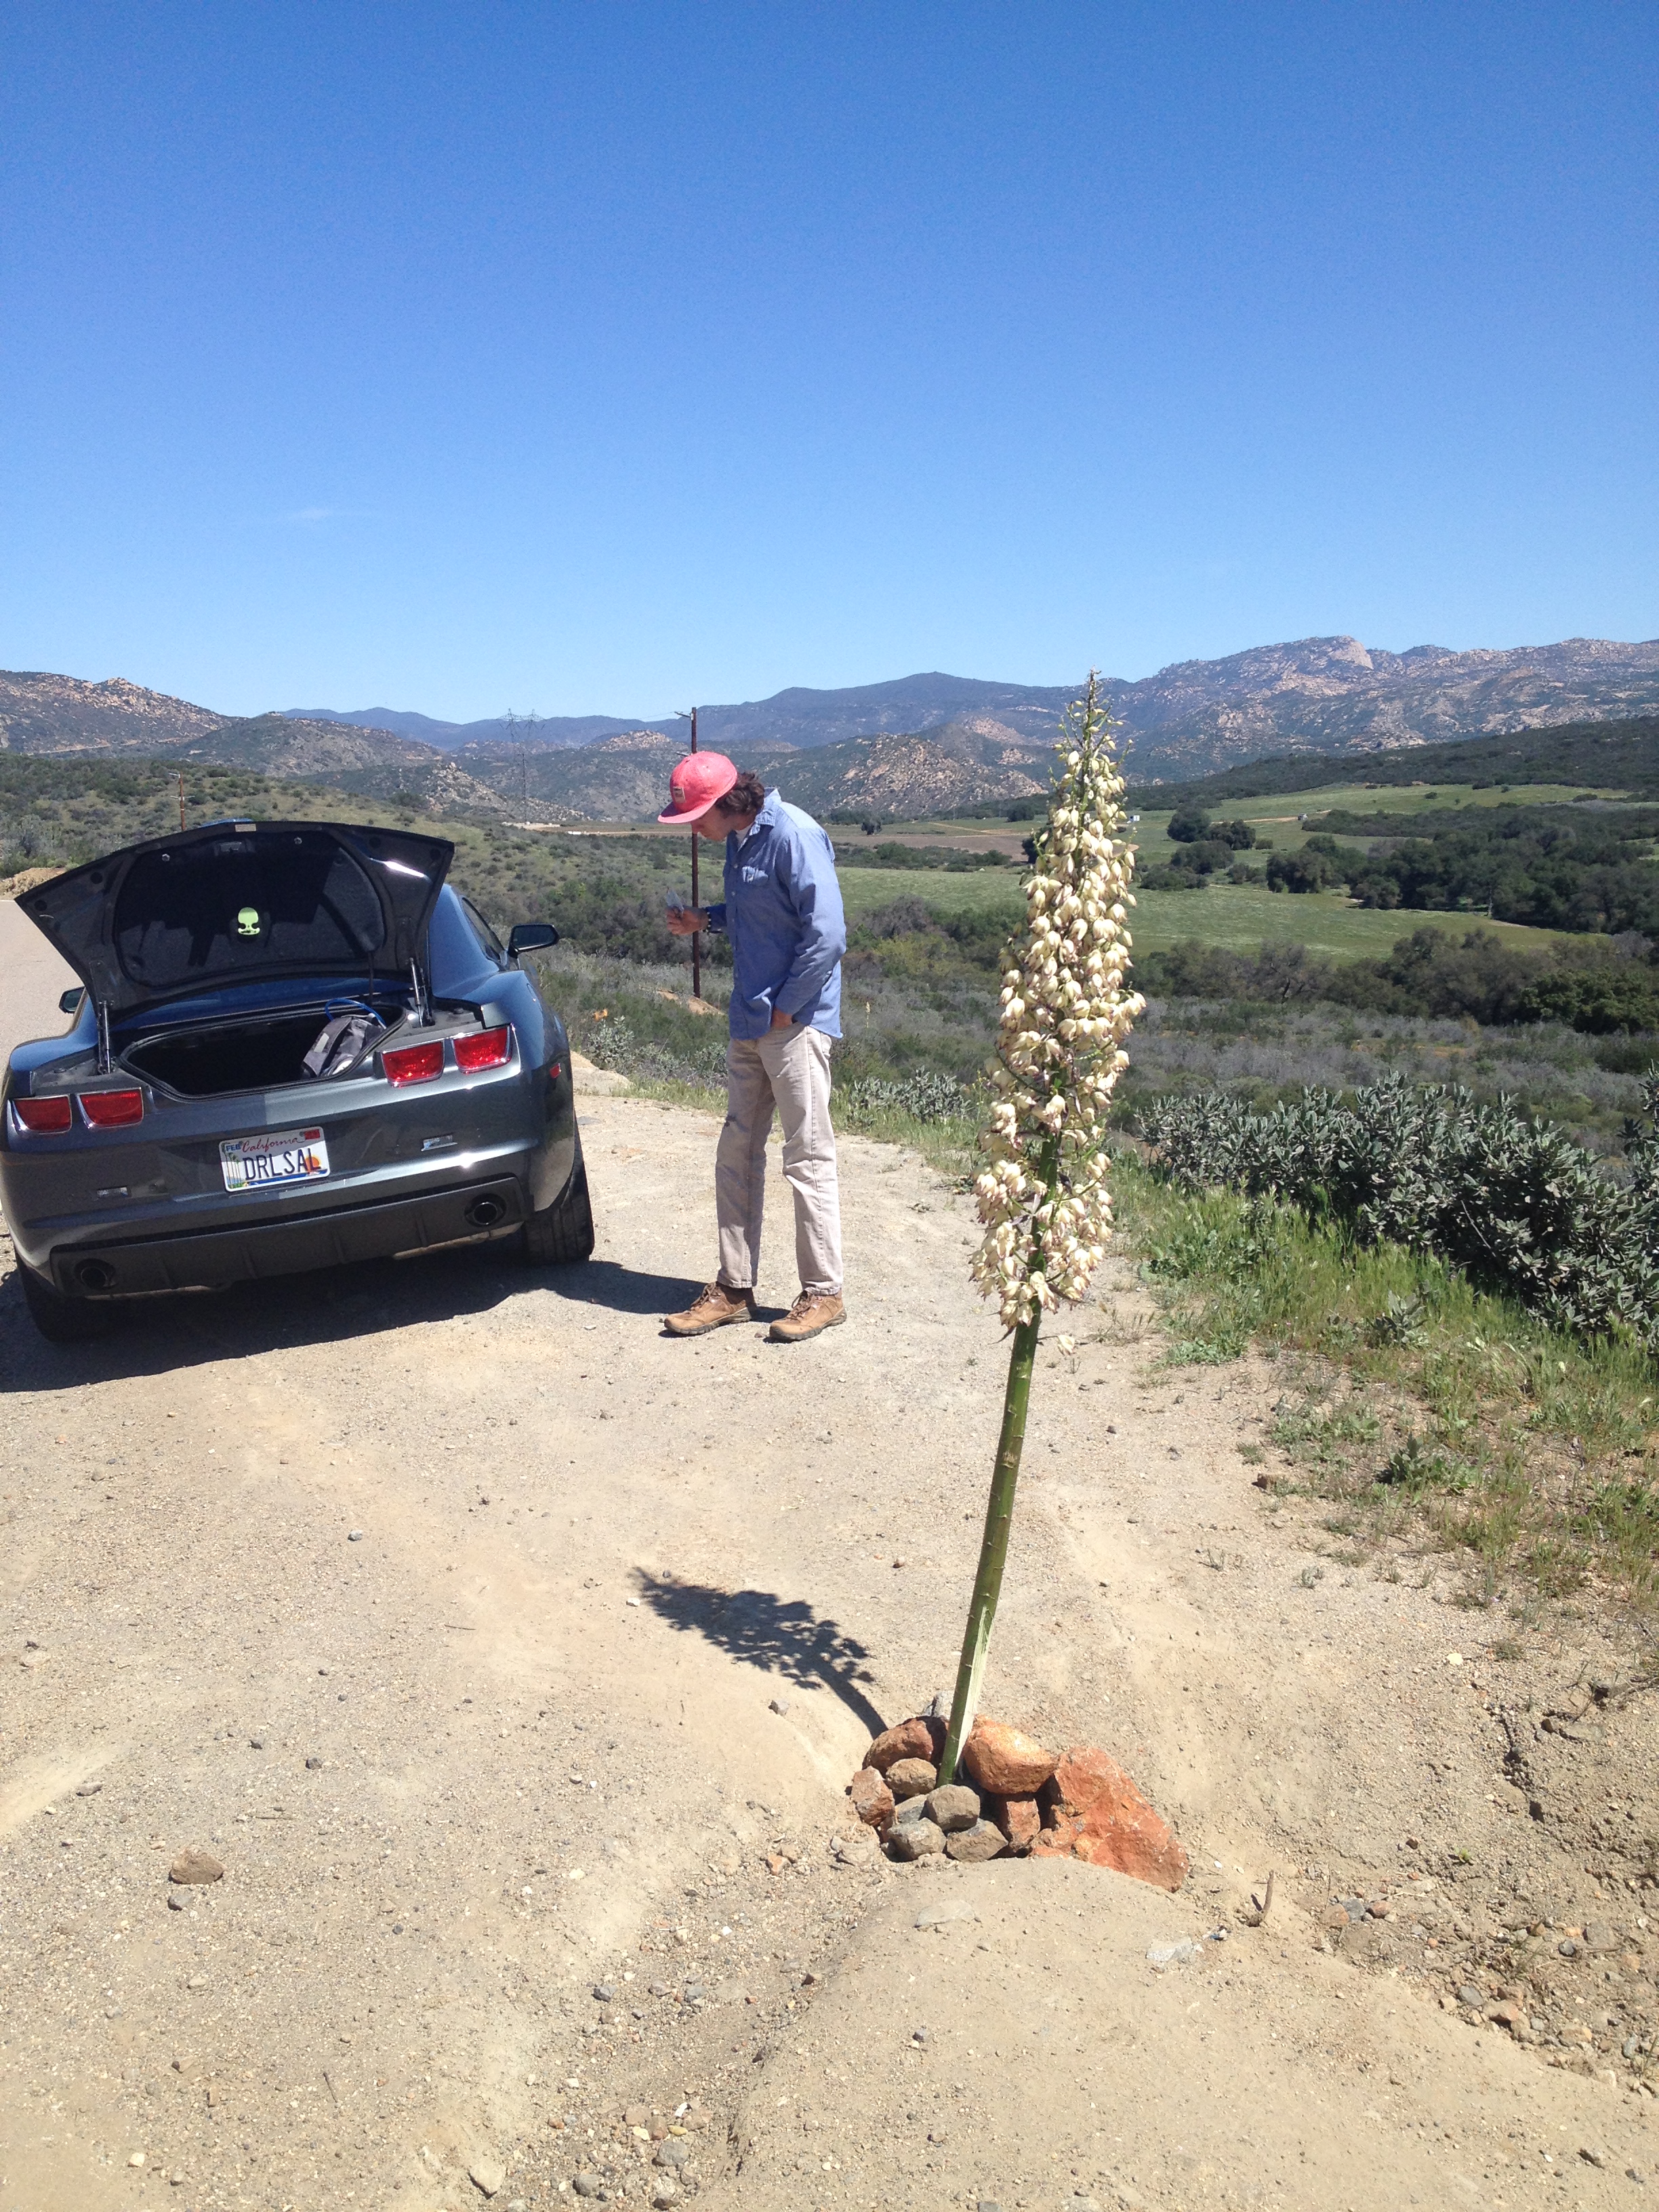
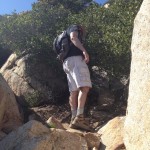
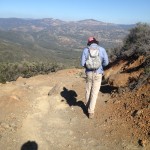
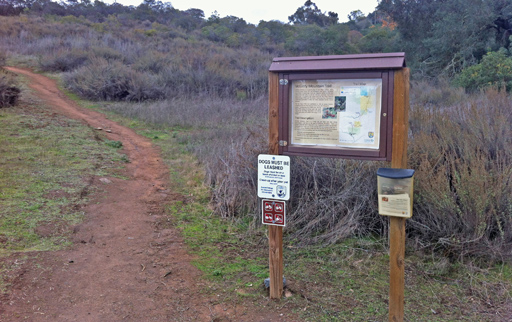
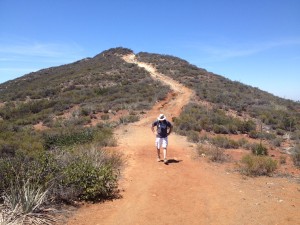
You can reach Lawson Peak most directly by way of the south segment of Carveacre Road. Ostensibly this is a dirt road, but actually it’s more like a deeply rutted wide trail, best suited for hikers and expert mountain bikers. The start of the old road is precisely at mile-marker 13.0 along Lyons Valley Road, some three miles east of the intersection of Honey Springs Road and Skyline Truck Trail. Limited parking is available in two small turnouts on Lyons Valley Road. There is a Yellow Swing Gate that indicates the trail/road start,. This hike climbs the entire way so take your time, develop a nice easy pace and break if you need.
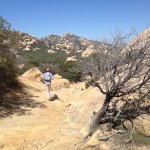
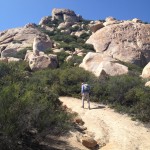
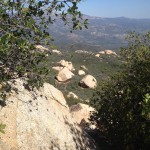
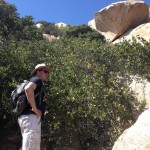
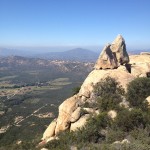
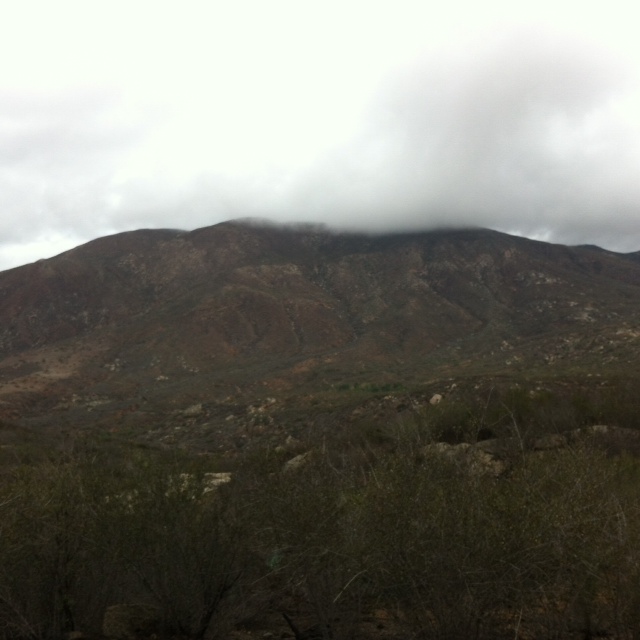
After climbing somewhat tediously to a crest in two miles, you descend a little to meet another dirt road coming in from the left. Lawson Peak lies straight ahead, a massive heap of granite slabs.
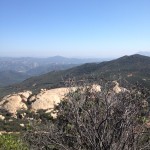
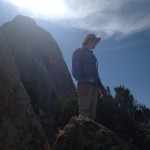
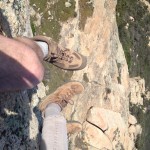
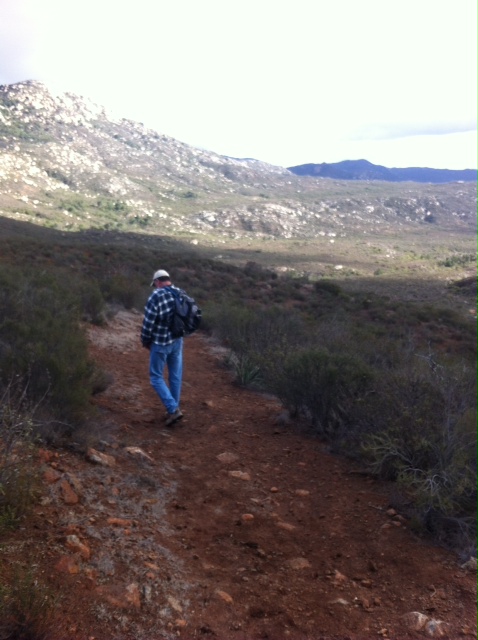
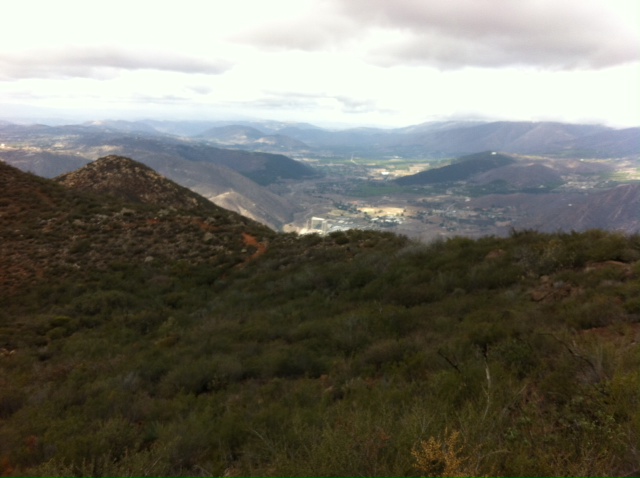
The fun begins as you plunge ahead through low brush and over boulders toward Lawson’s summit block — taking care to alert any rattlesnakes that may have become active in the warm sunshine. To reach the summit of Gaskill Peak, return to Carveacre Road and turn north. After 0.5 mile of road walking, you can find and follow an obscure path, on the left, see the arrow, up along Gaskill’s south ridge. A short but tricky bit of rock climbing puts you on the summit. large, flat expanse of granite, sheltered from the wind, lies near the summit a great spot for lunch.
As always take your time, ankles can turn very easily on a trail, and if its hot lots of hydration………..Have fun and remember Hiking is good for the Mind…Body and Soul!
Distance – 7.1 Miles
Water/Snacks/Lunch: Take all of them at least 2 liters of water. more if hot
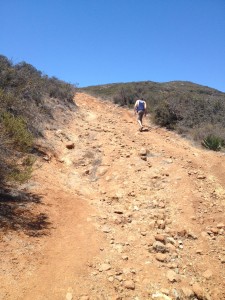
A hike I have always wanted to do in San Diego County is San Miguel Mountain, which is east of Chula Vista in the Eastlake area of our County. This trail is interesting in that its trailhead is located in the very nice community of Eastlake, literally, in fact you park on the side streets of suburbia to get to the start. Right from the get go you start to ascend rather steeply towards the summit and understand that this is going to be one difficult hike! The good news, you can see the summit and its Radio/TV towers the entire 3 mile up hike. The first 1.5 miles of this trail is a steady steep climb, the trail is very rocky in spots so be careful, in fact most of the hike the trail is rocky or flat earth. There is a “False†peak half way up at about the 1.5-mile mark, which is landmarked with the American Flag. Most take about an hour to get here; our time at the 1.5-mile mark was 44 minutes. To get to the flag veer left along the trail, to continue on to the “real” summit of San Miguel stay right and follow the trail. The beauty of this hike is that you cannot get lost; just stay on trail that and you will be lead to each summit. Most who hike San Miguel get to1.5 mile point and stop, as well as thinking they are at the summit, its not, keep going for the next 1.5 miles. Right after the 1.5-mile mark, the trail flattens out a bit as you wind around and then down to the valley point right before your steep ascent up to the peak of San Miguel Mountain. Although not easy once you summit you will be rewarded with a huge sense of accomplishment and incredible views of Mexico, The Coronado Islands, Downtown SD and much more. Take your time at the summit, refuel with snacks, lots of water and take in the panoramic reward you deserve. The descent back can be tricky due to the same steepness coming up is now the challenge going down. Slow and steady prevents sprains or breaks.
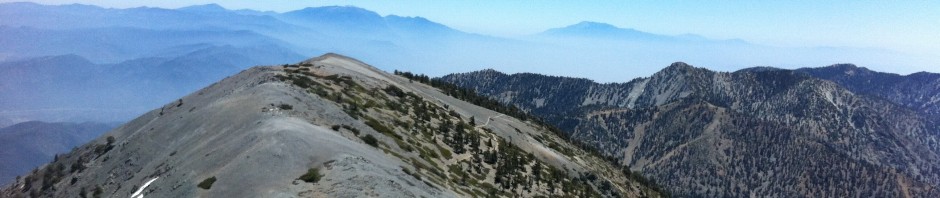
“Excluding Mt. Whitney and possibly Mt. Baldy this is the most difficult hike I’ve done in the state/county. However, it is very doable, one step at a time! As always lots of water, it can get hot out there so best time to Hike San Miguel is fall thru early spring and the earlier in the day the better. In late January when we hiked San Miguel it was in the low 70’s.
Directions: From North CountyTake the 805 S to 56 east to 125 to H street and go East. Take the E H St exit toll road turn left onto E H Continue onto Proctor Valley Rd. Turn left onto Coastal Hills Dr. Turn left onto Butterfly Way Butterfly Way turns right and becomes Iron Gate Ln. Destination will be on the left
San Miguel Mountain Trailhead, Iron Gate Lane, Chula Vista, CA 91914
Date Hiked: 01/25/15 HIkeability: Difficult Distance/Time/Temp.: 6 miles up hill both ways in spots, seriously. 3 hours/low 70’s. Water: 2 liters, plus if hot. Snacks: PRO Bar now my new favorite trail food.
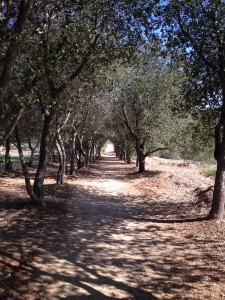
A hike that is a mainstay of my top hikes in San Diego County is Iron Mountain in Poway, CA. Located off of HWY 67 this hike never disappoints as it provides a rich balance of distance, challenge, hike-ability, scenery and accomplishment all rolled into a roughly 6 mile hike. The trail is a good mix of compacted sand/earth and rocky terrain, each provided at the appropriate time. The beginning of Iron takes you through a canopy of trees crowning your start to the hike. As you get about 1/4 mile into the hike the trail starts to climb, whether you take the side trail that veers off to the right, or continue on the more “traditional route up Iron you begin to “feel the burn” of ascending a trail.This hike is a moderate one and even if you are not an experienced hiker, Iron is very doable. Just always remember its not a race it’s a hiking journey, one step at a time. The trail is a well marked out and back hike that is open and “mountain” enough to spread out the sometimes populated trail. That said, this trail never gets crowded, so no matter what time of year, day or time you go you will have plenty of trail to yourself while benefitting from the energy of others who are taking on the same trail as you. In peak hike times the parking lot does get full and sometimes a line of parked cars dots hwy 67 leading up the to parking area and trailhead to Iron Mtn. Speaking of time of year, this trail gets hot in summer months and you are even greeted by a Park sign that states High Heat Advisory make sure you bring plenty of water. I like to take plenty of water any time of year, so thats not much of an issue. 48oz minimum is always a good start. This hike is the sister hike to Mt. Woodson and as you look to your left when you climb Iron you will see the towers of Woodson to your left, especially from the summit. The summit of Iron has a “Hike Journal” so make sure you sign is and proclaim your accomplishment to the world! Take your time at the top and look out over the eastern views of Ramona, Mt Gower the lakes and dams to the left and right as well of course of Mt Wooodson to the North, again marked by the TV and Radio Towers. The descent of Iron can get tricky especially near the summit due to a much rockier trail than as you get close to the bottom. But descending Iron is one of my favorites just because of the panoramic views of the surrounding Poway and Ramona areas as you are heading down. Look for the dam to your north, and the blue blue body of water it supports. As a reminder, warm weather brings out snakes, even though it was January, it was 75 degrees this day, as I was coming back through the “Canopy” of trees at hike end, I turned corner heading for parking lot and there was a baby rattlesnake crossing the trail, beautiful creatures, they aren’t looking for you and as long as you leave them be all is well.
Have Fun Hiking Iron!
PS– Reward yourself with the best smoothies in San Diego County. Shop is at corner of Espola and Twin Peaks Rd. Tell him Mark sent you, Date Shake is Killer!
Directions to Trailhead: Exit 15 at Ted Williams Parkway, exit east to Twin Peaks Rd. Go right to Espola. Go right up Espola to Poway Rd. Go left to Hwy 67. Trail head is located on Highway 67 and Poway Road. On the east side of the road there is a small gravel parking area, restrooms too!
Water: 48oz minimum.
Hikeability/Distance/Time: Moderate, 6 miles, 3 hours give or take 15 minutes.
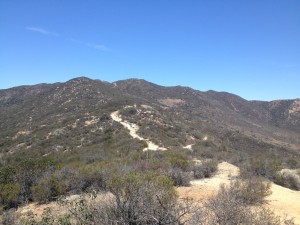
As you ascend you see the trail up in front of you climb but then level off as you hike along a ridge with great views of the Palomar Mountains to your right and the Cleveland National Forest to your north/ northwest. As you bend around and ascend the trail you will come to a point of a clearing to your left and off in the distance the trail to the summit is visible.
Directions: From San Diego, take Interstate 15 north of San Diego to exit 46 for Route 76. Turn left at the end of the ramp onto Route 76 and make the next right onto Old Highway 395. Drive 2.6 miles north and turn right on Stewart Canyon Road. Pass under the freeway to reach Pankey Road. Turn right and park in the dirt lot on the right. The trail-head is on the east side of Pankey Road. From the Coast take Route 76 east to Old Highway 395, turn left, Drive 2.6 miles north and turn right on Stewart Canyon Road. Pass under the freeway to reach Pankey Road. Turn right and park in the dirt lot on the right. The trail-head is on the east side of Pankey Road.
Respect your hiking limits, respect your partner’s hiking limits, , bring more water than you need and electrolytes for energy…
Directions Starting from the Sorrento Valley Trailhead West:
Los Penasquitos Trail Head West 4300 Sorrento Valley Blvd, San Diego, CA 92121
Exit Interstate 805 at Mira Mesa Boulevard/Sorrento Valley Road. Take either I-805 frontage road (Sorrento Valley Road on the west side or Vista Sorrento Parkway on the east side) 1 mile north to Sorrento Valley Boulevard. Turn right on Sorrento Valley Blvd. and continue 1 mile east to the western staging area. Parking lot is on the right off of Sorrento Valley Blvd. for Los Penasquitos Canyon Preserve. Park in the parking lot.
Hike Time and Distance: Across the Preserve and back from trailhead to trail head was about 11 miles. Hike time about 4 hours including break at the Falls.
Water and Food: On this day it was near 90 degrees so lots of water was consumed, about 90oz Beef or Turkey Jerky, Hard boiled eggs, cheese sticks and trail mix are easy to deal with for snacks.
A hidden hike that can be accessed from the West in Sorrento Valley and from the East at Rancho Penasquitos is the Los Penasquitos Canyon Preserve. Each of the mentioned locations offers a trailhead start that leads to a very scenic waterfall, with Rancho Penasquitos being 3.3 miles start to the waterfall and the Sorrento Valley side taking 2.7 from start to waterfall.
On this day I wanted to include both trails roundtrip. I started this hike from the West approach of the Preserve.
Los Penasquitos (meaning little cliffs) Canyon Preserve lies between Rancho Penasquitos and Sorrento Hills to the north and Mira Mesa to the south. Stretching approximately seven miles from the I-5 and 805 merge to just east of I-15; it encompasses some 4,000 acres of both PeÃasquitos and Lopez Canyons. The Preserve is jointly owned and administered by the City and County of San Diego.
What You Can Expect From This Hike!
A waterfall cascading through volcanic rock stream side forest of giant California live oaks. Groves of majestic sycamore trees.year-round stream populated by pacific tree frogs, crayfish and largemouth bass.
A freshwater marsh hosting a variety of aquatic birds including great blue herons, egrets, mallard ducks and more. Mule deer, bobcat, red-tail hawks, rattles snakes, coyote, and raccoon are just a few of the mammals that can be observed throughout the Preserve.
The Sorrento Valley trailhead start offers a good size parking area and a restroom. As you begin you will come to a fork in the trail one leading you to Lopez Canyon the other pointing you towards the waterfall to the left.
As you veer to the left you will go under the Sorrento Valley Blvd. overpass. The trial from here climbs somewhat and the trail turns from compacted dirt to a rocky path. This portion of the hike is the only real climb as the remainder of the trail is flat. You are now on your way to the waterfall, which is 2.7 miles from where you started.
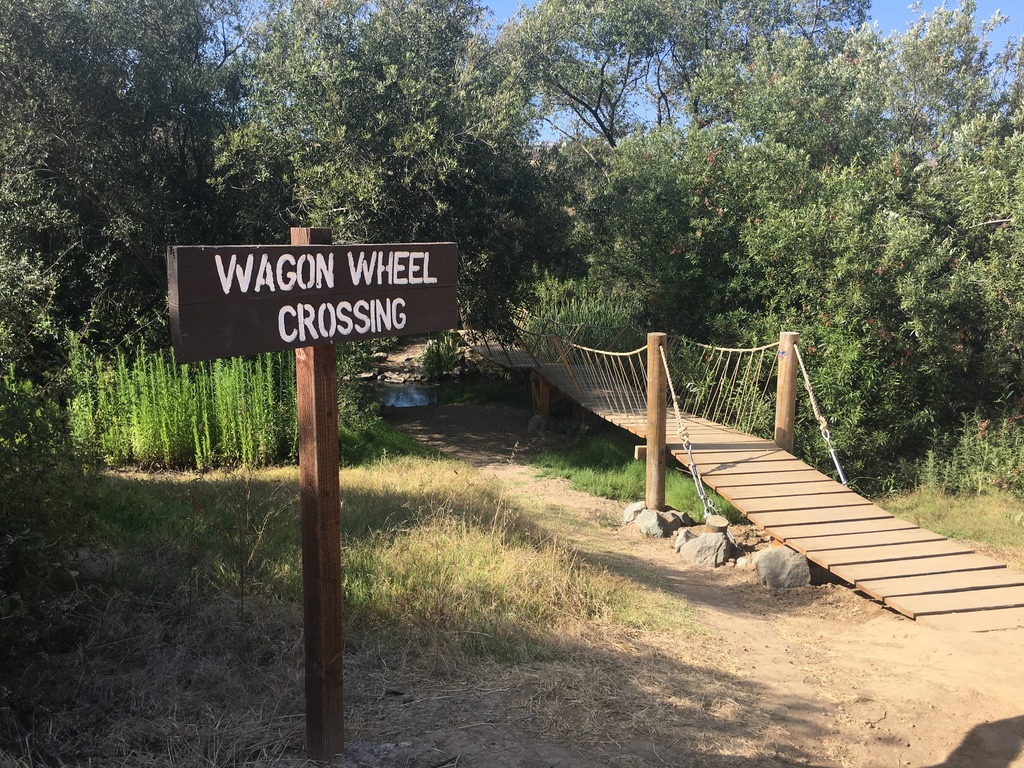
The trail has two different paths you can take. As you come upon the wagon wheel trail section you can veer left to cross the creek, which leads you to a secondary trail and the waterfall, or you can continue on and be lead to the same waterfall just from a different side, either way you will get to your destination.
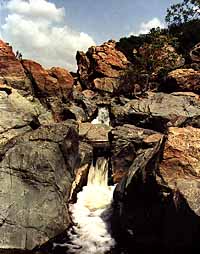
We stopped at the waterfall to take a break and since it had rained the day before there was plenty of water running through the rocks and river. After our short break we were ready to continue on to the other side of the trail and the Rancho Penasquitos trailhead start from the East.
Since this trail is so flat, and more a nature walk then a hike, we covered the next 3.3 miles in less than 90 minutes.
If you want to spin off the trail as you approach the Penasquitos start you can visit the Ranch House, which besides having a historical story is a fun place to walk around.
A trail marker lets you know where to turn. Our destination of the Penasquitos trailhead start was accomplished we stopped turned around and repeated our journey back to the Carmel Valley trailhead.
Starting from Rancho Penasquitos Trailhead:From I-5: Take I-5 to the 56 East, following signs toward the 15. Exit at Black Mountain Road and turn right. At the intersection of Black Mountain Rd. and Mercy Rd., turn right into the Penasquitos Canyon Open Space Preserve Parking lot. From I-15, exit at Mercy Road. Southbound traffic turns right; northbound traffic turns left and crosses the freeway. Mercy Rd. will dead-end at the parking lot for Penasquitos Canyon.
To build up hike endurance, ( this was our last hike befor Mt. Whitney) take in some scenery with a waterfall to boot this hike is very doable and a great family hike to take the dog on as well fun hiking the Los Penasquitos Canyon Preserve!
TO TRAILHEAD: From northern or western San Diego, take the 54 East and merge onto the 94 East. The 94 eventually turns back into the 54, or, Jamacha Blvd. Pass the shopping centers and make your first right on Willow Glen Drive. Make your first right onto Steele Cyn Rd. where you will see signs for the Cottonwood Golf Course. Make your first left onto Jamul Drive. Drive carefully up the canyon for a couple miles and turn left into the dirt lot where the trailhead is located.
From southern San Diego, or Campo area, drive up the 94 until you see Lyons Valley Rd. Turn right onto Lyons Valley, and left onto Jamul Drive. Right after you pass the Jamul Community Church, the trailhead parking lot will be on
Hikeability: Moderate-Strenuous. When & Temp: Saturday, June 14, 2014, 1-4 pm 83 degrees Time and Distance: 5.3 miles about 3 hours with 20 minutes at the top. Water & Food: 70 oz of water, an orange and snack bar
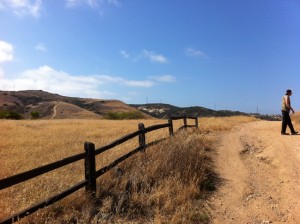
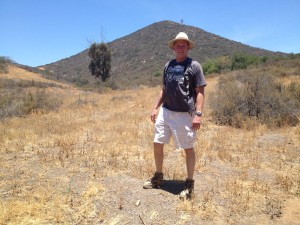
Hiking trails are plentiful in our county including an area I haven’t had much experience hiking, the East County part of San Diego. East County is home to some of the more aggressive hiking trails out there in our County and Southern California. Not only due to the elevation of the mountain summits but the aggressiveness and challenge of the trails as well.
On such hike is the McGinty Mountain hiking trail located in the rural community of Jamul, CA. Although not long in distance, approx. 5.3 miles return trip, the trail offers quite the challenge! Most of the trail composition is hard packed clay and soils mixed with gravel and in certaains sections, loose gravel and jagged rock. .
The trailhead is located in an unassuming area of Jamul, and quite easy to get too from Hwy 94. A small parking lot off of Jamul Drive landmarks your start. The trail starts out easy enough and on this day was hot and dry. This hike also isn’t known for a lot of shade, so take lots of water, bring a hat and sunscreen.
As you start the trail you will quickly start to climb, follow the switchbacks to the false peak of McGinty Mountain as you do you pass through and climb above the local neighborhood of very big ranch-style homes. In fact, at one point on the trail, you will come to a fence that separates the trail from the neighborhood, stay right and continue along on the switchbacks up.
You will go approx. one mile until you reach the false summit and fist bluff area. A large shade tree to the right landmarks this for you as the trail leads you to this open area. Take a break here, eat an orange catch your breath.
The most challenging part of this hike is ahead. Head back to where you just exited the trail, which is to the left, and continue on, and soon you will see the “real” peak of McGinty and the trail that leads to it. From this point, you have about 1.5 miles to go to the peak.
The trail splits the surrounding area, which gives you a great view of Mexico to the right or east and the distant Pacific Ocean to the left or west. In fact, as you look back on the trail as you approach the summit, the trail looks like a “backbone” as it traverses the mountainous terrain of the area.
At this point as fellow hikers reminded us, the part of the trail is “easy”. Soon you will see the trail begin to climb, get steep, as it leads you to the summit. There are two places where the trail gets very challenging and very rocky. Make sure you take it slow and are aware of the trail composition.
After your first steep climb, you have a chance to get your breath and take on the second leg of the climb and the summit of McGinty. As you approach the summit you will see a high point to your left full of boulders, make your way up the makeshift path to the peak. Sit here enjoy your accomplishment, snack, hydrate and take in the beauty of the East County and the surrounding mountains.
The McGinty summit offers one of the more beautiful panoramic views of our area, with The Pacific Ocean, Mexico, neighboring mountains such as El Cajon, Miguel, and Lyons Peak and in the distance Mt. Woodson and Iron Mountain Poway. all easily viewed from the Peak. If its a very clear day you may be able to see Pt. Loma in the distance to your southwest.
The return trip is the same trail back, I always find the descent harder to do than the ascent especially on the knees, watch your step and enjoy your hike back!
Not many know of McGinty Mountain in the East County, but this well kept secret is very much worth taking on and is listed #23 on the list of peaks in the county at www.100peaks.com.
Have Fun Be Safe! HIke with a partner, respect your partner’s limits, respect your own limits.
Just the thought of hiking a place called Hell Hole Canyon conjures up an image of a rigorous, treacherous, hot landscape with snakes and hazards all around.For the most part that pretty much describes this hike that’s a hidden find and tucked into the mountains of Valley Center.Although it wasn’t hot and there were no snakes out and about HHC is one interesting hike, and I mean that in a good way.In fact what at first appearance is a walk in the park quickly can turn into a strenuous, challenging and very scenic hike.Getting to Hell Hole Canyon takes you past Lake Henshaw and as you follow the easy directions of the route leads you to the end of the road into a very well kept staging area equipped with clean restrooms and posted information of the trails and preserve. You can download a preserve map or get one of the very informative and nicely made brochures at the trailhead start which contains glossy photos of the preserve.The preserve is made up of 5 trails that comprise the trail system; Hell Creek Trail, Canyon View Trail, Horsetheif Trail, Rodriquez Peak Trail and Paradise Mountain Trail.These trails total about 13 miles if you hike each and every one.However, the trail hiked on this day was a little over 9 miles leading up to Paradise Mountain which included the Hell Creek Canyon Trail at the start, the Rodriquez Mountain Trail that fed into the Paradise Mountain Trail and then looping back around to the Hell Creek Canyon Trail and back.The hike starts out descending which of course means on the return it is ascending. Although not terribly aggressive, after you’ve hiked 8 miles of trails including a pretty steep ascent up to Paradise Mountain, that last Ascent to end your hike is definitely a challenge.Hell Creek Trail offers a diverse start to your hike, hard packed sand through a dessert type landscape quickly turns into low lying greenery and California Oaks.This part of the hike is leisurely and easy to do.Off in the distance you can see Rodriquez Peak and Paradise Mountain.As my hiking partner commented, “Oh, that doesn’t look very far to the summit.”Famous last words as I’ve never been on a hike before where you have to hike nearly two miles before you get to the base of the mountain.The whole area of the preserve opens up to many beautiful scenic views and is well worth the journey that lies ahead.As a reminder if you want to take on the Paradise Mountain and Rodriquez Peak Trail which is quite strenuous id follow the advice of the Preserve brochure which states; “To minimize the severe change in elevation, we recommend hiking this loop in a counterclockwise direction.”We of course read this as we were about done with our hike and about to ascend out of the canyon. The hiking trails are well-marked, very clean trails and except for some spots near the top of Paradise Mountain on both the ascent and descent, which are rockier, are smoothed hard packed trails.As you start to ascend these trails the soil turns from sand color to red clay, which as we found out on a damp day can turn to red mud. The highlights of this hike for me were the views from Rodriquez Peak and Paradise Mountain.Viewpoints are marked V! which offer a great view of the San Luis Rey River valley and V2, which gives you a view of Hell Hole Canyon.I’ve not been on too many hikes that offer you such a mountainous panoramic view.Also, it’s a great view of the valley below including both Valley View and Harrah’s Casinos. You really do feel high up looking down on those far away structures.The summit of Paradise Mountain sneaks up on you, so as soon as you see the V1 marker you are pretty much there.At this point from trailhead start and remembering we did the “clockwise” route up, you are about at the 4.1-mile mark, we stopped at about mile 4.33 and had lunch.This spot offered a great view of the San Luis River Valley.After lunch we just continued hiking “clockwise” on the trail and back down the Paradise Mountain Trail, which eventually met up with the Hell Creel Trail.This trail led us back to the trailhead start.A side note; There is a spot in the Preserve called Abandoned Homes, which we did not go to but does look like an interesting landmark.You can see this area as you descend Paradise Mountain. I enjoyed everything about this hike and trail system including the diverse trail landscape, the challenge of the hike, a climb up a mountain, great views from everywhere and the fact you can quickly turn a 3 mile hike into a 9 mile one if you choose.Although, snakes, bobcats and coyotes are common in the Preserve we didn’t see any, which for the most part works for me.Although I do enjoy seeing these beautiful creatures of nature, just not too close.With Rodriquez Peak and Paradise Mountain in the background the final climb out of the canyon led us back to our starting point and the staging area of the Preserve.It’s always a great feeling of accomplishment at the end of any hike, and Hell Hole Canyon did not disappoint regarding accomplishment. If you are looking for a hike that most up here in North County don’t know about I highly suggest hiking Hell Hole Canyon whether it be a 3 mile or 9 mile hike, the Preserve has a lot to offer!
On the two-year anniversary of my adding the hiking experience to my journey I’m reminded that my first hike was at Torrey Pines Reserve.Now two years later I am hiking places such as Hell Hole Canyon, what a great experience it’s been and I am looking forward to what trails lay ahead on my hiking journey.
Hellhole Canyon Preserve 19324 Santee Lane Valley Center, CA 92082
Phone number: (760) 742-1631
Directions: From Escondido take East Valley Parkway to N. Lake Wohlford Rd. Go right on N. Lake Wohlford Rd. for 6 miles to Paradise Mountain Rd. Make a right at Paradise Mountain Rd. Take Paradise Mountain Rd. for 3.5 miles to Kiavo Rd. Take Kiavo Rd. one block to Santee Lane and make a left up the preserve entrance.
Hike-ability:Easy in spots, strenuous in other’s depending on if you climb Paradise Mountain
Water & Food:Cool weather made it easier on water but still consumed 70 oz. Brought Lunch and snacks too.Whatever lunch is make it a protein.
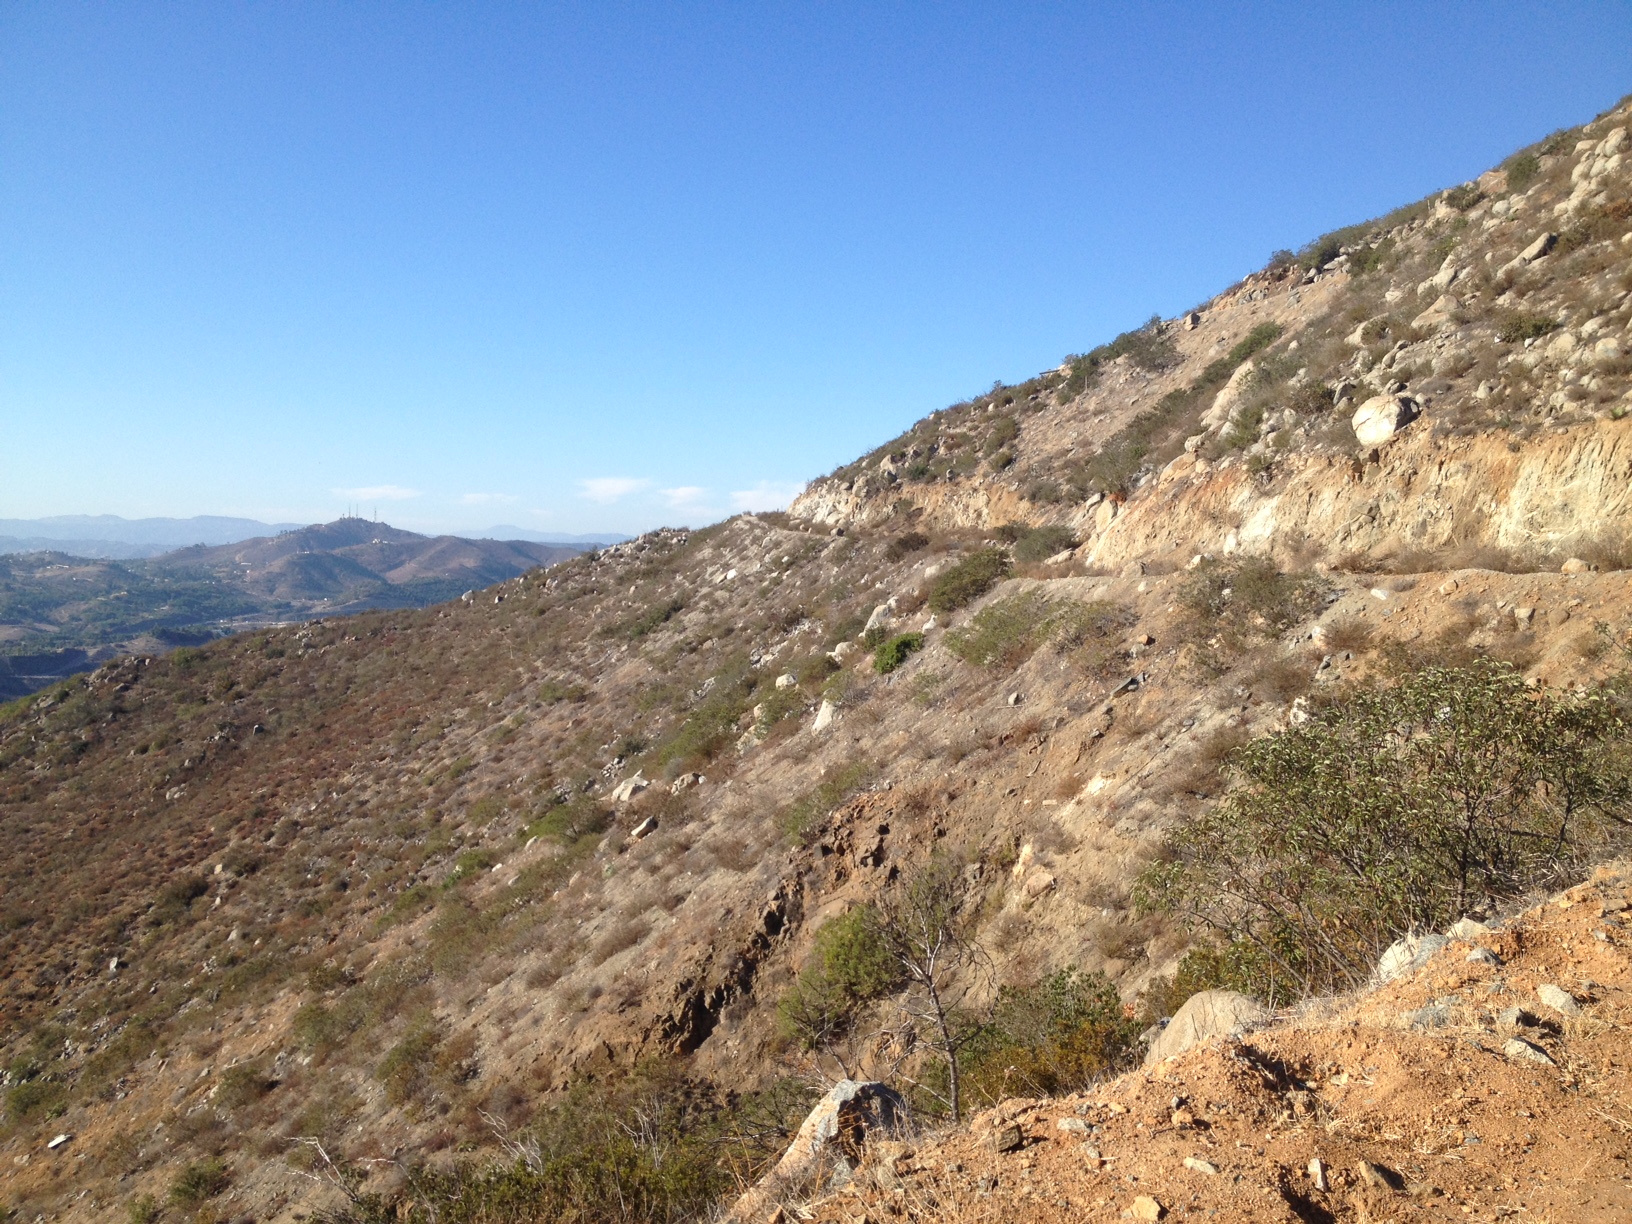
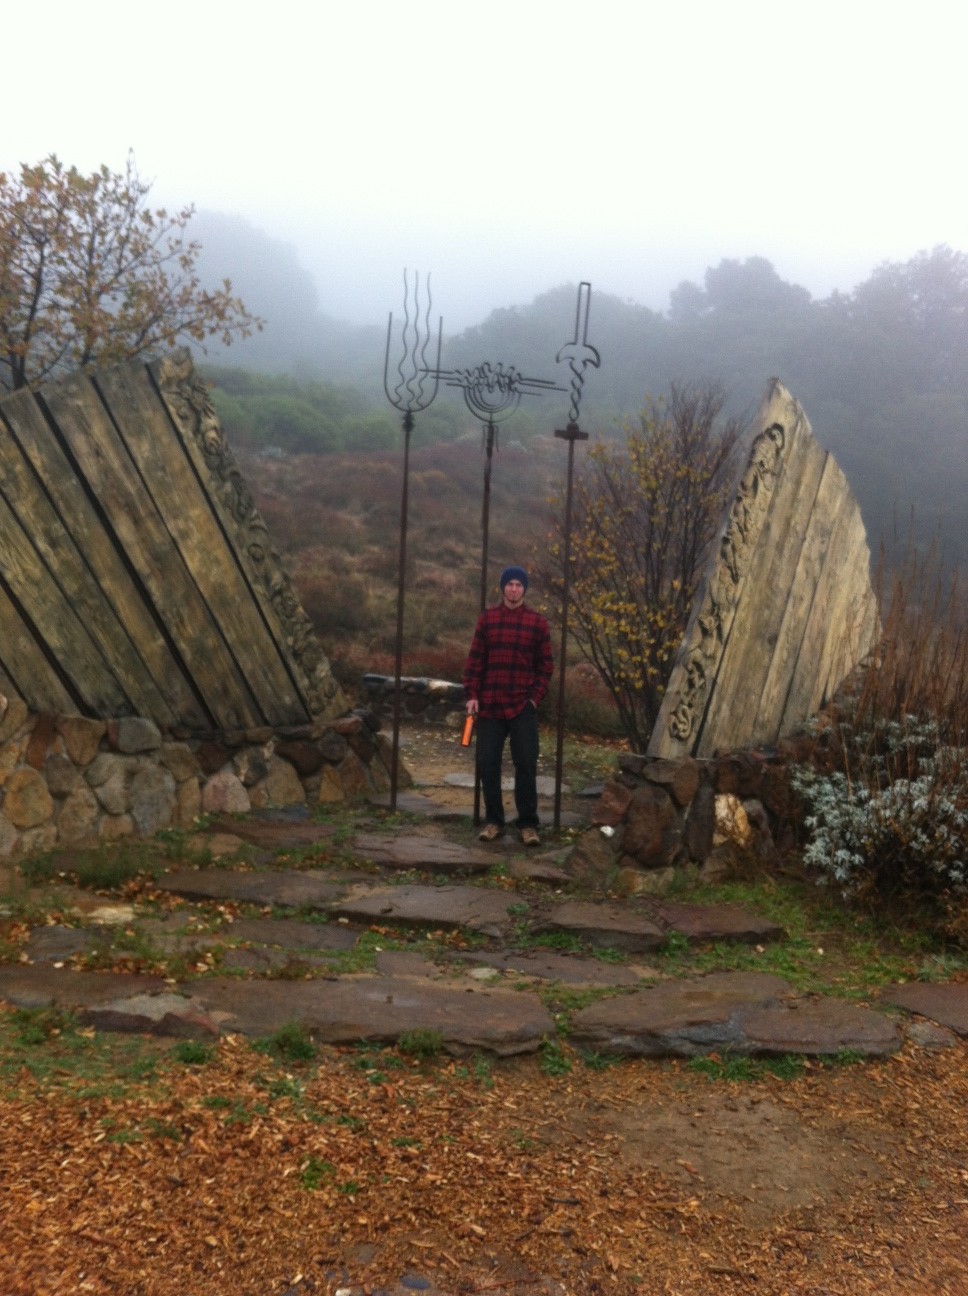
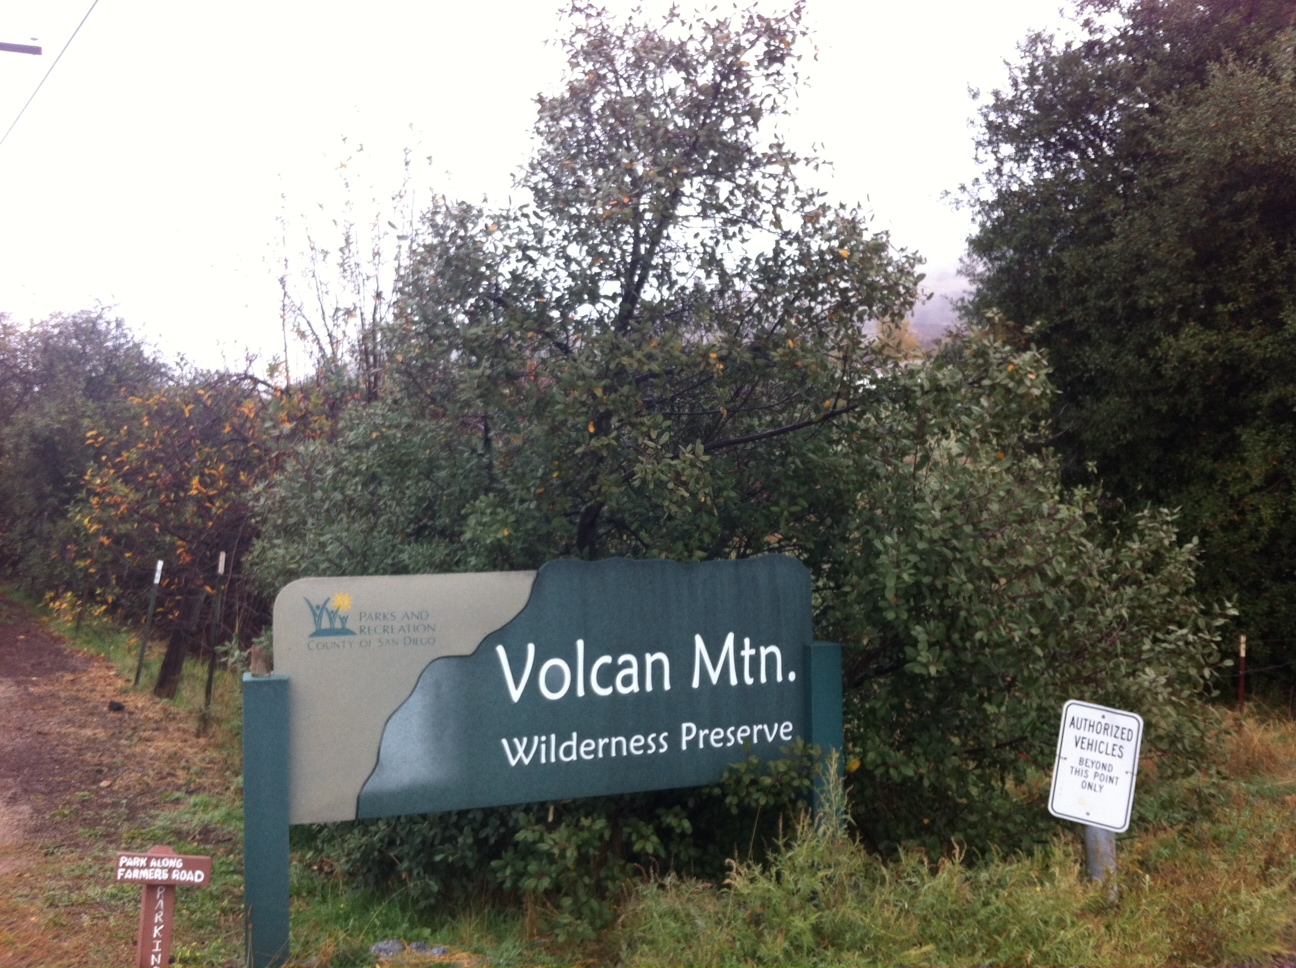
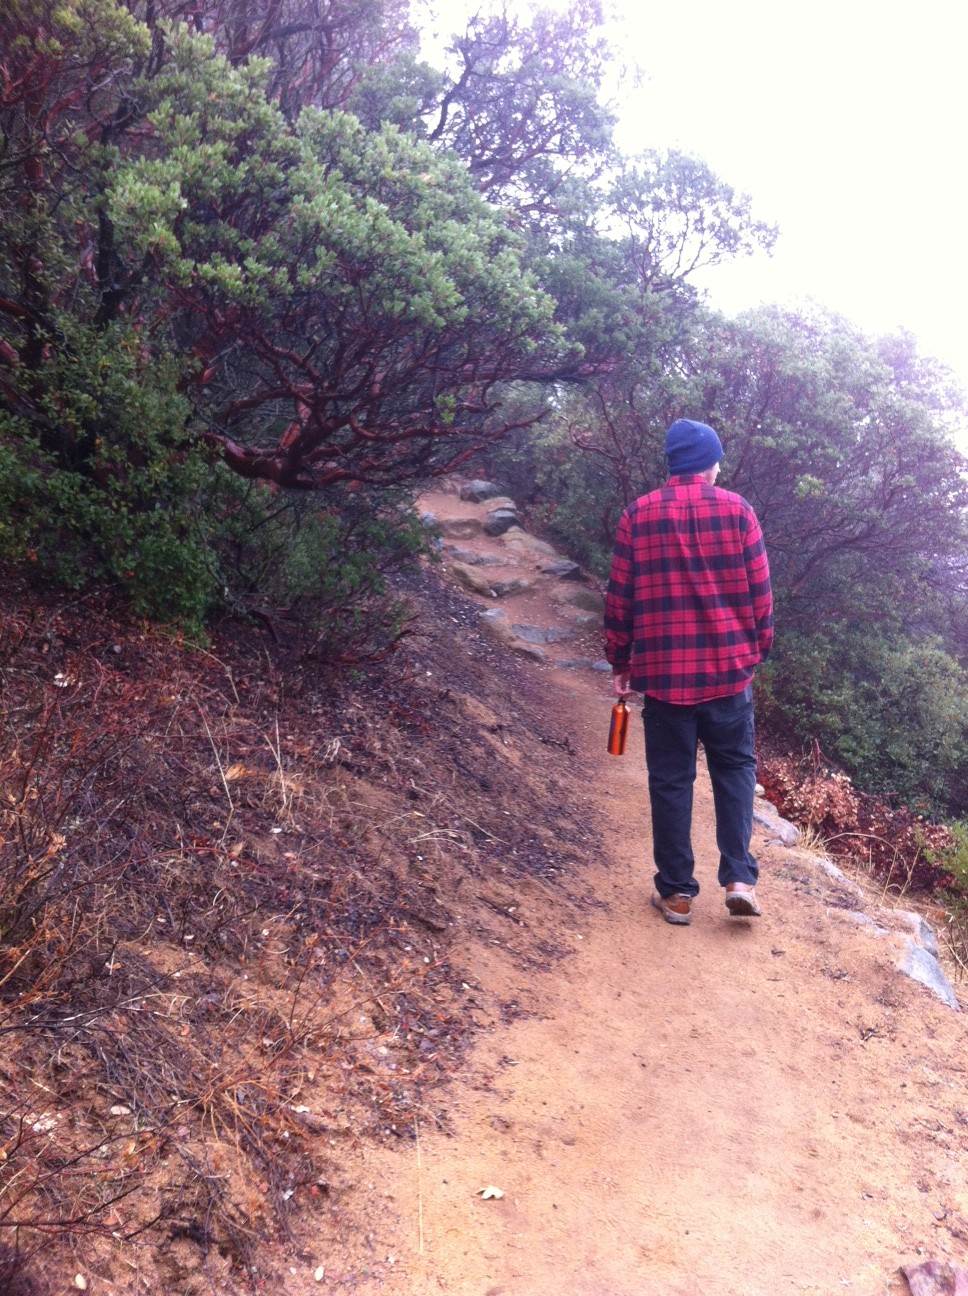
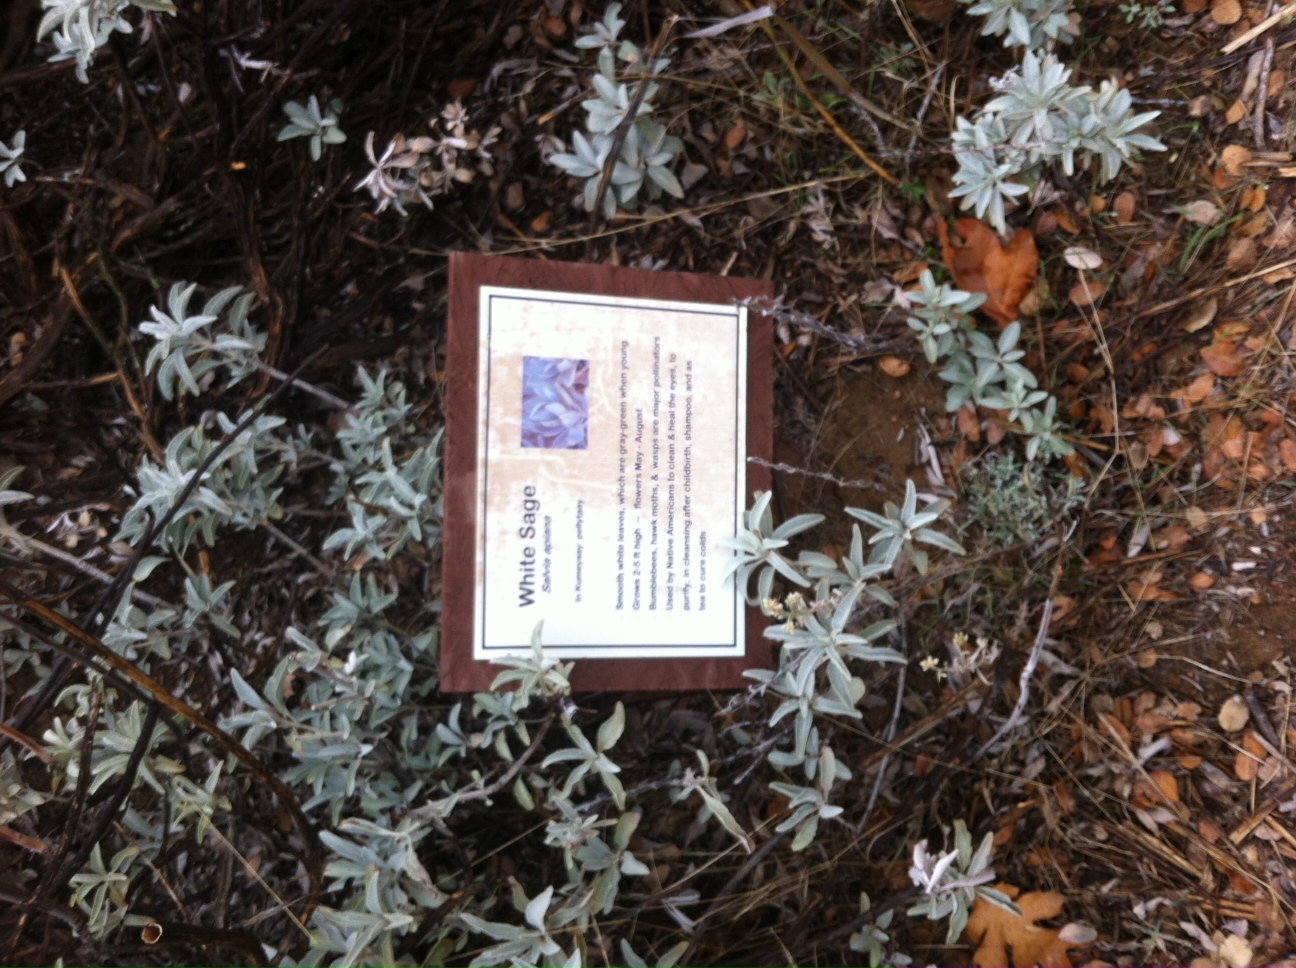
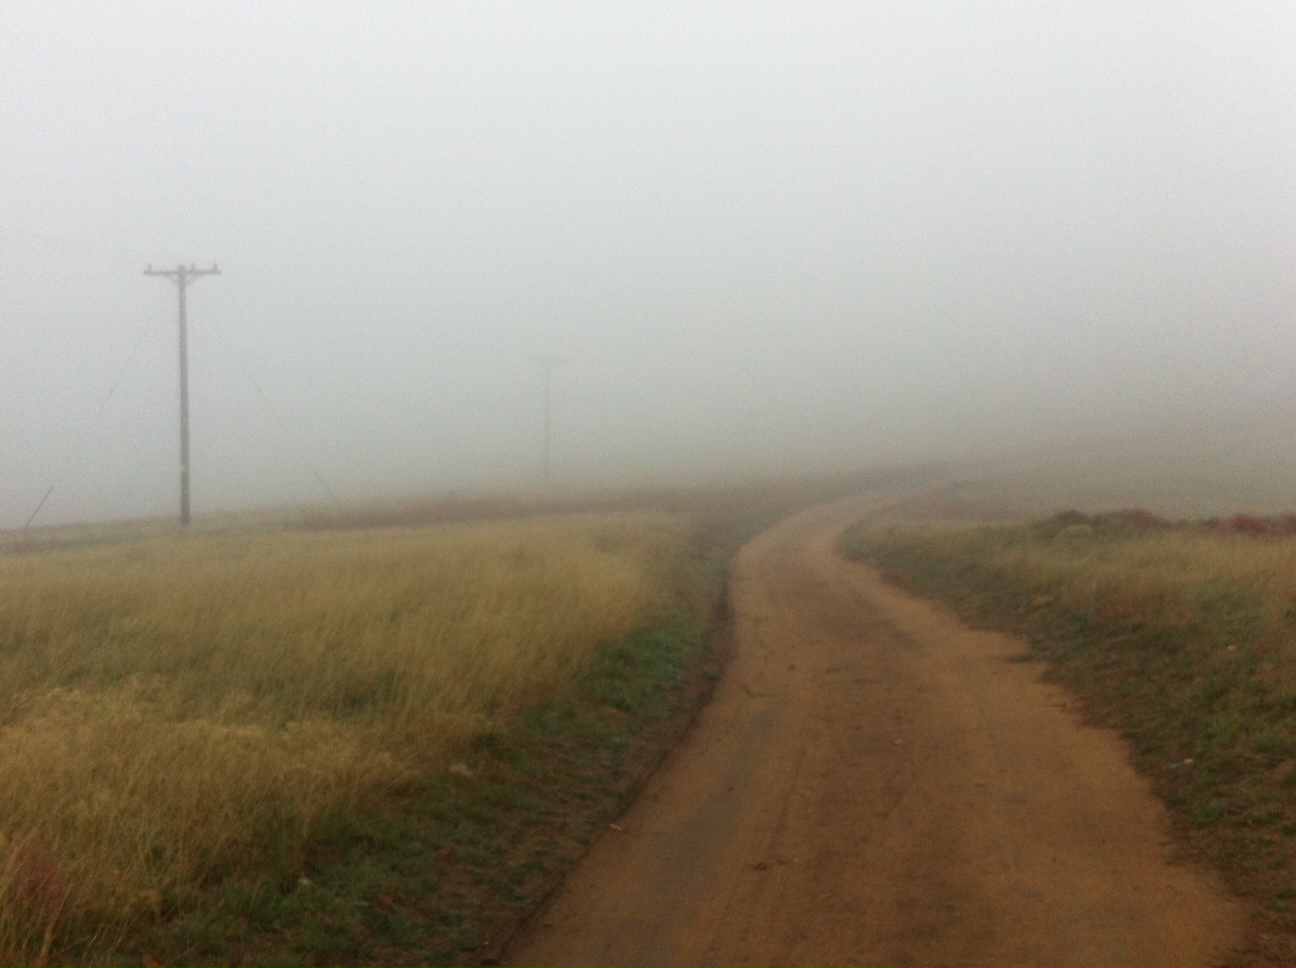
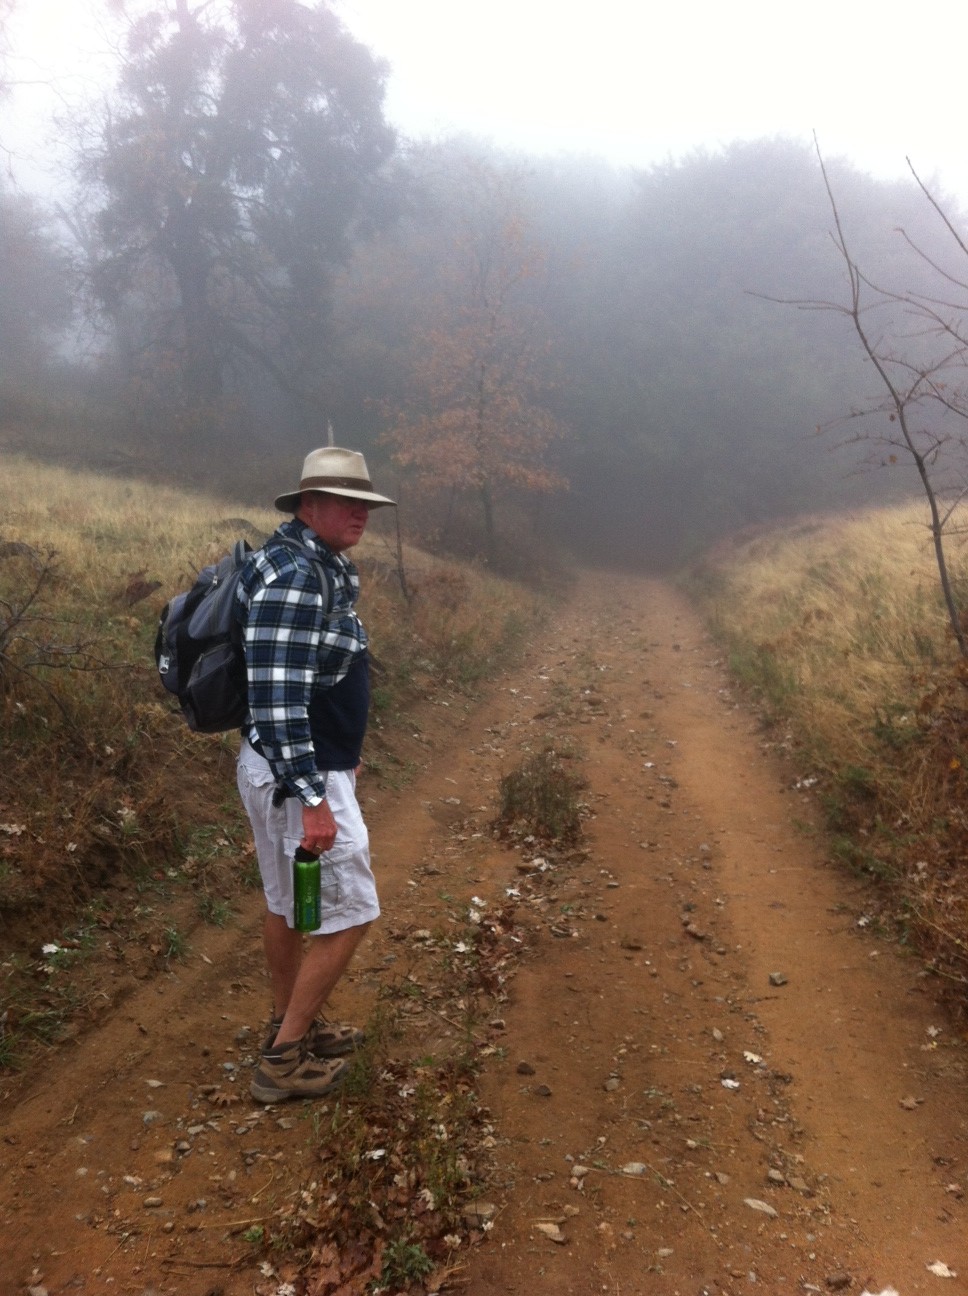
There are hikes and their are hikes! Volcan Mountain Wilderness Preserve, just outside of Julian, CA is one of those hikes. Volcan offers raw beauty as well as a very strenuous physical challenge. On this day it also offered 43-degree temperatures and 45 mph winds, lots of fog and drizzle. Quite frankly the challenging weather just added to the richness of this hike and a hike I put in my top 5 in the county. Volcan Mountain Wilderness Preserve is located off farmer’s road, is easy to get to and parking is roadside off of Farmers. A sign marks the trailhead entrance, and a very abstract and beautiful sculptured gateway marks the trailhead start. Julian artist Jim Hubbell contributed the design for the gateway, building the rock wall using white pegmatite and black tourmaline in the raw stage with the shiny black being obsidian. Right from the get go you begin a steady climb with switchbacks along a well-carved compact trail. Some spots are rocky, but this serves as an advantage for you to get your footing as the trail twists and turns. You will soon come to the Five Oaks Trail signpost, which is on your immediate right. Various vegetation lines the trail including oak, white sage and other plant life. Many of the various plants are marked with signs and description. Follow this shaded trail the rest of the way up to the mid-summit part of the hike. A sign will alert you as you arrive there. From here you can turn right and head up .3 mile to the gate, which leads you the final 1.2 miles to the 5333-foot summit. Warning: The summit is only open on the weekends, and from April to November. A double locked wired fence and gate attests to this fact. Not that we jumped the gate to head on up to the summit, (and I’m not suggesting this but), if you do, you are in for a treat of an elevation change. Not only does the vegetation switch to an Alpine feel, but also the winds kick up. Soon you are above the pines and in a sparse area as you ascend to the summit.
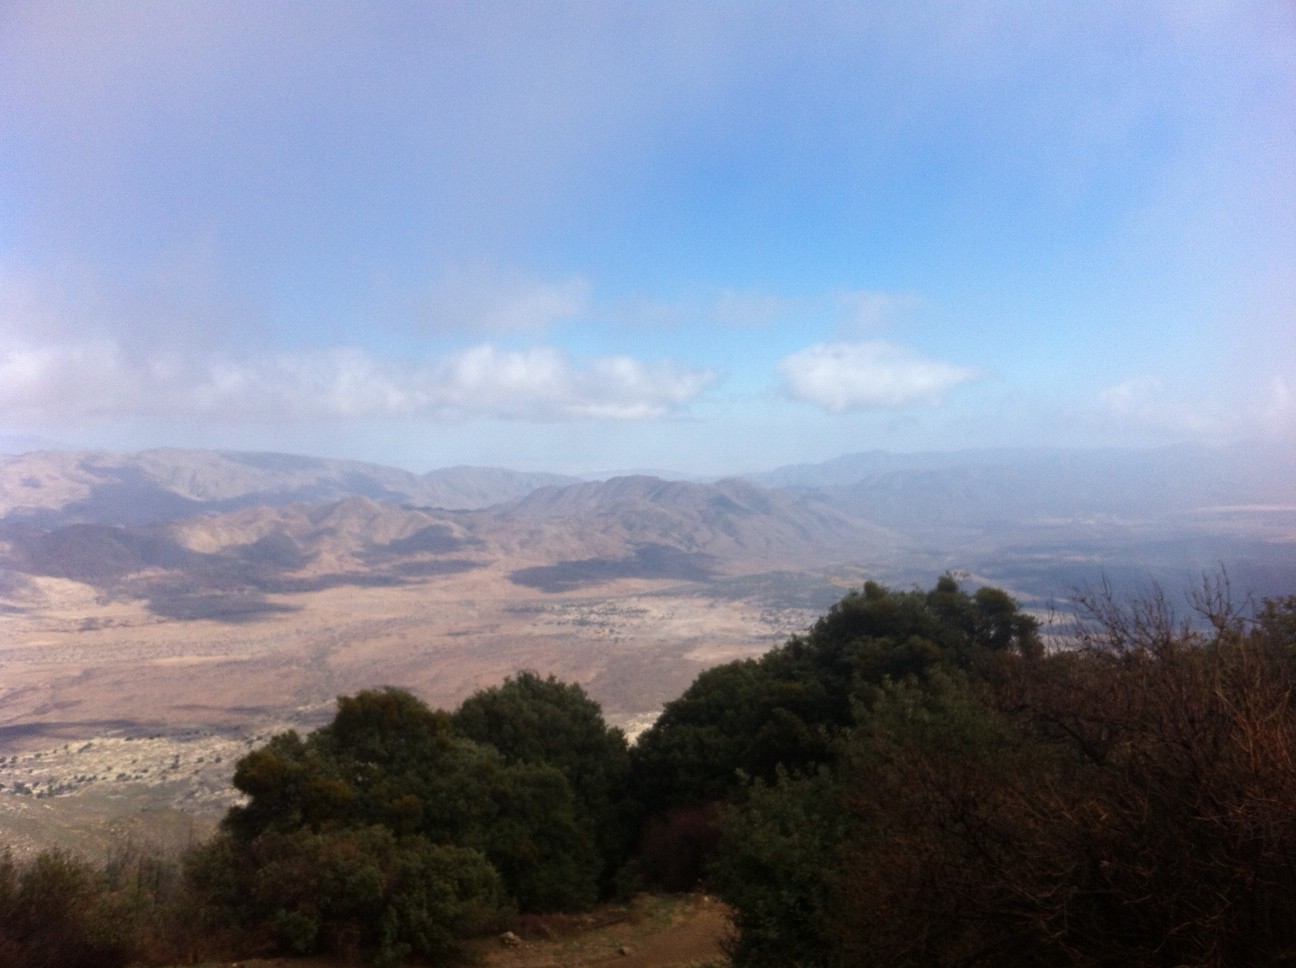
On this day the winds were howling, literally, and the fog was blowing by us at a pretty quick rate. (I’m guessing that’s why they close this last section of the trail during winter) The final third of the ascent is uphill, but as far as the entire hike, I say the initial hike up the Five Oaks Trail trail is steeper and offers the more strenuous of the entire hike. The trail at the summit loops around and offer amazing views of the valley floor down below, Earthquake Valley, and far off in the distance, the Salton Sea. Great view and not one I had expected. The descent down lead us back to the same midpoint summit but from here we took the Fire Road Trail back which leads you back to the trailhead start. The ascent up total mileage is 3.1 the descent down is about a mile less at 2.1 miles.
I can’t say enough good things about the Volcan Mountain Wilderness Preserve trail. It is strenuous, so if you’re not in hiking shape you are going to huff and puff, if nothing else because of the climb up to the 5333-foot level summit.
Directions: Take Highway 78/79 into Julian, to Main Street. Going north, Main Street turns into Farmer Road. Take Farmer Road to Wynola Road and turn right, then a quick left back onto Farmer Road.
HIkeability: Strenuous
Distance: 5-6 miles depending on route 2.5 hours
Water and Food: Yes and at least 50oz, more in heat. Snacks or a small lunch
What you need:33oz water, orange or a small snack, good hiking shoes (no running shoes or sneakers, too slippery on the rocks and gravel)
How long:Distance wise just over 3 miles round tip. Time wise, ive done this hike in as little as 60 minutes round trip, today 90 including stop at top.
How to get there: From Interstate 8 – Take 8 to the College Avenue exit. Proceed north on College Avenue 1.0 miles to Navajo Road. Turn right and proceed on Navajo Road 1.9 miles to Golfcrest Drive. Turn left on Golfcrest Drive to enter parking lot.
From Route 52 – Take 52 to the Mast Blvd. exit in Santee. Driving east, turn left onto Mast Blvd., go under the freeway to the first traffic signal (West Hills Parkway) and turn right. Driving west, turn right onto Mast Blvd. and right onto West Hills Parkway. Take West Hills Parkway to Mission Gorge Road and turn right. Proceed down Mission Gorge Road 1.9 miles to Golfcrest Drive. Turn left onto Golfcrest Drive and proceed to the top of the hill. The staging area is on the left at the intersection of Navajo Road and Golfcrest Drive.
A hike to consider if you are looking for a relatively easy, short, scenic workout kind of hike is Cowles Mountain, a very popular trail which is part of theMission Trails Regional Park system in Santee, CA.Besides Torrey Pines this may be the most traveled trail in the county, so much so that the main trail-head start at Navajo Road and Golfcrest Drive. presents quite the parking challenge, especially on the weekends.
There are other trail-head starts to this hike but on this day I choose the Navajo Road and Golfcrest Drive start. Cowles (pronounced, Coals) is the highest peak in the City of San Diego at nearly 1600 feet. Although not long at just over 3 miles up and back, the trail is all climb based on a series of switchbacks the entire ascent to the summit. This hike is very doable, offering a physical challenge, great views of Pt. Loma, San Diego, Mexico, the Ocean, mountain peaks of the area including El Cajon Mountain and of course the therapeutic benefits of the hike. As far as I am concerned not enough can be said of the therapeutic benefits of hiking.
Just the fact you are out in nature provides a calm and relaxed state. Combine that with the physical component, which gets the endorphins, flowing producing a positive feel good state of mind as well as many of the five senses (sight, hearing, smell, touch and taste) being stimulated and satisfied, and the sense of accomplishment finishing a demanding task. As far as the physical demands of the trail, this past summer a lot of the trail was maintananced and many of the eroded beat up sections of the trail were cleaned up.
However, the hard packed rocky composition of the trail still remains thus restoring the hike that Cowles is known for. In fact, it is also these rocky spots along the way that have caused more than one hiker a sprained ankle or a ride off the mountain in a helicopter, ss always be careful and take your time.
Besides Iron Mountain I call Cowles my go to trail that provides me with what I want from a hike; challenge, a physical workout, a place to get a mental break and a mountainous adventure within the confines of the city.
So if you are looking for a quick fix of a hike that is within driving distance of where ever you are in the County, Cowles Mountain is the hike for you.
Hiking out in the East County has become my favorite place to find a trail. The biggest reason for me is that everywhere you are surrounded in mountain scenery and great views. Just driving to these trails provided you with that. Lawson and Gaskill Peak do not disappoint here , as the drive out as well as the hike itself offers beautiful scenery. Gaskill and Lawson peaks are located SE of Alpine, CA and about 10 miles north of the International border. They stand right at the SW boundary of Cleveland National Forest’s Descanso district.
 You can reach Lawson Peak most directly by way of the south segment of Carveacre Road. Ostensibly this is a dirt road, but actually it’s more like a deeply rutted wide trail, best suited for hikers and expert mountain bikers. The start of the old road is precisely at mile-marker 13.0 along Lyons Valley Road, some three miles east of the intersection of Honey Springs Road and Skyline Truck Trail. Limited parking is available in two small turnouts on Lyons Valley Road. There is a Yellow Swing Gate that indicates the trail/road start,. This hike climbs the entire way so take your time, develop a nice easy pace and break if you need.
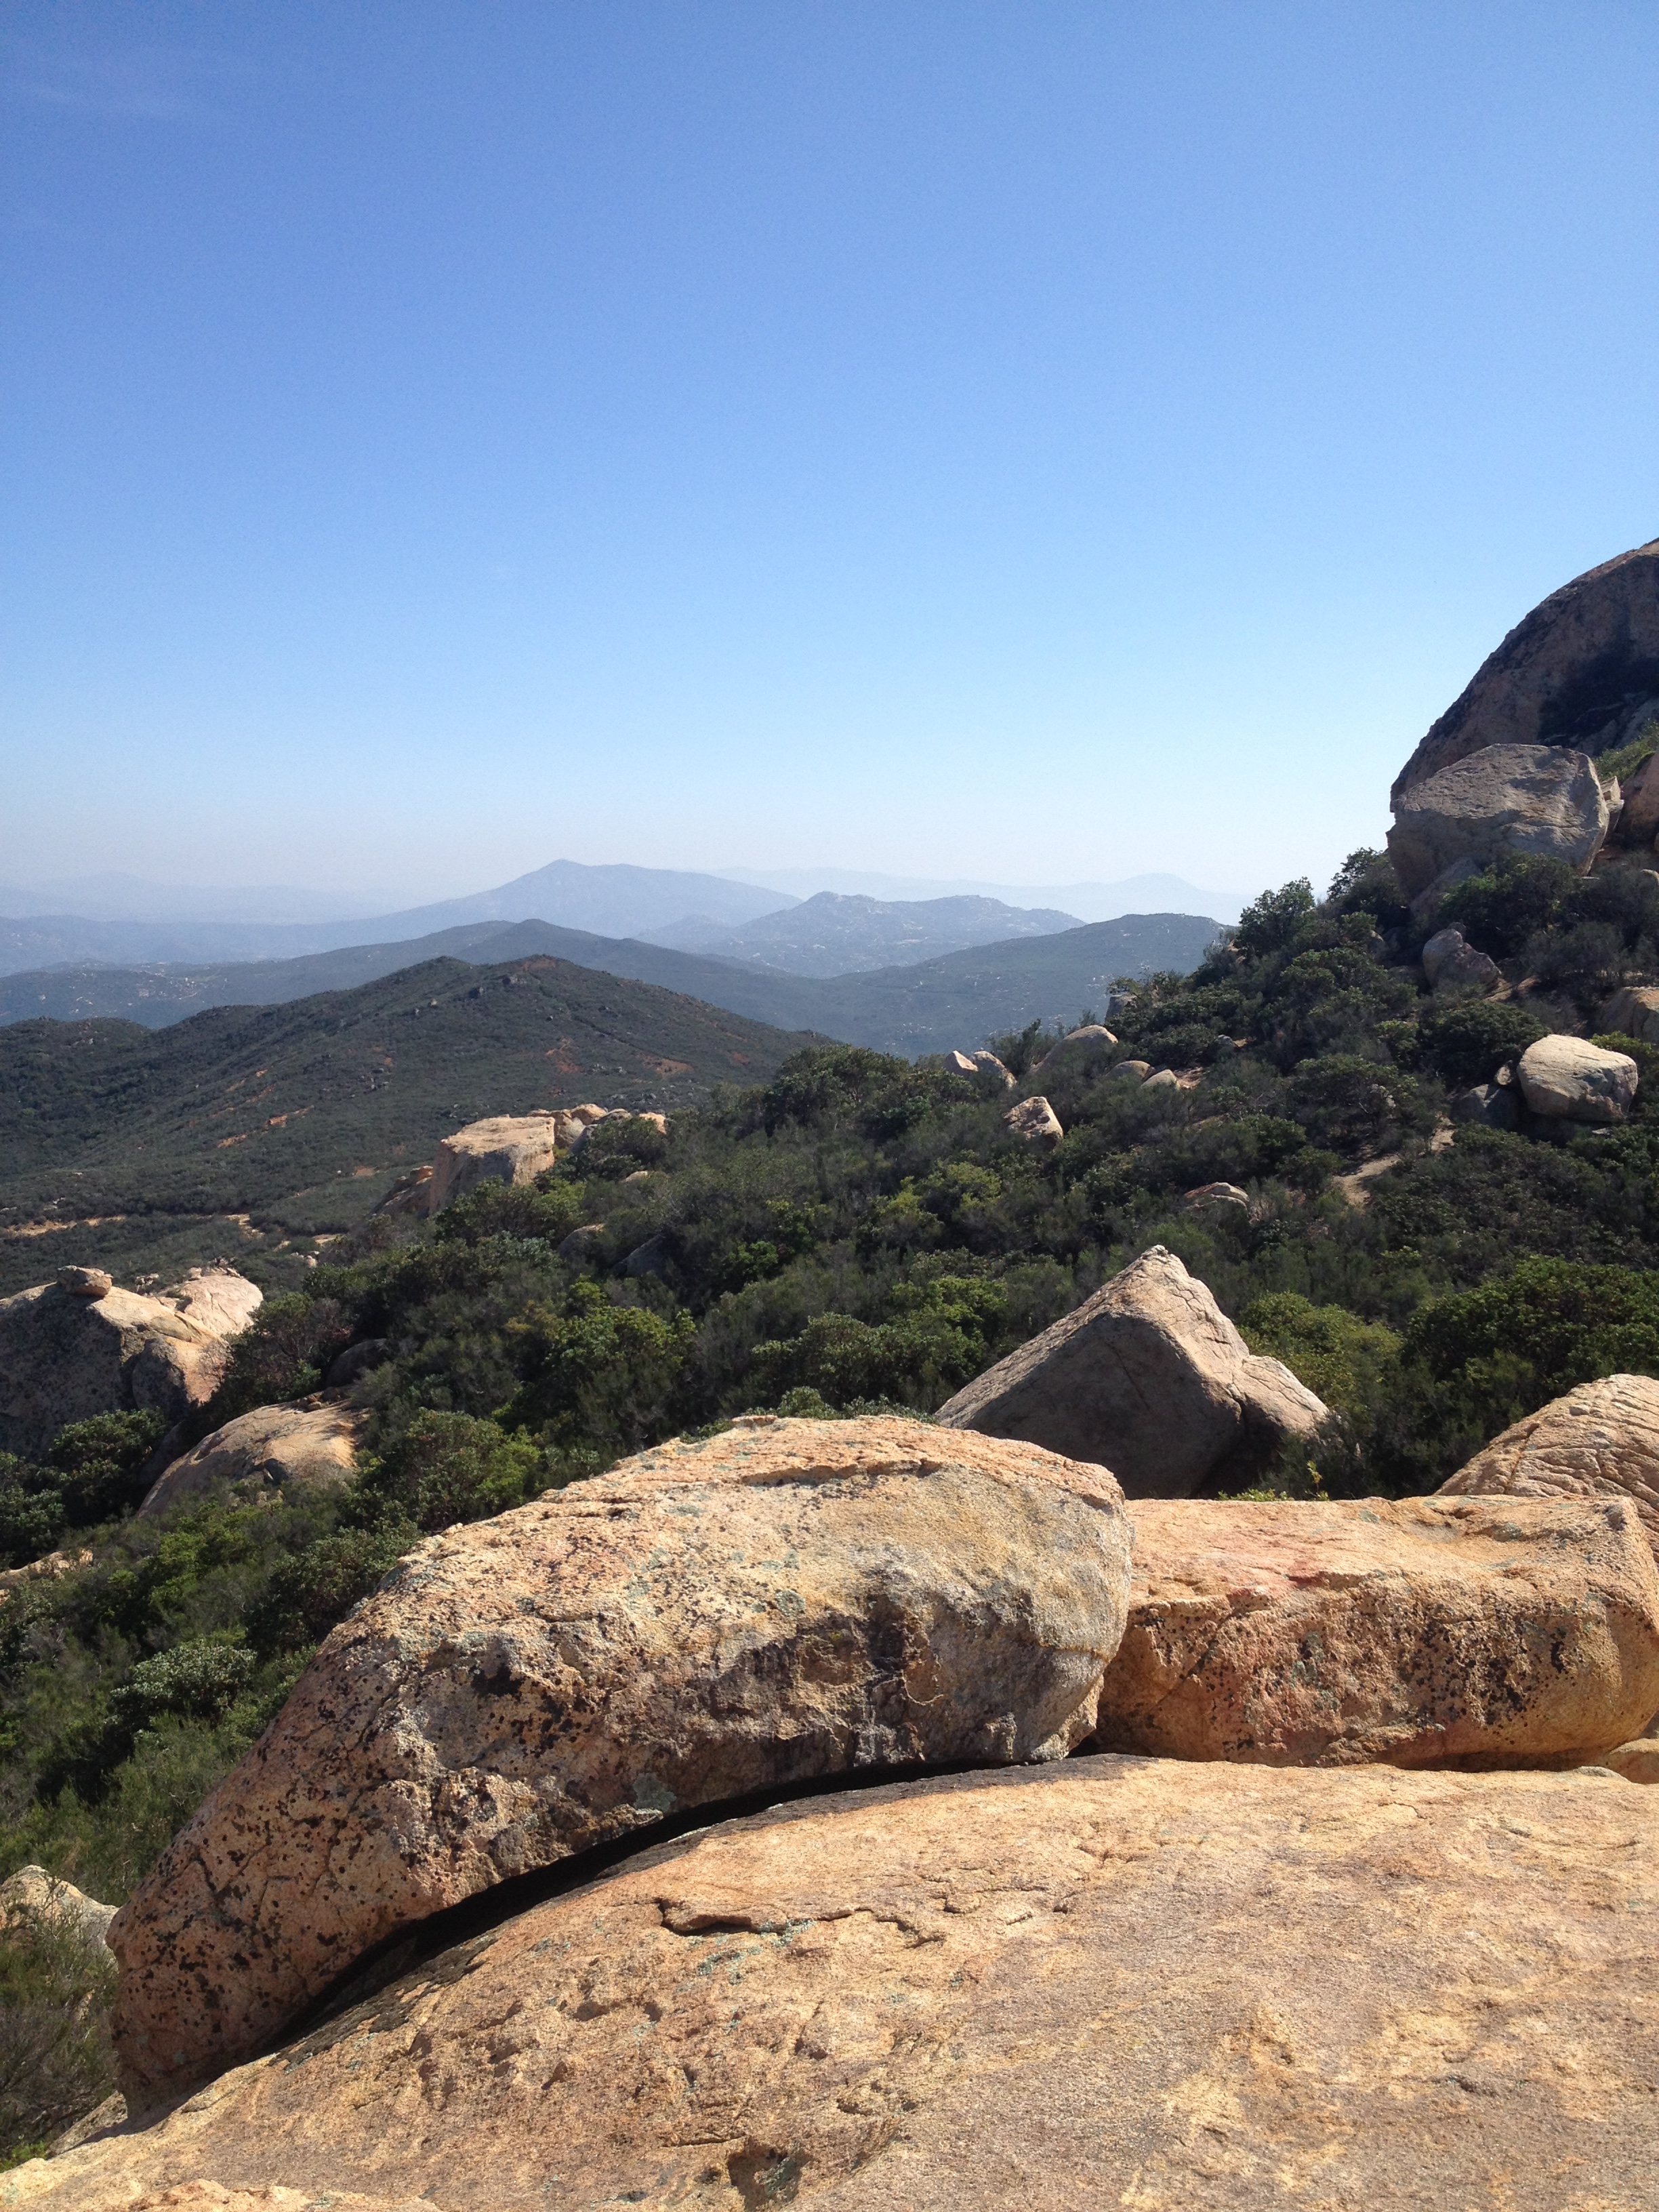


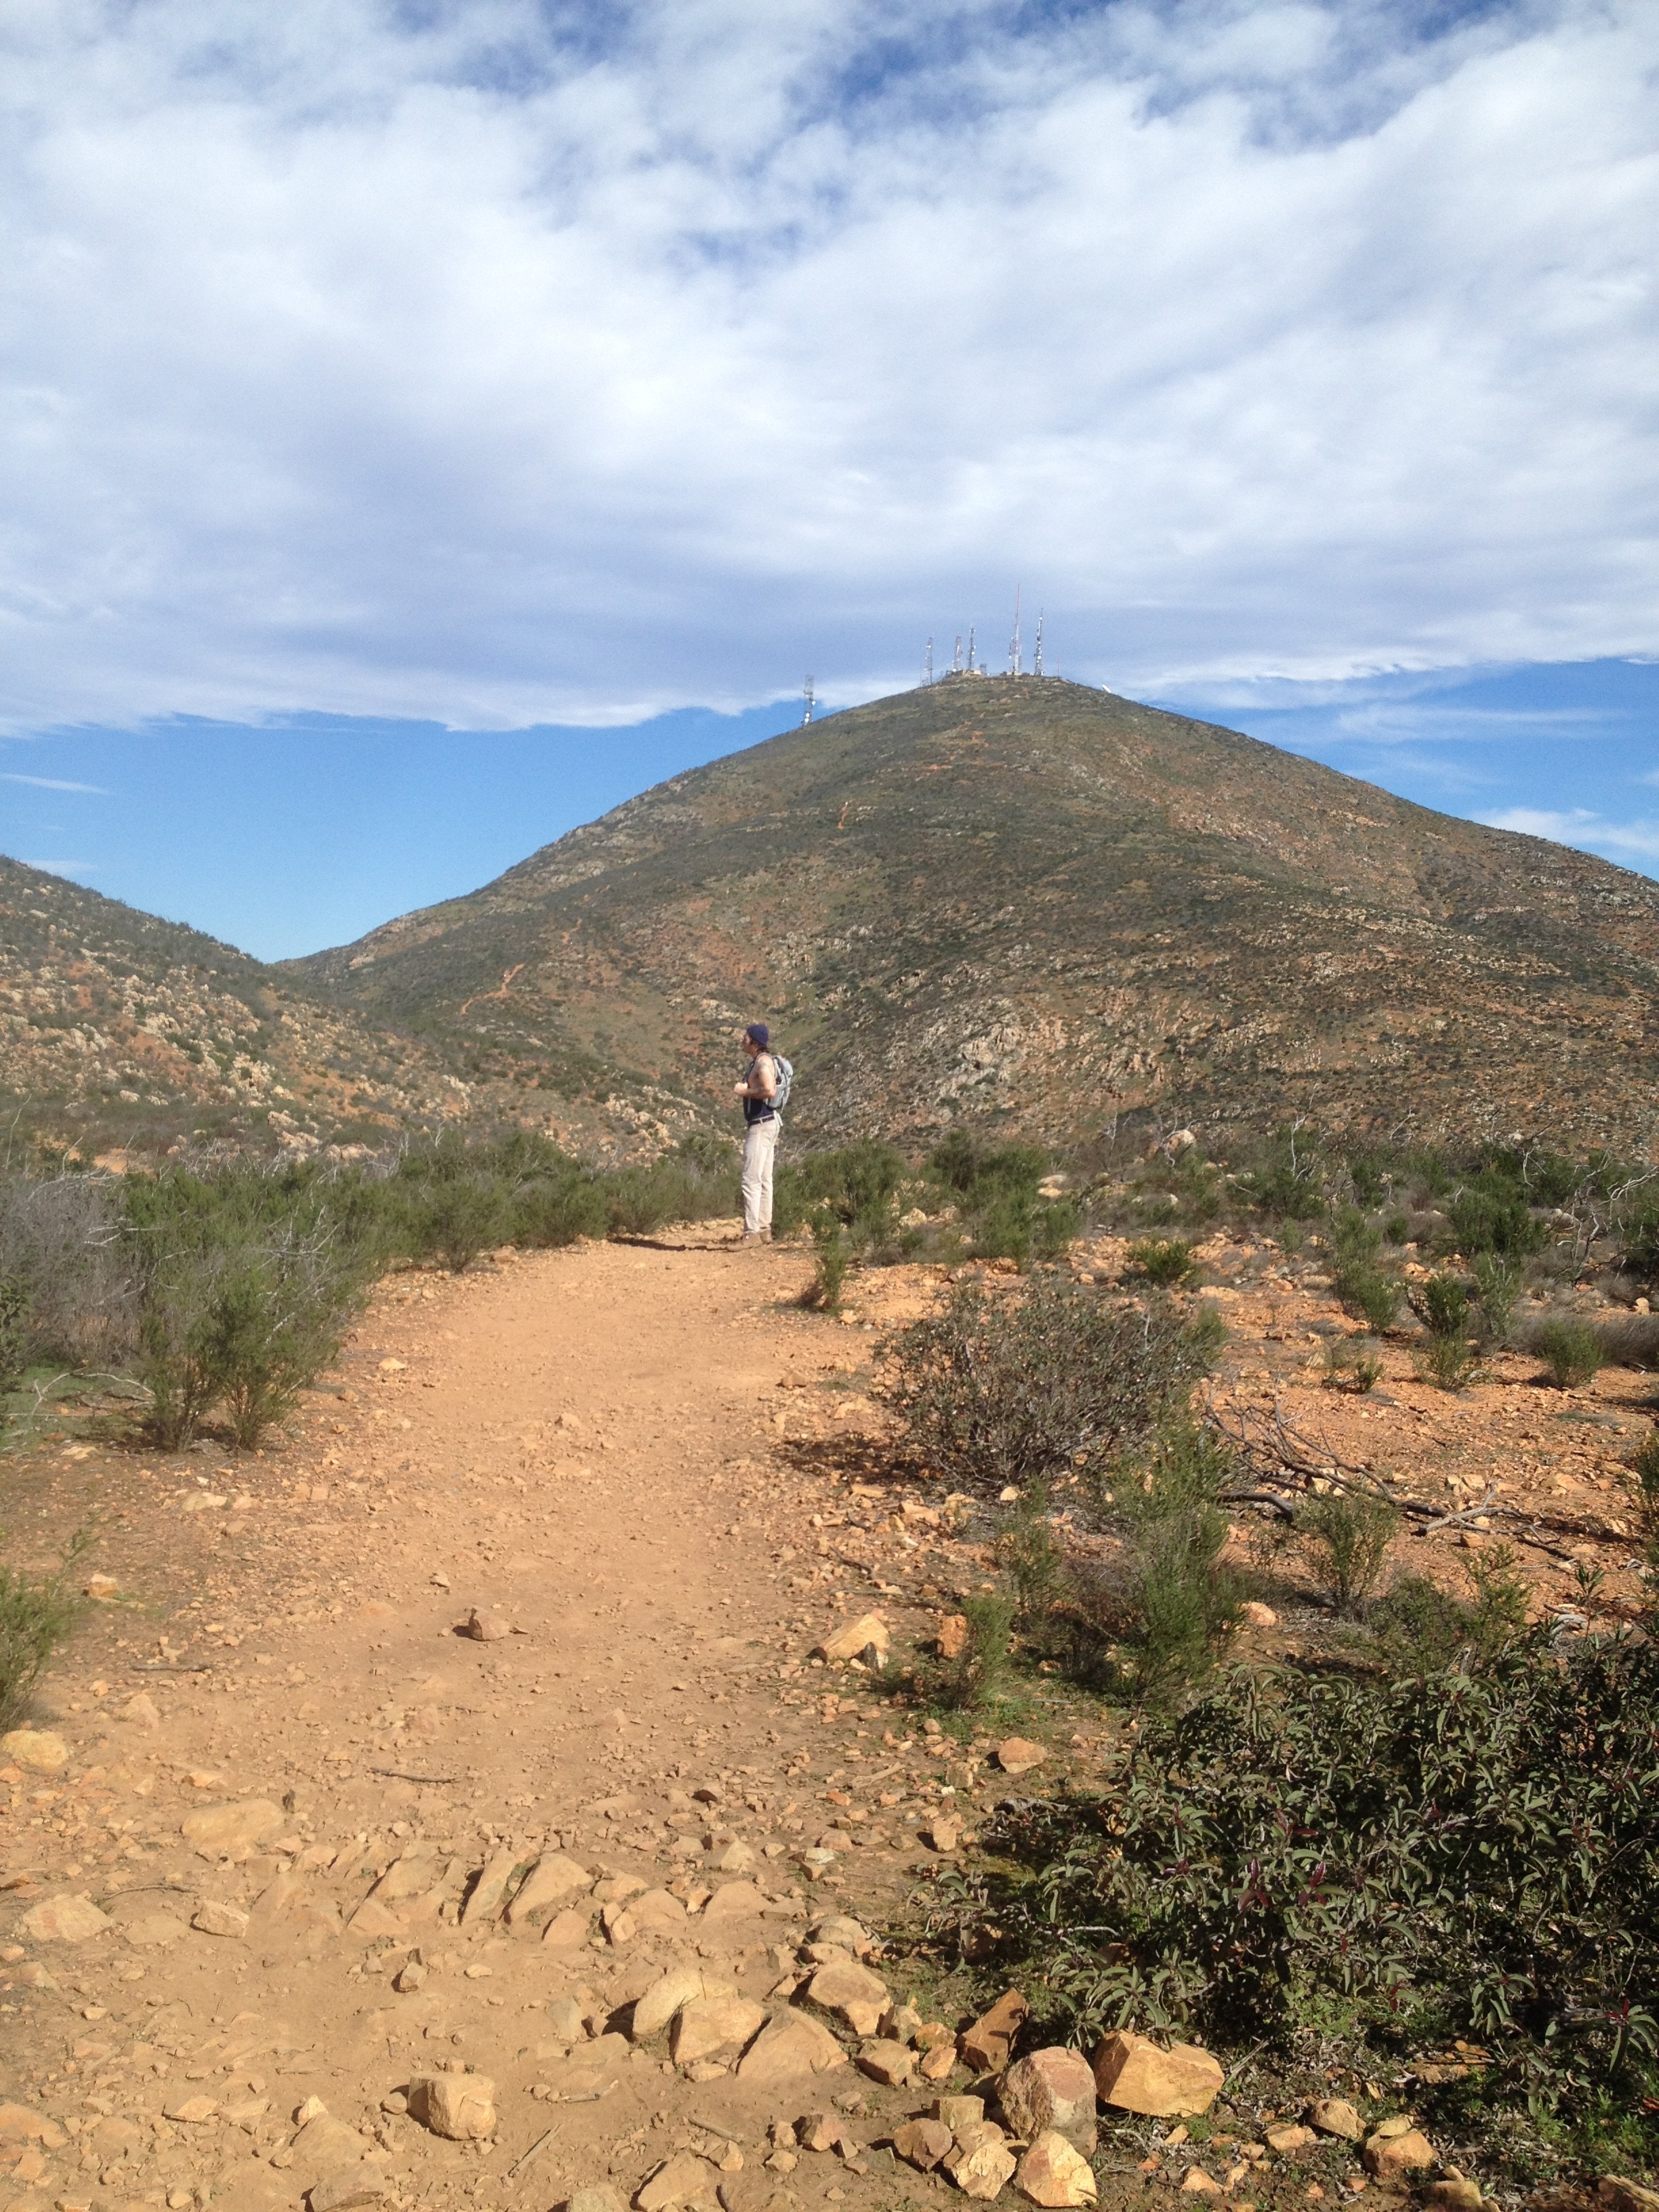
 its not, keep going for the next 1.5 miles. Right after the 1.5-mile mark, the trail flattens out a bit as you wind around and then down to the valley point right before your steep ascent up to the peak of San Miguel Mountain. Although not easy once you summit you will be rewarded with a huge sense of accomplishment and incredible views of Mexico, The Coronado Islands, Downtown SD and much more. Take your time at the summit, refuel with snacks, lots of water and take in the panoramic reward you deserve. The descent back can be tricky due to the same steepness coming up is now the challenge going down. Slow and steady prevents sprains or breaks.
 tting from the energy of others who are taking on the same trail as you. In peak hike times the parking lot does get full and sometimes a line of parked cars dots hwy 67 leading up the to parking area and trailhead to Iron Mtn. Speaking of time of year, this trail gets hot in summer months and you are even greeted by a Park sign that states High Heat Advisory make sure you bring plenty of water. I like to take plenty of water any time of year, so thats not much of an issue. 48oz minimum is always a good start.
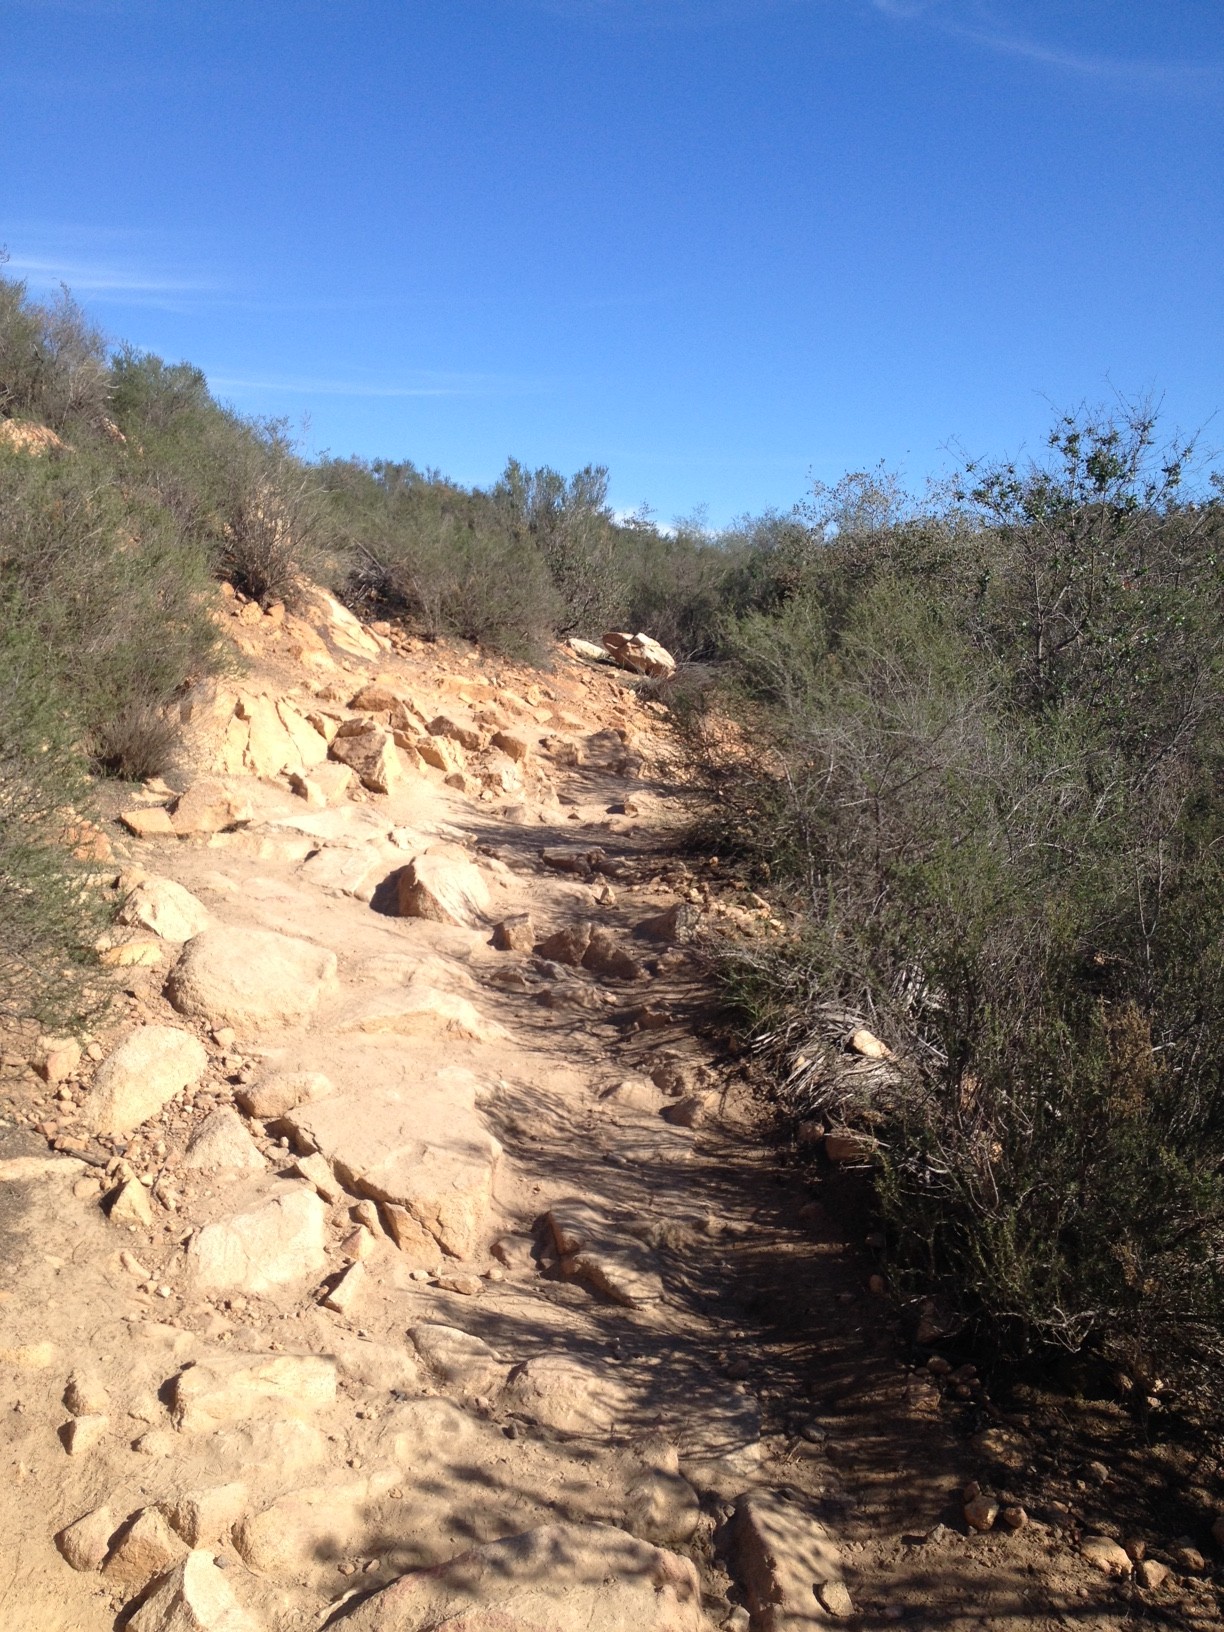
 the TV and Radio Towers. The descent of Iron can get tricky especially near the summit due to a much rockier trail than as you get close to the bottom. But descending Iron is one of my favorites just because of the panoramic views of the surrounding Poway and Ramona areas as you are heading down. Look for the dam to your north, and the blue blue body of water it supports. As a reminder, warm weather brings out snakes, even though it was January, it was 75 degrees this day, as I was coming back through the “Canopy” of trees at hike end, I turned corner heading for parking lot and there was a baby rattlesnake crossing the trail, beautiful creatures, they aren’t looking for you and as long as you leave them be all is well.


